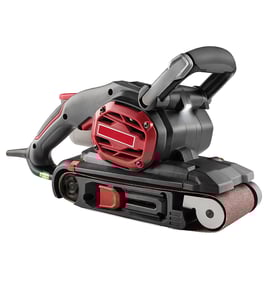

Can I use a belt sander to sand a deck?
Yes, you can sand a deck with a belt sander, and your Craftsman 31511750 3" dustless belt sander works well for small areas, edges, and spot-removal of old stain or sealer. For large deck surfaces, work slowly and evenly to avoid gouging soft wood.
Best way to sand a deck with a belt sander
- Start with a coarse belt (typically 60 to 80 grit) to remove finish and flatten rough boards.
- Sand with the grain (parallel to the deck boards) to reduce visible scratches.
- Keep the sander moving; pausing in one spot can create dips and swirl marks.
- Use light, even pressure; let the sanding belt do the cutting.
- Vacuum or blow off dust between grit changes so the next belt cuts cleanly.
Grit progression (typical)
| Goal | Start grit | Finish grit |
|---|---|---|
| Strip old stain or sealer | 60 | 80 |
| Smooth for re-staining | 80 | 100 |
| Smooth for paint (less common on decks) | 80 | 120 |
Setup and safety checks that prevent damage
- Inspect boards for raised nails or screws; set fasteners below the surface.
- Check for splinters, rot, or loose boards; repair before sanding.
- Empty or clear the dust collection path often (dustless sanders still clog).
- Wear eye protection and a dust mask or respirator rated for fine wood dust.
Why it matters
Deck boards are usually softwood; aggressive sanding or stopping in one spot can dish the surface and make stain look blotchy. A steady pace, correct grit, and sanding with the grain gives you a flatter surface and a more even finish.
For replacement parts and diagrams for model 31511750, use the parts list for your sander or search by model on Sears PartsDirect.
Last updated: February 2026
How to tell what size belt for belt sander?
For your Craftsman 31511750 3 inch dustless belt sander, the correct sanding belt size is defined by belt width x belt length. We match the belt by measuring the old belt (best method) or by measuring the roller path on the sander so the belt tracks correctly and doesn’t slip.
Fast ways to measure the belt size
- Measure the belt width across the back of the belt (the smooth side), edge to edge.
- Use the old belt if you have it: cut it once, lay it flat, and measure end to end for length.
- If you don’t want to cut it: wrap a flexible tape around the belt and record the full loop length.
- No belt available: wrap a string around both rollers (following the belt path), mark the overlap, then measure the string.
- Write it as width x length (example format: 3 inch x 21 inch).
Which method should I use?
| Situation | Best method | Why it works |
|---|---|---|
| Old belt is available | Cut and measure flat | Most accurate for stretched or worn belts |
| Old belt is intact and reusable | Measure the full loop | Quick, no cutting |
| Belt is missing | String around rollers | Captures the real belt path |
Tips to avoid buying the wrong belt
- Measure in inches and round to the nearest 1/16 inch.
- Don’t measure the belt on the angled seam; measure the straight sections.
- If the old belt is badly stretched, use the roller-path string method as a cross-check.
- Confirm the belt width matches the platen/roller width (a 3 inch sander typically uses a 3 inch wide belt).
Why it matters
A belt that’s too long can slip, stall, or refuse to track; a belt that’s too short can overload the motor, strain bearings, and make belt changes difficult. Correct sizing helps your Craftsman sander run cooler and sand more evenly.
If you’re ordering, start with the parts list for model 31511750, or search by model number on Sears PartsDirect.
Last updated: February 2026
What's better, an orbital sander or a belt sander?
A belt sander (like the Craftsman 31511750 3" dustless belt sander) is better for fast stock removal and flattening; an orbital sander is better for controlled sanding and finish prep with fewer deep scratches. For most projects, we use a belt sander first, then switch to an orbital sander before finishing.
Quick comparison: belt vs orbital
| Task | Belt sander | Orbital sander |
|---|---|---|
| Remove a lot of material fast | Best choice | Slow |
| Flatten glued panels (table tops, benches) | Very good | Not ideal |
| Final sanding before stain/paint | Too aggressive | Best choice |
| Risk of gouges/sanding through | Higher | Lower |
| Working on edges and tight spots | Harder | Easier |
When we recommend a belt sander
- Leveling high spots on glued-up panels
- Removing old finish quickly (with care)
- Shaping and straightening rough lumber
- Smoothing end grain or proud joints (light pressure)
- Fast cleanup on large, flat surfaces
When we recommend an orbital sander
- Sanding between coats of finish
- Blending swirl marks and scratch patterns
- Working on veneers or thin stock
- Final prep for stain, paint, or clear coat
- Light smoothing where you need maximum control
Why it matters
A belt sander cuts in a straight-line scratch pattern and removes material quickly, so it can flatten surfaces fast but also leaves deeper scratches that show up under finish. An orbital sander removes less material per pass, but it is the better tool for a uniform surface that finishes cleanly.
Practical tips for best results
- Start with the belt sander only as coarse as needed (common starting range: 60 to 80 grit), then step up.
- Keep the belt sander moving; pausing in one spot creates dips.
- Let the tool do the work; heavy pressure increases gouging and belt wear.
- Switch to an orbital sander for the last sanding steps (common range: 120 to 220 grit, depending on the finish).
- For parts and diagrams for your Craftsman 31511750, search by model number on Sears PartsDirect.
Last updated: February 2026