Owner’s manual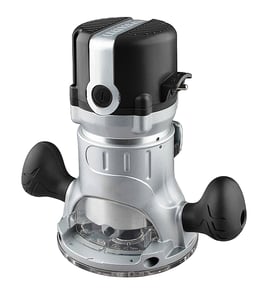


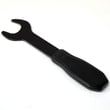
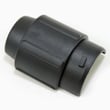
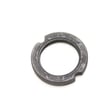
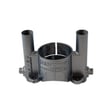
How to remove collet from Craftsman router?
To remove the collet on your Craftsman router model 32027680, you typically loosen the collet nut, then use the nut’s “self-release” action to pop the collet free from the shaft. Once it releases, the collet slides out so you can swap bits or change collet sizes.
Safe removal steps (most Craftsman routers)
- Unplug the router.
- Remove the bit (if installed) by loosening the collet nut.
- Keep turning the collet nut until you feel it “catch” and then release the collet from the spindle.
- Slide the collet out of the collet nut (some styles pull out; others press out).
- Reinstall the collet by snapping it back into the nut, then thread the nut back onto the spindle.
If the collet is stuck
A collet can stick from pitch buildup, fine dust, or overtightening.
- Loosen the collet nut fully, then tighten slightly and loosen again to trigger the self-release.
- Clean the collet and nut with a dry brush; remove packed sawdust.
- Lightly tap the side of the nut with a plastic-handled tool while supporting the router (no metal hammering).
- Inspect for burrs, cracks, or a bell-mouthed collet; replace worn parts.
Quick checks before you reinstall
| What to check | What “good” looks like | What to do if it’s not good |
|---|---|---|
| Collet slots | Even, not spread | Replace the collet |
| Collet nut threads | Smooth, not cross-threaded | Replace the nut |
| Bit shank fit | Snug, no wobble | Use the correct collet size |
Why it matters
A properly seated collet grips the bit evenly. That reduces bit slippage, chatter, burning, and runout, and it helps protect the router spindle and bearings.
Model-specific notes
For the exact collet style and any lock-button or wrench procedure used on the Craftsman 32027680, follow the steps and diagrams in the 32027680 owner's manual.
Last updated: February 2026
What is a Sears Craftsman 32027680 router?
The Craftsman 32027680 router is a corded, handheld power tool used to shape, trim, and cut wood with a rotating router bit. We use it for common woodworking tasks like edge profiling, dadoes, rabbets, and flush trimming; set-up and safe operation details are in the owner's manual.
What this router is used for
A router like the Craftsman 32027680 is designed to spin a bit at high speed so you can remove material cleanly and consistently.
Common projects and cuts include:
- Rounding over or beveling edges (decorative profiles)
- Cutting grooves for shelves or panels (dadoes)
- Cutting steps along an edge (rabbets)
- Trimming laminate or veneer flush to an edge
- Making hinge mortises and recesses with a guide
What to check before you use it
Before powering up any Craftsman router, we recommend a quick inspection and correct set-up.
- Unplug the router before changing bits or making adjustments
- Confirm the bit shank is fully seated in the collet, then tightened securely
- Set the cutting depth in small steps (multiple shallow passes)
- Verify the base is stable and the workpiece is clamped
- Keep the cord clear of the cutting path
Typical specs you will see on corded routers
Exact ratings vary by version and label, but most corded routers in this class share similar basics.
| Item | Typical range | Why it matters |
|---|---|---|
| Power | ~6 to 12 amps | Affects cutting strength under load |
| Voltage | 120V AC | Standard household power in the U.S. |
| Bit shank sizes | 1/4 in, sometimes 1/2 in | Determines which bits fit the collet |
| Speed | Variable or single speed | Helps match speed to bit size/material |
Why it matters
Using the right bit, depth, and feed direction helps prevent burning, tear-out, and kickback. It also protects key wear items like the collet, brushes, switch, and cord from damage.
Last updated: February 2026
How to change a router bit on a Craftsman router?
To change a router bit on your Craftsman router model 32027680, unplug the router, loosen the collet nut with the correct wrenches (or spindle lock), swap the bit, then retighten the collet securely before restoring power. For model-specific controls and wrench sizes, use the 32027680 owner's manual.
Step-by-step: changing the bit safely
- Unplug the router (or remove the battery if it is a cordless base).
- Remove the router from the workpiece and set it on a stable surface.
- Raise the motor in the base (or raise the bit above the router table) so you can access the collet.
- Engage the spindle lock (if equipped) or use two wrenches: one to hold the shaft, one to turn the collet nut.
- Turn the collet nut counterclockwise to loosen; pull the old bit out.
- Insert the new bit shank fully, then pull it back out about 1/16 to 1/8 inch so it is not bottomed out.
- Tighten the collet nut firmly (snug plus a solid final tighten); do not overtighten.
Correct bit fit: 1/4-inch vs 1/2-inch shanks
| What to check | What “right” looks like | Why it matters |
|---|---|---|
| Shank size | Matches the collet (commonly 1/4 inch; some routers accept 1/2 inch with a different collet) | Wrong size can slip or damage the collet |
| Shank condition | Clean, smooth, not scored | Dirt or damage reduces grip |
| Insertion depth | Not bottomed out; slight pull-back after fully inserting | Helps the collet clamp evenly |
If the bit is stuck or the collet will not loosen
- Loosen the collet nut until you feel it “break” the taper free; many collets release the bit on a second loosen point.
- Tap the collet wrench lightly with your palm (not a hammer) to free a stuck collet.
- Remove the collet and clean out sawdust and resin; a dirty collet is a common cause of bit slip.
- Replace the collet if it is cracked, bell-mouthed, or will not grip consistently.
Why it matters
A properly tightened collet on the Craftsman 32027680 keeps the router bit from slipping under load, which improves cut quality and reduces kickback risk, especially with larger straight bits, round-over bits, and flush-trim bits.
Last updated: February 2026
How do I adjust the depth on a Craftsman router?
To adjust depth on your Craftsman router model 32027680, set the bit depth with the depth rod or turret stop, then lock the setting so it cannot drift while routing. Make small test cuts in scrap wood until the depth is exactly where you want it.
Depth adjustment steps (common on Craftsman plunge and fixed-base routers)
- Unplug the router before touching the bit or base.
- Set the router on a flat surface with the bit installed and tightened.
- Release the depth lock (plunge lock lever or clamp, depending on base style).
- Lower the motor/base until the bit tip reaches your target depth reference.
- Set the depth stop:
- If your router has a depth rod, run it down to contact the stop, then snug its lock.
- If it has a turret stop, rotate to the step you want, then fine-tune with the micro-adjust (if equipped).
- Lock the depth (plunge lock or clamp) and re-check that nothing moves.
- Make a test pass in scrap; adjust in small increments until the cut matches your goal.
Quick depth targets (typical routing)
| Task | Typical depth per pass | Notes |
|---|---|---|
| Edge profiling (roundover/chamfer) | 1/16 to 1/8 in. | Sneak up on final profile to avoid tear-out |
| Grooves/dados | 1/8 to 1/4 in. | Multiple passes reduce burning and chatter |
| Deep mortises | 1/8 to 3/16 in. | Clear chips often; do not force feed |
Why it matters
Accurate depth control prevents burning, tear-out, and bit overload. Taking multiple shallow passes also helps the router maintain RPM and leaves a cleaner finish.
Model-specific tip
Your Craftsman 32027680 depth controls and lock points are shown in the owner's manual. Use the manual’s diagrams to identify the exact depth rod, turret stop, and lock lever locations for your base.
Last updated: February 2026