Installation guide
 Owner’s manual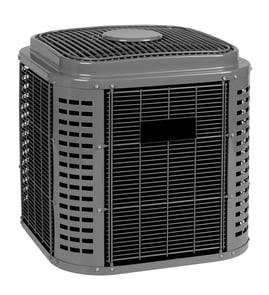

How to look up AC model number?
To look up your AC model number, we recommend checking the rating plate on the outdoor Payne unit and matching that number to your paperwork; for this page, the model is PA10JA048000AA. Use the model number to pull the correct parts list and wiring information in the PA10JA048000AA owner's manual.
Where to find the model number on a central AC or heat pump
Most central air conditioners and heat pumps have a rating plate (data tag) on the outdoor condenser unit. Common locations include:
- On the outside cabinet near the electrical service panel
- Inside the access panel (you may need to remove a few screws)
- On the side of the unit near the refrigerant lines
- Occasionally on the back panel (harder to see if installed close to a wall)
What the model number looks like (and what to write down)
When you find the tag, record these items exactly as shown:
- Model number (example: PA10JA048000AA)
- Serial number (helps identify age and production run)
- Electrical ratings (voltage and minimum circuit ampacity)
- Refrigerant type (used for service and charging)
Quick reference table
| Item on rating plate | Why it matters | Used for |
|---|---|---|
| Model number | Identifies the exact unit design | Correct parts and diagrams |
| Serial number | Identifies production run | Service history, compatibility checks |
| Electrical ratings | Confirms power requirements | Safe troubleshooting and repairs |
| Refrigerant type | Confirms system refrigerant | Proper service procedures |
Why it matters
Using the exact model number prevents ordering the wrong Payne parts and helps you follow the correct operating and maintenance guidance. The manual also emphasizes safe operation and maintenance practices for your system; see the PA10JA048000AA owner's manual.
Last updated: January 2026
How to tell AC size by model number?
For Payne model PA10JA048000AA, we determine AC size by finding the capacity code in the model number; the “048” indicates about 48,000 BTU/hr, which equals 4 tons (48,000 ÷ 12,000). Confirm the exact rating on the unit data plate and in the PA10JA048000AA installation guide.
How to read the size code in the model number
Most central air conditioners and heat pumps use a 3-digit capacity code that represents thousands of BTU per hour.
- Find the 3-digit group in the model number (commonly 018, 024, 030, 036, 042, 048, 060)
- Convert to BTU/hr by multiplying by 1,000 (example: 048 = 48,000 BTU/hr)
- Convert BTU/hr to tons by dividing by 12,000
- Use the outdoor unit rating plate for the final confirmation
- Match the outdoor unit size to the indoor coil and metering device per the PA10JA048000AA installation guide
Quick conversion table (BTU to tons)
| Model code | Approx. BTU/hr | Approx. tons |
|---|---|---|
| 024 | 24,000 | 2.0 |
| 036 | 36,000 | 3.0 |
| 048 | 48,000 | 4.0 |
| 060 | 60,000 | 5.0 |
Why it matters
Correct sizing affects comfort, humidity control, and equipment life. It also matters for installation details like refrigerant line sizing and indoor coil setup. For example, the installation information for this series lists recommended liquid and vapor tube diameters by unit size, and it calls out checking the indoor coil piston against the outdoor unit rating plate.
Related checks that help confirm you have the right match
- Verify the indoor coil piston/metering device matches the outdoor unit rating plate
- Confirm refrigerant line sizes are appropriate for the unit size and line length
- Make sure the outdoor unit is installed level (within the stated tolerance)
- Maintain required clearances for airflow and service access
- If troubleshooting poor cooling, inspect the outdoor fan system (motor and blade) for proper operation; a failing central air conditioner condenser fan motor HC39GE237 can mimic an undersized system
Last updated: January 2026
What is the most expensive part to replace on an AC unit?
On most central AC and heat pump systems (including Payne model PA10JA048000AA), the compressor is typically the most expensive single component to replace because it is the sealed “heart” of the refrigerant system and labor is high. Use the PA10JA048000AA owner's manual for operating and maintenance practices that help protect compressor life.
Why the compressor costs the most
A compressor replacement usually involves more than swapping a part; it often includes refrigerant recovery, brazing, evacuation, and recharge.
- It is a major mechanical and electrical component
- It is tied into the sealed refrigerant circuit
- It requires specialized HVAC tools and EPA-compliant refrigerant handling
- It often drives additional “while you’re in there” repairs (electrical or airflow issues)
Other high-cost repairs to know about
Depending on what failed and why, these can also be expensive on a central air conditioner or heat pump:
- Outdoor coil (condenser coil) replacement
- Refrigerant leak detection and repair plus recharge
- Control board or major electrical repairs
- Condenser fan motor replacement (for this model, see central air conditioner condenser fan motor HC39GE237)
Quick cost and complexity comparison
| Component | Typical cost impact | Typical complexity | Notes |
|---|---|---|---|
| Compressor | Highest | Highest | Sealed system work and labor intensive |
| Outdoor coil | High | High | Often paired with refrigerant work |
| Condenser fan motor | Medium to high | Medium | Can prevent overheating if failing |
| Contactor/capacitor | Low to medium | Low to medium | Common electrical wear items |
What helps prevent compressor damage
The manual emphasizes airflow and proper operation; both directly affect compressor stress.
- Keep the indoor air filter clean and installed correctly
- Keep supply and return registers unblocked
- Keep the outdoor unit clear of debris and vegetation
- Avoid rapid cycling; wait at least 5 minutes before restarting after shutdown
- Stay within normal cooling outdoor temperatures (about 55°F to 125°F)
Why it matters
When a compressor is stressed by restricted airflow, dirty coils, or rapid cycling, the system runs hotter and longer; that increases energy use and raises the risk of a major, high-cost failure.
Last updated: January 2026