 Owner’s manual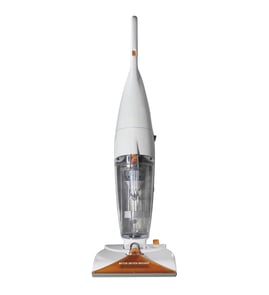

What should you not clean with steam cleaner?
For the Bissell 9300 (ProHeat 2X deep cleaner), do not use steam or hot moisture on heat-sensitive, porous, or “water-only” restricted materials. Avoid items that can warp, delaminate, bleed dye, or be damaged by moisture, and follow the fabric care tag rules in the owner's manual.
Surfaces and items to avoid
- Delicate fabrics: silk and velvet; they can shrink, distort, or lose texture.
- Upholstery labeled “X” or “Dry clean only”: do not wet-clean these materials.
- Unsealed wood and laminate: moisture can swell boards and lift seams.
- Porous natural stone (unsealed marble, limestone, travertine): heat and moisture can etch or discolor.
- Painted or wallpapered walls: steam can soften paint and loosen adhesive.
- Cardboard, paper, and water-sensitive adhesives: they can warp and fall apart.
- Electrical components and outlets: moisture raises shock risk and can damage internal parts.
Upholstery quick-check (model-specific)
The Bissell 9300 is designed to clean upholstery only when the fabric tag allows it.
| Upholstery tag | What it means | Use the cleaner? |
|---|---|---|
| W or WS | Water-based cleaning allowed | Yes, with light passes and good drying airflow |
| S (or solvent-only) | Solvent cleaning required | No |
| X | Vacuum only | No |
| Dry clean only | Professional dry cleaning | No |
Safe-use tips that prevent damage
- Test in a hidden spot first for colorfastness.
- Use short spray passes; then make extra suction-only passes to pull water back out.
- Do not overwet; plan drying time before using the area.
- Use only cleaning fluids intended for deep cleaners; the manual warns that non-approved solutions can harm internal components.
Why it matters
Steam and hot moisture can force water into seams, padding, and porous materials. That leads to swelling, adhesive failure, dye transfer, and longer dry times, which can create odors and premature wear.
Last updated: February 2026
Where does the dirt go when using a steam cleaner?
On the Bissell 9300 (ProHeat 2X deep cleaner), the loosened soil is lifted out of the carpet and ends up in the dirty water area of the 2-in-1 tank. Clean water stays in an internal bladder while dirty water collects outside it, so the machine keeps clean and dirty water separated.
What happens to the dirt during cleaning
As you make cleaning passes, heated water and formula loosen grime and debris, and suction pulls that dirty water back into the tank.
- Clean water is stored in a heavy-duty bladder inside the tank
- Water and formula mix as you clean (based on your selected setting)
- Dirty water pulled from the carpet collects outside the bladder
- Loose fibers, pet hair, and fuzz can also rinse out when you clean the nozzle
- A final “water only” rinse pass helps remove leftover loosened soil
Where to look on the machine
Most of what you remove is visible in the recovery (dirty water) portion of the tank.
| What you see | Where it is | What it means |
|---|---|---|
| Dark or cloudy water | Outside the bladder (dirty side) | Soil is being extracted properly |
| Foam | Dirty side of tank | Often from leftover detergent or too much formula |
| Lint, hair, fuzz | Nozzle area and tank | Normal pickup from carpet fibers and pets |
Tips to make sure dirt is actually removed (not left behind)
These steps match how the ProHeat 2X is designed to clean and extract.
- Use slow forward and backward passes so suction has time to recover water
- Release the trigger and make a “dry pass” to pull up residual water
- Repeat passes until the pulled-up solution looks cleaner
- Finish with a rinse setting (water only) to flush out remaining loosened soil
- Empty and rinse the tank after each job so odors and residue do not build up
Why it matters
If the dirty water tank is filling and the water looks darker, extraction is working. If you skip dry passes or rinsing, more loosened soil and formula can stay in the carpet and attract new dirt faster.
For model-specific tank removal, nozzle rinsing, and cleaning-pass guidance, follow the 9300 owner's manual.
Last updated: February 2026
What are the common problems with steam cleaners?
Common problems with the Bissell 9300 deep cleaner (ProHeat 2X style) include no heat or no “ready” light, reduced or no spray, poor pickup, and leaks from tanks or fittings. Most issues trace back to low fluid levels, tanks not seated correctly, clogs, or a pump that lost prime; our owner's manual walks through these checks.
Most common symptoms and what usually causes them
- Reduced spray or no spray: empty water bladder or formula tank, tanks not seated, pump lost prime
- Heater ready light does not illuminate: heater switch off, power switch off (both must be on)
- Not picking up solution: dial set wrong, tank not seated, tanks empty, dirty-water tank full
- Tool or accessory not spraying: tool cartridge not connected, dial set to the wrong position, trigger/applicator clogged
- Water leakage: tank latch not secured, tank seals dirty, cracks in tank or hose connections
Quick checks we recommend (in order)
- Unplug the unit before servicing (important for safety).
- Verify both switches are ON (power and heater) if you are expecting heat.
- Check fluid levels:
- Fill the heavy-duty bladder with clean hot tap water (do not boil or microwave).
- Fill the formula tank with the correct cleaning formula.
- Reseat both tanks: remove and reinstall so they fit snugly.
- Re-prime the pump: power off, then back on; wait about a minute, then press the trigger.
- Rinse and clear common clog points: rinse the tank area and filter; rinse the floor nozzle at the faucet if flow is weak.
Symptom-to-fix guide
| Problem you notice | What to check first | What to do next |
|---|---|---|
| No spray / weak spray | Water bladder and formula tank levels | Reseat tanks; re-prime pump; rinse nozzle |
| No heater ready light | Power switch and heater switch | Turn both on; then test again |
| Poor pickup | Dial setting; tank seating | Set dial correctly; reseat tanks; empty dirty-water tank |
| Tool not spraying | Cartridge connection; dial setting | Reconnect cartridge; set dial to hose/attachments; soak tool in hot water |
Why it matters
When tanks are even slightly unseated or the pump loses prime, the cleaner can’t move water and solution through the spray nozzles, and pickup performance drops fast. A quick reseat, rinse, and prime restores normal cleaning in most cases.
Last updated: February 2026
What is the best steam cleaner on the market?
There is no single “best” steam cleaner for everyone; the best choice depends on what you clean most (floors, grout, upholstery, or whole-home jobs) and how much heat, tank capacity, and attachments you need. For Bissell model 9300, our owner's manual highlights a built-in heater (up to 25°F hotter, capped at 190°F) and brush-driven deep cleaning, which is ideal when you want strong carpet cleaning performance.
How to choose the best steam cleaner for your needs
- Surface type: sealed hard floors, tile and grout, upholstery, or carpeted areas
- Heat and output: faster heat-up and steady steam for heavy soil
- Tank size: small handheld for quick jobs; larger canister for longer sessions
- Attachments: crevice tool, brushes, upholstery tools for tight spaces
- Control features: adjustable output, on/off heat, and easy tank emptying
Quick comparison: common steam cleaner types
| Type | Best for | Typical strengths | Typical tradeoffs |
|---|---|---|---|
| Handheld | Grout lines, fixtures, spot jobs | Portable, quick setup | Small tank, shorter run time |
| Steam mop | Sealed hard floors | Simple, fast daily cleaning | Limited detailing reach |
| Canister steam cleaner | Whole-home, multi-surface | Long run time, many tools | Larger, more storage space |
| Carpet deep cleaner with heat and brushes | Carpets, rugs, upholstery | Agitation plus heat for deep soil | Not a “steam-only” tool; uses water/formula |
What matters most for Bissell 9300 owners
Our Bissell 9300 (ProHeat 2X deep cleaner) is built around heated cleaning and brush agitation, not just steam. Key model-specific points from the manual:
- Built-in heater boosts hot tap water up to 25°F hotter
- Temperature is limited to 190°F for safe operation
- Heater switch lets you turn heat off for more delicate rugs
- Separate clean water and dirty water areas in the 2-in-1 tank design
Why it matters
Matching the machine to the job prevents frustration. A handheld steamer can be “best” for grout, while a canister can be “best” for long sessions. If your priority is deep carpet cleaning, a heated, brush-based cleaner like the Bissell 9300 is often the best fit.
Last updated: February 2026