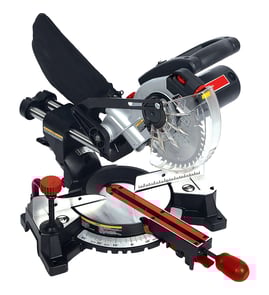

How to change the blade on a Pro Tech miter saw?
To change the blade on your Pro-Tech CS72121 12-inch compound miter saw, unplug the saw, lock the blade, remove the arbor bolt and washers, swap the blade (correct rotation), then reinstall and tighten the bolt (many miter saws use a left-hand thread, so you turn left to tighten).
Safety first (do this every time)
- Unplug the miter saw; do not rely on the trigger switch
- Wear cut-resistant gloves when handling the blade
- Raise and lock the saw head so it cannot drop
- Keep the lower blade guard moving freely; do not tie it back
- Use the correct wrench; do not use pliers on the arbor bolt
Blade change steps (typical for a 12-inch compound miter saw)
- Remove power: unplug the cord.
- Access the arbor: raise the blade guard as designed (usually by loosening the guard cover screw or pivoting the guard plate).
- Lock the spindle: press and hold the spindle lock button.
- Loosen the arbor bolt: turn the bolt in the direction that loosens it (commonly right to loosen on left-hand-thread designs).
- Remove hardware: take off the outer washer and bolt; keep parts in order.
- Swap the blade: install the new blade with teeth pointing the correct direction (match the rotation arrow on the blade guard).
- Reinstall and tighten: reinstall washer(s) and bolt; hold the spindle lock and tighten firmly (commonly left to tighten).
- Test: spin the blade by hand to confirm it clears the guard, then plug in and do a brief no-load run.
Quick direction check (what to turn)
| What you are doing | Common miter saw arbor thread | What you usually do |
|---|---|---|
| Loosening the arbor bolt | Left-hand thread | Turn right to loosen |
| Tightening the arbor bolt | Left-hand thread | Turn left to tighten |
Why it matters
Correct blade rotation and proper arbor bolt tightening help prevent blade wobble, poor cut quality, and unsafe operation. Keeping the washers in the original order also helps the blade clamp evenly.
For help confirming you have the correct model number before ordering a blade or hardware, use how to find your appliance model number (and what it means for parts).
Last updated: February 2026
How to unlock a pro tech miter saw?
To unlock your Pro-Tech CS72121 12-inch compound miter saw, release the storage (down) lock that holds the saw head in the lowered position, then loosen the miter-angle lock so the turntable can rotate. Always unplug the saw before adjusting locks.
What “unlock” usually means on a compound miter saw
Most saws like the Pro-Tech CS72121 have more than one lock; you may need to release only the one related to what will not move.
- Head down-lock (storage/transport): Keeps the saw head pushed down for carrying or storage
- Miter lock: Clamps the rotating base so you can set a left or right miter angle
- Bevel lock (if you are changing bevel): Clamps the tilt of the saw head for bevel cuts
- Spindle lock (blade change only): Locks the blade arbor so you can remove the blade bolt
Step-by-step: release the head down-lock safely
- Unplug the saw.
- Hold the handle and press the saw head down slightly to take pressure off the lock.
- Find the down-lock control (commonly a pin, knob, or lever near the pivot area) and release it.
- Raise the head slowly; do not let it spring up.
Step-by-step: unlock and set a miter angle
- Loosen the miter lock (commonly a knob or handle on the front area of the base).
- Rotate the table to your angle.
- Tighten the miter lock firmly before cutting.
| If this won’t move | Most common cause | What to do |
|---|---|---|
| Head will not rise | Down-lock still engaged or under tension | Press down slightly, then release the lock again |
| Table will not rotate | Miter lock still tight | Loosen more, then re-tighten after setting angle |
| Bevel will not tilt | Bevel lock still tight | Loosen bevel lock, set bevel, then tighten |
Why it matters
Releasing the correct lock prevents forcing the hinge or base, which helps keep your miter saw accurate and reduces the chance of binding during a cut.
For general DIY safety practices that apply to power tools and repairs, use: are diy appliance repairs safe
Last updated: February 2026
What are the parts of a miter saw?
A Pro-Tech 12-inch compound miter saw like model CS72121 is built around a motor-driven blade, a pivoting saw head, and adjustable fences and tables that let us set accurate miter and bevel angles. Most parts fall into cutting, guiding, clamping, and safety groups.
Main parts you will see on most miter saws
- Blade and arbor: the blade mounts to the arbor (spindle) and is held by an arbor bolt and washers.
- Blade guard (upper and lower): covers the blade; the lower guard retracts as we lower the head.
- Motor and drive: the electric motor spins the blade (direct drive or belt drive, depending on design).
- Handle and trigger switch: the on/off control is typically in the handle.
- Saw head and pivot arm: the head pivots down to make the cut.
- Base and turntable: the work surface; the turntable rotates left/right for miter cuts.
- Fence: the vertical back support that keeps the workpiece square to the blade.
Angle-setting and accuracy parts
| Part | What it does | What to check if cuts are off |
|---|---|---|
| Miter scale and pointer | Shows left/right angle setting | Pointer alignment, debris under turntable |
| Miter detent plate | “Clicks” into common angles | Worn detents, loose hardware |
| Bevel scale and bevel lock | Sets tilt angle of the blade | Lock tightness, hinge play |
| Positive stops | Helps return to common angles | Stop screw adjustment |
Work-holding and dust parts
- Clamp (if equipped): holds trim or lumber against the fence.
- Dust port and dust bag (if equipped): captures sawdust; many users connect a shop vacuum.
- Table inserts: supports the work near the blade opening.
Why it matters
Knowing the names of the miter scale, bevel lock, fence, and blade guard helps us diagnose problems faster (for example, “won’t hold angle” usually points to a lock, detent, or pivot issue) and order the right replacement parts by model.
For help locating the model tag and using the exact model number when searching parts, use how to find your appliance model number (and what it means for parts).
Last updated: February 2026
Which is better, a 10 inch or 12 inch miter saw?
For most homeowners and trim work, a 10-inch miter saw is the better all-around choice because it’s lighter, easier to carry, and blades cost less. A 12-inch saw (like the 12-inch Pro-Tech CS72121) is better when you regularly need maximum cut capacity for wider or taller stock.
Quick comparison
| Feature | 10-inch miter saw | 12-inch miter saw (CS72121 size class) |
|---|---|---|
| Typical best use | Baseboard, casing, small projects | Wider boards, taller crown, heavier-duty work |
| Portability | Easier to move and store | Heavier and bulkier |
| Blade cost | Usually lower | Usually higher |
| Cut capacity | Good for most trim | Better for large stock |
Choose a 10-inch saw if you mostly do
- Baseboard and door casing
- Small to medium DIY projects
- Occasional weekend use where portability matters
- Jobs where you want lower-cost blades and easier handling
Choose a 12-inch saw (like the Pro-Tech CS72121) if you often cut
- Wider boards (common in decking and framing tasks)
- Taller trim profiles (including larger crown molding)
- Thicker hardwoods where extra capacity helps
- Material where you want more “headroom” before you hit the saw’s limits
What to check before deciding
Even within 10-inch and 12-inch classes, capacity varies by design (standard vs sliding, fence height, and bevel range). We recommend comparing these items side-by-side:
- Maximum crosscut width at 90 degrees
- Maximum cut height against the fence
- Bevel and miter range (and whether detents match your common angles)
- Blade availability for the tooth count you prefer (finish vs framing)
- Shop space and how you plan to support long boards
Why it matters
The “better” saw is the one that matches your most common cuts. If you buy too small, you’ll fight capacity limits and make extra passes. If you buy too large, you’ll carry extra weight and pay more for blades without gaining real benefit.
For help confirming you have the right model number before ordering blades or repair parts for your Pro-Tech saw, use our guide: how to find your appliance model number (and what it means for parts).
Last updated: February 2026