Installation guide
 Owner’s manual




How to reset a KitchenAid wall oven?
To reset your KitchenAid wall oven/microwave combo model KEHC379JSS4, turn power off at the breaker for about 1 minute, then restore power. The display will briefly light up, and you can clear any “PF” (power failure) message by pressing the appropriate CANCEL pad.
Quick reset steps (KEHC379JSS4)
- Turn OFF the oven circuit breaker (or remove power at the disconnect).
- Wait about 60 seconds.
- Turn the breaker ON.
- If you see “PF id = 27” or “PF id = 30”, press LOWER OVEN CANCEL, UPPER OVEN CANCEL, or CANCEL OFF (varies by model) to clear it.
- Reset the clock if needed.
What the display messages mean
A “PF” message indicates the control detected a power interruption. Clearing it with a CANCEL pad gets the control back to normal standby so you can bake, broil, or use microwave functions again.
| Display message | Meaning | What to do |
|---|---|---|
| PF id = 27 / PF id = 30 | Power failure detected | Press a CANCEL pad, then reset clock |
| Err | Invalid pad touch | Press a CANCEL pad and re-enter the setting |
| RETRY (brief flash) | Invalid pad touch | Re-enter the setting |
If the oven still will not respond after a reset
- Confirm the breaker is fully seated (flip OFF then ON again).
- Check whether Control lock is enabled; if so, press and hold 3 CONTROL LOCK for about 3 seconds to toggle it.
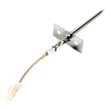
- If the display is on but heating is incorrect, a failed sensor can cause temperature problems; the wall oven temperature sensor is a common suspect.
Helpful references:
Why it matters
A proper reset clears power-failure prompts and control glitches so the electronic touch controls can accept commands normally. It is also the first step before deeper troubleshooting of heating, keypad, or display issues.
Last updated: January 2026
What size is a KitchenAid wall oven?
For the KitchenAid KEHC379JSS4 wall oven with microwave, the overall size depends on the cutout and trim requirements for your cabinet. Most KitchenAid wall ovens are built in common widths (24, 27, or 30 inches) with depths designed to fit standard cabinetry; confirm the exact cutout dimensions in the KEHC379JSS4 installation guide.
Typical wall oven size ranges (what most homes are built for)
These are the common sizing ranges we see for built-in wall ovens and wall oven/microwave combos:
- Width: 24, 27, or 30 inches (most common)
- Cabinet cutout height: typically around 27 to 29 inches for a single oven section (combo units vary)
- Depth: typically 22 to 24 inches to align with standard cabinet depth
- Capacity: often about 2 to 5 cubic feet for the oven cavity (varies by configuration)
How to measure for the right fit
Measure the cabinet opening, not the appliance door.
- Measure cutout width at the top, middle, and bottom
- Measure cutout height on both left and right sides
- Measure cutout depth from the front cabinet face to the back wall
- Check for clearance around the unit for airflow and door swing
- Verify the electrical supply location and access before installation
Quick reference: what to check in the guide
| What you need | Where it’s used | Why it matters |
|---|---|---|
| Cutout width/height/depth | Cabinet opening | Prevents gaps or a unit that will not slide in |
| Trim/overall dimensions | Front appearance | Ensures the face covers the cutout cleanly |
| Clearance requirements | Door swing and ventilation | Prevents overheating and rubbing |
| Electrical requirements | Junction box and circuit | Avoids wiring changes during install |
Why it matters
Wall ovens are sized around cabinet cutouts, not just the oven cavity. Using the exact cutout specs for KEHC379JSS4 helps you avoid costly cabinet modifications and ensures proper ventilation for safe, reliable operation.
Last updated: January 2026
How to know if the KitchenAid wall oven thermostat is bad?
If your KitchenAid KEHC379JSS4 wall oven/microwave combo consistently overheats, underheats, or swings widely in temperature even after you calibrate settings, the oven’s temperature control system needs attention. In many cases, the root cause is a failed temperature sensor or a control issue rather than a simple “thermostat.”
Common signs the temperature control is failing
- Food burns on the outside but is undercooked inside.
- Preheat takes much longer than normal.
- Oven temperature overshoots the set point (for example, set to 350°F but runs much hotter).
- Temperature swings are large and frequent during baking.
- You see heat-related shutdown symptoms (cooling fan running a long time, error beeps, or the oven stops heating).
Quick checks we recommend (safe, practical)
- Confirm the symptom: Use an oven thermometer and compare the average temperature over 20 to 30 minutes.
- Check calibration settings: Many KitchenAid ovens allow an offset adjustment; follow the steps in the KEHC379JSS4 owner’s manual.
- Inspect the sensor circuit (power off at the breaker): A loose connector or damaged wiring can mimic a bad thermostat.
- Test the oven temperature sensor: A sensor that is out of range can cause overheating or underheating; the model uses a dedicated sensor such as the wall oven temperature sensor WPW10131825.
What to replace first (most common)
In this model family, the temperature sensor is the most common, straightforward part to test and replace before suspecting the electronic control.
| Symptom | Most likely cause | Typical next step |
|---|---|---|
| Oven runs too hot | Temperature sensor reading wrong | Test sensor resistance; replace if out of range |
| Oven runs too cool | Weak bake element or sensor issue | Inspect element; test sensor |
| Big temperature swings | Sensor, wiring, or control cycling | Check connections; test sensor |
Why it matters
Accurate temperature control protects baking results and prevents heat stress on components like the bake element, broil element, and wiring. Catching a drifting sensor early can prevent repeated overheating and nuisance shutdowns.
Last updated: January 2026
Why is my KitchenAid wall oven not turning on?
If your KitchenAid KEHC379JSS4 wall oven with microwave won’t turn on (especially if the display is blank), the most common causes are a power supply problem, a tripped control lock, or an open safety device such as a fuse or high-limit thermostat that has cut power to the controls.
Quick checks we recommend first
- Confirm the unit has power at the home breaker (double-pole breaker for an electric wall oven). Reset it fully (OFF, then ON).
- If the display is on but the oven won’t respond, make sure Control Lock is not enabled (the manual shows how to unlock it). See the KEHC379JSS4 owner’s manual.
- Check for signs of overheating (hot cabinet area, fan running unusually long) that can trip a limit device.
- If the microwave door is not closing correctly, the microwave side can be disabled by the door safety system.
- If power is present but the unit is dead, plan to test internal safety parts for continuity.
Parts that commonly stop power to the oven controls
On a combo unit like the KEHC379JSS4, a failed safety device can interrupt power and leave the display blank.
| Symptom | Most likely area | What to do next |
|---|---|---|
| Display blank, no beeps | Power supply, internal fuse | Verify breaker, then test the fuse (black) WP4375321 |
| Works sometimes, then shuts down | Overheat protection | Test the range high-limit thermostat WP9759243 |
| Oven heats wrong or won’t regulate | Temperature sensing | Test the wall oven temperature sensor WPW10131825 |
Safe troubleshooting steps (before any disassembly)
- Turn off power at the breaker and confirm the oven is de-energized.
- If the display is working, try canceling any active mode and unlocking Control Lock per the KEHC379JSS4 owner’s manual.
- If the display is blank, restore power and check whether the cooling fan runs or any lights come on.
- If you’re using a meter, follow a proven process for continuity checks. Use how to use a multimeter to test electrical parts video as a reference.
Why it matters
A “dead” wall oven is usually a power interruption or a safety shutdown. Finding whether the issue is external power (breaker/wiring) or an internal open fuse/thermostat helps you avoid replacing the wrong part and gets the oven and microwave functions back safely.
Last updated: January 2026