Owner’s manual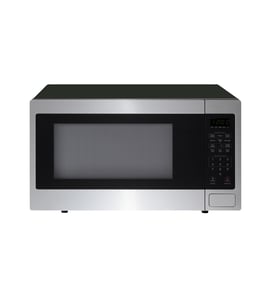





Do all Whirlpool microwaves use the same mounting bracket?
No. Whirlpool microwaves do not all use the same mounting bracket or mounting plate; the bracket style and hole pattern vary by model and by microwave type (countertop vs over-the-range). For your Whirlpool WMC20005YB0 countertop microwave, mounting brackets are not a standard interchangeable part.
Why mounting brackets are not interchangeable
Even within the Whirlpool brand, mounting hardware changes because of differences in:
- Cabinet and chassis dimensions
- Venting and airflow design
- Weight distribution and mounting points
- Control panel and door geometry
- Installation method (countertop sits on a surface; over-the-range mounts to a cabinet and wall)
How to confirm what fits your exact model
Use your model number (WMC20005YB0) as the deciding factor, not the brand name alone.
- Check the parts diagram and hardware notes in the owner's manual
- Match the bracket by model-specific part listing (not by “looks similar”)
- If you are replacing turntable-related parts, use model-matched components such as the support W10398734 or ring turn W10398732
Quick comparison: countertop vs over-the-range mounting
| Microwave type | Typical mounting method | Bracket interchangeability |
|---|---|---|
| Countertop (like WMC20005YB0) | Sits on counter; no wall bracket required | Not applicable or model-specific |
| Over-the-range | Wall plate plus upper cabinet bolts | Model-specific; rarely interchangeable |
Why it matters
Using the wrong mounting bracket can cause poor alignment, vibration, cabinet damage, or an unsafe installation. Matching the bracket to the exact Whirlpool model number prevents fit and stability problems.
Last updated: February 2026
How do I reset my Whirlpool microwave control panel?
To reset the control panel on your Whirlpool WMC20005YB0, first make sure the microwave is not running. If the controls are locked, press and hold CANCEL/OFF for 3 seconds until “Loc” clears; this restores normal keypad operation (it is the most common “reset”). For model-specific keypad functions, follow the steps in the owner's manual.
Quick reset options (most common fixes)
- Stop a cooking cycle: press CANCEL/OFF once.
- Clear a wrong entry: press CANCEL/OFF, then re-enter the settings.
- Unlock the control panel (Control Lock): with the microwave off, press and hold CANCEL/OFF for 3 seconds.
- Cancel the Timer: if the Timer is showing, press CANCEL/OFF (if cooking time is showing, press TIMER/CLOCK to display the Timer first, then press CANCEL/OFF).
What “Loc” means on the display
“Loc” indicates Control Lock is turned on. This feature disables the keypad to prevent unintended use.
| Display message | What it means | What to do |
|---|---|---|
| Loc | Control panel is locked | Hold CANCEL/OFF for 3 seconds (microwave must be off) |
| Timer counting down | Timer is active | Press CANCEL/OFF to cancel the Timer |
| Cooking time counting down | Cooking cycle is active | Press CANCEL/OFF to stop cooking |
If the keypad still will not respond
- Confirm the display is not showing Loc.
- Press CANCEL/OFF once, wait 5 seconds, then try a simple cook function.
- Unplug the microwave for 1 minute, then plug it back in (this clears minor control glitches).
- If the turntable is not moving and you are troubleshooting a “not working right” complaint, inspect the turntable parts for binding or misalignment, such as the ring turn W10398732 and support W10398734.
Why it matters
A “reset” is often just unlocking the controls or clearing an active Timer or cook cycle. Using the correct cancel and lock steps prevents accidental changes and gets your WMC20005YB0 back to normal operation quickly.
Last updated: February 2026
How much does it cost to replace a microwave turntable motor?
For a Whirlpool WMC20005YB0 countertop microwave, replacing the turntable motor typically costs $20 to $100 for the motor part; if you hire a service technician, the total repair commonly lands around $90 to $200+ once labor and trip charges are included.
What changes the price most
- Labor vs. DIY: labor is usually the biggest cost driver.
- Access difficulty: some countertop microwaves require more disassembly to reach the motor.
- What else is worn: a jammed or damaged turntable support can mimic a bad motor.
- Parts availability: pricing varies by exact motor and supplier.
- Symptoms accuracy: a turntable that is simply mis-seated can look like a motor failure.
Quick checks before you price a motor
The WMC20005YB0 manual troubleshooting points to a few basics first: the turntable must be seated correctly on the support, and the support rollers must move freely. Use these steps to avoid buying the wrong part. See the owner's manual.
- Confirm the glass tray is right-side up and sitting securely.
- Remove the tray and clean the support and rollers, then reinstall.
- Place 1 cup of water on the tray and run a short cook cycle to see if it starts turning.
- Do not run the microwave with the turntable system not installed correctly.
Parts that are commonly involved (not always the motor)
If the tray is not rotating smoothly, these model-matched parts are often involved:
| What you see | Likely cause | Common fix |
|---|---|---|
| Tray wobbles, binds, or drags | Dirty or worn support/rollers | Clean or replace the support W10398734 |
| Tray does not roll smoothly | Turn ring worn or damaged | Inspect or replace the ring turn W10398732 |
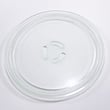
| Tray is chipped or won’t sit flat | Damaged glass tray | Replace the cook tray W11401795 |
Why it matters
A turntable that does not rotate can heat food unevenly. On this Whirlpool design, the turntable can rotate in either direction for more even cooking, so keeping the tray and support working correctly helps performance and reduces repeat service.
Last updated: February 2026
What size is a Whirlpool countertop microwave?
The Whirlpool countertop microwave model WMC20005YB0 measures 15-3/8 in. wide × 14-1/8 in. high × 13-3/4 in. deep (overall exterior size). For placement clearances and electrical location requirements, use the installation and location sections in the WMC20005YB0 owner's manual.
Quick specs for WMC20005YB0
- Width: 15-3/8 in.
- Height: 14-1/8 in.
- Depth: 13-3/4 in.
- Type: countertop microwave
- Best practice: allow extra space for airflow and an easy-to-reach outlet
How we recommend measuring your space
Measure the spot where the microwave will sit, not just the microwave itself:
- Opening width: left-to-right between side walls or cabinet panels
- Usable depth: front edge to the wall (include baseboard or backsplash thickness)
- Overhead clearance: countertop to the shelf or cabinet above
- Outlet access: confirm the cord reaches without stretching or pinching
Fit planning table
| What you are checking | What to compare | Why it matters |
|---|---|---|
| Shelf/cubby width | Opening width vs. 15-3/8 in. | Prevents rubbing and vibration |
| Depth to wall | Depth vs. 13-3/4 in. plus cord space | Avoids crushed cord and restricted airflow |
| Height clearance | Space above 14-1/8 in. | Helps heat dissipate |
| Level surface | Flat, stable countertop | Reduces noise and turntable issues |
Why it matters
Using the correct WMC20005YB0 dimensions helps you avoid blocked ventilation, cord damage, and turntable problems that can happen when a countertop microwave is squeezed into a tight opening.
Last updated: February 2026