 Error Codes




How much does it cost to replace a GE oven control board?
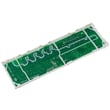
For a GE CHS900P2M3S1 electric range, replacing the oven control board typically runs $150 to $450 for the part, and $300 to $700 total if you hire service (part plus labor). The exact price depends on the specific control board used in your model and whether the repair includes diagnosis and setup.
Typical cost breakdown
- Control board (part only): $150 to $450
- Service call/diagnosis: $80 to $150
- Labor (installation and testing): $150 to $250
- Total installed cost (common range): $300 to $700
| Scenario | What you pay for | Typical total |
|---|---|---|
| DIY replacement | Part only | $150 to $450 |
| Pro replacement | Part + diagnosis + labor | $300 to $700 |
| Complex electrical issue | Board plus additional troubleshooting/parts | $450 to $900 |
What changes the price the most
- Which board your range uses: Some models use a single main control (ERC), others have multiple boards (main control plus user interface).
- Symptom vs. root cause: A dead display, F-code, or no-bake condition can also be caused by wiring, a temperature sensor, or a failed element.
- Labor time: Built-in diagnostics, disassembly, and verification (bake, broil, convection, cooling fan) add time.
Before you replace the board (quick checks)
- Reset power: Turn the breaker off for 2 minutes, then back on.
- Confirm proper supply: Electric ranges need a solid 240V supply; a tripped breaker can leave you with partial power.
- Look for an error code: Use our GE freestanding range error codes guide to match the code to the most likely failed part.
- If the oven will not heat: Follow the steps in oven wont heat troubleshooting electric range problems video to rule out common heating failures.
Why it matters
The control board is the “brain” for bake, broil, convection, and temperature regulation. Replacing it when the real issue is a sensor, element, or power supply can add cost without fixing the problem.
Last updated: February 2026
What are the parts of an electric oven?
An electric oven in a GE CHS900P2M3S1 range is built around heating elements, temperature sensing, airflow, and controls. The core parts include the bake and broil heating circuits, oven temperature sensor, control board, door and gasket, oven light, racks, and (on many models) a convection fan system.
Main electric oven parts (what they do)
- Bake element (lower heat source): Provides most of the heat for baking and roasting.
- Broil element (upper heat source): Provides intense top heat for broiling and browning.
- Oven temperature sensor (RTD): Tells the control the actual oven temperature so it can regulate heat.
- Electronic oven control (control board) and user interface: Runs bake/broil/convection logic, timing, and safety monitoring.
- Convection fan and fan blade (if equipped): Circulates hot air for more even cooking.
- Oven door assembly: Hinges, handle, glass, and door switch help retain heat and support safe operation.
- Door gasket (seal): Keeps heat in and helps temperatures stay stable.
Quick “parts map” by area
| Oven area | Common parts you’ll find there | What you notice when it fails |
|---|---|---|
| Top of cavity | Broil element | Poor broiling, weak browning |
| Bottom of cavity | Bake element (sometimes hidden) | Long preheat, uneven baking |
| Rear wall | Convection fan, sensor | Hot spots, temperature swings |
| Control panel | Control board, keypad/display | Error codes, no heat commands |
| Door perimeter | Gasket, hinges, switch | Heat leaks, door won’t close right |
Why it matters
Knowing the major oven parts helps you troubleshoot faster. For example, “oven won’t heat” often points to a bake/broil heating circuit, sensor, or control issue, while uneven baking often points to airflow (convection fan) or temperature sensing.
Helpful troubleshooting resources
- Use GE freestanding range error codes to interpret fault codes tied to the sensor, control, or heating circuits.
- If the oven is not heating or preheating normally, follow oven wont heat troubleshooting electric range problems video for a practical step-by-step diagnosis.
Last updated: February 2026
How do I find the right GE part number?
For your GE CHS900P2M3S1 electric range, the right part number comes from matching the exact model number to the correct parts diagram, then selecting the part by its location and description (not just by how it looks). This prevents ordering a similar but incompatible part.
Step-by-step: find the correct part number
- Confirm the model number is CHS900P2M3S1 (use the full model, not a partial).
- Use the model’s parts diagrams to locate the section you’re working on (cooktop, oven cavity, door, controls, wiring).
- Identify the part by its diagram position and name (for example: surface element, oven temperature sensor, control board, door hinge).
- Compare key details before ordering: mounting style, connector type, finish/color, and whether it is left/right specific.
- If multiple similar parts appear, match by function and location (bake vs broil circuit, left-front vs right-rear element).
Where to look for the model number on a range
Most GE electric ranges place the model/serial tag in one of these spots:
- Frame behind the oven door (along the front edge)
- Storage drawer frame area (if equipped)
- Lower front frame behind the warming drawer (if equipped)
- Back panel (less common for day-to-day access)
Quick checks before you order
| What you’re replacing | What to verify first | Common symptom if mismatched |
|---|---|---|
| Surface element | Size, wattage class, terminal style | Won’t heat, overheats, or doesn’t fit |
| Oven sensor | Connector type, harness length | Temperature swings, error codes |
| Control board | Exact board revision/overlay match | Dead display, wrong functions |
| Door parts | Left/right orientation, finish | Door won’t close or aligns poorly |
Why it matters
GE range parts are model-specific; even small differences in wiring connectors, element wattage, or control board revisions can cause heating problems, error codes, or fit issues. Using the diagram tied to CHS900P2M3S1 is the most reliable way to get the correct replacement.
If you’re seeing an error code
Use our GE range error code resources to narrow the part you actually need before ordering:
Last updated: February 2026
How to order GE appliance parts?
To order replacement parts for your GE CHS900P2M3S1 electric range, we recommend using the model number to match the correct diagrams and part list, then purchasing the exact part that fits your range through Sears PartsDirect.
What you need before you order
Having these details ready helps ensure you get the right GE range part the first time:
- Full model number: CHS900P2M3S1
- Serial number (helps confirm production version)
- The part name you need (for example: surface element, oven temperature sensor, control board)
- A quick symptom description (for example: “oven not heating” or “burner not working”)
- Whether you need a cosmetic part (knob, handle) or a functional part (switch, relay, element)
How we recommend ordering parts (best practice)
- Confirm the appliance is a GE electric range and verify the model tag matches CHS900P2M3S1.
- Identify the failed system (cooktop, bake, broil, door lock, display).
- Use a symptom-based check to avoid ordering the wrong part.
- Order the exact replacement part listed for your model.
Quick symptom-to-part checklist
| Symptom | Most common parts involved | What to check first |
|---|---|---|
| Oven will not heat | Bake element, control board, temperature sensor | Power supply and element continuity |
| One surface burner not heating | Radiant element, infinite switch, wiring | Swap element position if applicable |
| Error code on display | Control board, sensor, latch system | Record code and follow GE steps |
| Hot surface light stays on | Surface indicator circuit, switch, element | Let glass cool fully, then test |
Why it matters
GE ranges often have multiple versions under the same model family. Ordering by CHS900P2M3S1 (not just “GE range”) helps match the correct electrical ratings, mounting style, and harness connections so the repair is safe and reliable.
Helpful DIY references for GE range issues
- Use GE freestanding range error codes to interpret display codes before ordering parts.
- If your range is a manual-clean style, use GE manual cleaning range error codes for the correct code list.
Last updated: February 2026




