Owner’s manual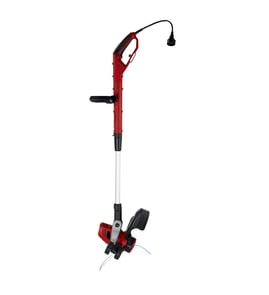
Are black and decker string trimmers good?
Yes. Black & Decker string trimmers like the LST400 are a solid choice for routine yard maintenance because they are designed to be easy to handle and simple to keep running with the correct cutting line and spool setup. For model-specific operation and line requirements, use the LST400 owner's manual.
What “good” means for the LST400 in real use
A trimmer is “good” when it starts reliably, cuts consistently, and does not require constant fiddling. On the LST400, performance depends heavily on using the correct line and letting the self-feed system work as designed.
- Uses .065 in (1.65 mm) round nylon monofilament line
- Self-feeding spool advances line automatically during use
- Cutting line wears faster on abrasive edges (sidewalks, curbs) and in heavy weeds
- Runtime can drop when using higher-power/acceleration modes (when equipped)
What to do to keep it cutting well
Using the wrong line or forcing the feed system is the fastest way to turn a “good” trimmer into a frustrating one.
- Use only .065 in round line (heavier or serrated line can overload the motor and overheat it)
- Do not bump the head on the ground to feed line
- Keep the spool housing clean (remove packed grass and dirt)
- Replace the spool when line becomes consistently tangled or stops feeding
- Trim line length so it only reaches the trimming blade (do not leave it excessively long)
Recommended replacement items (from the manual)
The manual calls out these common wear items for best results:
| Item | What it does | Why it matters |
|---|---|---|
| AF-100 replacement spool | Holds and feeds cutting line | Proper feed reduces tangles and uneven cutting |
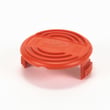
| RC-100 replacement cap | Secures spool in the head | A worn cap can cause poor seating and feed issues |
Why it matters
Most “bad trimmer” complaints come from line choice and line feeding habits, not the motor itself. When we match the LST400 to the correct .065 in round line and avoid bump-feeding, it trims and edges more consistently and with fewer interruptions.
Last updated: February 2026
Which is better, .080 or .095 trimmer line?
For the Black & DECKER LST400 line trimmer, neither .080 nor .095 is the better choice because this model is designed to use .065 inch round nylon line; using thicker line can cause poor feeding, slow cutting, and extra wear on the spool system. Confirm the line type and loading steps in the owner's manual.
What we recommend for the LST400
Use the line size and shape the trimmer was built around so the automatic feed works correctly.
- Use .065 inch (1.65 mm) round nylon line
- Avoid .080 and .095 line; they are typically too thick for this head
- Do not bump the trimmer on the ground to feed line (this model uses automatic feed)
- Keep line length correct; trim excess so it only reaches the line-cutting blade
- For best results, use a factory-wound replacement spool (bulk line can tangle more often)
.080 vs .095: quick comparison (general guidance)
These sizes are common on other trimmers, but they are not a match for the LST400.
| Line diameter | Best for (typical) | Tradeoff | Fit for LST400 |
|---|---|---|---|
| .080 in | Light to medium trimming | Easier on smaller motors | Not recommended |
| .095 in | Heavy weeds, thicker stems | More load on motor, can reduce runtime | Not recommended |
Why it matters
Line diameter affects motor load, cutting speed, and line feeding. On the LST400, thicker line can drag in the spool housing, reduce RPM, and make the automatic feed act up, especially when edging along abrasive surfaces.
If you want more cutting power without thicker line
Instead of upsizing line, use the trimmer's built-in power mode correctly.
- Switch to acceleration mode (#2) for heavier growth (runtime decreases in this mode)
- Clean the spool housing so it rotates freely
- Replace frayed or dried-out line; store spare line in a sealed bag with a tablespoon of water
Last updated: February 2026
Why do landscapers take the guard off string trimmers?
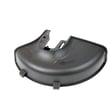
Some landscapers remove the guard to improve visibility and reach in tight edging spots, and to reduce drag from the guard near fences and curbs. For the Black & DECKER LST400, the owner's manual is clear: do not operate the trimmer without the guard firmly in place because it is designed to protect the user from thrown debris.
What the guard does on the Black & DECKER LST400
The guard is not just a “cover”; it is part of the safety system for trimming and edging.
- Helps deflect stones, metal pieces, and other debris thrown by the rotating nylon line
- Helps keep hands, legs, and feet farther from the cutting path
- Supports safer edging, where objects can be thrown at high speed
- Includes the line cut-off blade area (after installation, the blade cover is removed)
- Helps maintain the intended operating setup for the tool
Why pros sometimes remove it anyway
In day-to-day commercial work, speed and access often drive the decision.
- Better sightline to the cut for “cleaner” edging
- Easier to get close to posts, chain link fences, and landscape borders
- Less interference when swinging the trimmer side to side
- Perceived productivity gain when moving quickly across large properties
Safety and performance tradeoffs (guard on vs. off)
| Factor | Guard on (recommended) | Guard off (common reason) |
|---|---|---|
| Debris control | Reduced thrown objects | More debris toward operator and bystanders |
| Personal safety | Better protection for legs and eyes | Higher risk of injury |
| Work area safety | Easier to keep others safer | Greater need for distance and PPE |
| Tool setup | Matches intended design | Increases exposure to rotating line |
Why it matters
When edging, the manual warns that stones and metal can be thrown at high speed, and it calls out keeping people and pets at least 100 feet away. The guard and trimmer are designed together to reduce that danger, so removing the guard increases the risk in the exact situations where debris is most likely.
If the guard is missing or loose
- Remove the battery before inspecting or adjusting anything
- Reinstall the guard so it slides fully onto the motor housing and snaps into place
- Confirm the locking tab is engaged and the guard screw is installed
- Wear ANSI Z87.1 eye protection and heavy long pants when operating
- Keep bystanders well away from the trimming and edging area
Last updated: February 2026
Why does my Black and Decker strimmer line keep breaking?
Your Black & Decker LST400 line usually keeps breaking because the trimmer is being used against abrasive surfaces, the wrong line size/type is installed, or the spool is wound or seated incorrectly. Using the correct .065-inch round nylon line and keeping the spool clean prevents most breakage.
Most common causes (and what to do)
- Abrasive trimming: Edging along sidewalks, curbs, and fences wears line fast; feed line more often and avoid dragging the head on hard surfaces.
- Wrong line type: Use only .065 inch (1.65 mm) round nylon monofilament; heavier or serrated line can overheat the motor and feed poorly.
- Spool tangles or cross-winding: Rewind neatly in layers; do not crisscross the line.
- Dirty or jammed head: Remove grass and debris from the spool and housing so the feed mechanism can move freely.
- Line too long after reloading: If line extends past the trimming blade, cut it back so it just reaches the blade.
Quick checks for the LST400
Use these steps to stop repeat breakage:
- Remove the battery.
- Remove the spool cap and pull out the spool.
- Clean the spool housing and eyelet area.
- Confirm the line is .065-inch round and wound neatly.
- Reinstall the spool so it seats fully; the line should route through the eyelet.
Recommended line and spool guidance
| Item | What works best | Why it matters |
|---|---|---|
| Cutting line | .065 in (1.65 mm) round nylon monofilament | Feeds correctly and avoids motor overload |
| Spool | Factory-wound replacement spool (AF-100) | Reduces tangles compared to hand-wound bulk line |
| Spool cap | RC-100 | Helps the spool stay secured and feed properly |
Why it matters
Line that breaks constantly slows trimming, increases motor strain (especially with heavier line), and can lead to repeated feed jams. Correct line size, clean housing, and neat winding keep the automatic feed working smoothly.
For diagrams and the exact spool replacement and rewinding steps, follow the owner's manual.
Last updated: February 2026