


Get free shipping on your order, with any water filter subscription. Find my filter

Open Hamburger Menu
Sears Parts Direct
Tips to find your model number

Whirlpool WOC75EC0HS22 electric oven/microwave combo Parts

Here are the diagrams and repair parts for Whirlpool WOC75EC0HS22 electric oven/microwave combo, as well as links to manuals and error code tables, if available.

Whirlpool WOC75EC0HS22 electric oven/microwave combo
By Schematic
By Part
SELECT DIAGRAM
?

This is the number corresponding to the part on the diagram / schematic

Browse Parts for WOC75EC0HS22 Electric Oven/Microwave Combo

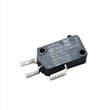
  • Microwave Door Interlock Switch for Whirlpool WOC75EC0HS22 - Part W10211972

    Cabinet and stirrer parts diagram

    Switch

    Part #461967848881

    Replaced by #W10211972

    Info Icon
    Manufacturer substitution
    This part replaces 461967848881. Substitute parts can look different from the original.
    In Stock
    $37.39
    14% OFF Phone Price : $43.39Info Icon
    Minus Item
    Qty
    Plus Item
  • Blower, Mine for Whirlpool WOC75EC0HS22 - Part W11598119

    Control panel parts diagram

    Blower

    Part #W11397930

    Replaced by #W11598119

    Info Icon
    Manufacturer substitution
    This part replaces W11397930. Substitute parts can look different from the original.
    In Stock
    $153.23
    10% OFF Was : $170.26Info Icon
    Minus Item
    Qty
    Plus Item
  • Appliance Silicone Sealant for Whirlpool WOC75EC0HS22 - Part WP482338

    Optional parts (not included) diagram

    Adhesive

    Part #482338

    Replaced by #WP482338

    Info Icon
    Manufacturer substitution
    This part replaces 482338. Substitute parts can look different from the original.
    In Stock
    $21.65
    35% OFF Was : $33.32Info Icon
    Minus Item
    Qty
    Plus Item
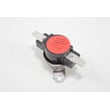
  • Range High-limit Thermostat for Whirlpool WOC75EC0HS22 - Part WP4449751

    Oven parts diagram

    Range High-limit Thermostat

    Part #4449751

    Replaced by #WP4449751

    Info Icon
    Manufacturer substitution
    This part replaces 4449751. Substitute parts can look different from the original.
    In Stock
    $123.71
    9% OFF Phone Price : $135.71Info Icon
    Minus Item
    Qty
    Plus Item
  • Magnetron 2m for Whirlpool WOC75EC0HS22 - Part W11578959

    Cabinet and stirrer parts diagram

    Magnetron 2m

    Part #W11504545

    Replaced by #W11578959

    Info Icon
    Manufacturer substitution
    This part replaces W11504545. Substitute parts can look different from the original.
    In Stock
    $157.46
    Minus Item
    Qty
    Plus Item
  • Wall Oven Door Inner Glass for Whirlpool WOC75EC0HS22 - Part WPW10618107

    Oven door parts diagram

    Wall Oven Door Inner Glass

    Part #W10618107

    Replaced by #WPW10618107

    Info Icon
    Manufacturer substitution
    This part replaces W10618107. Substitute parts can look different from the original.
    In Stock
    $131.21
    8% OFF Phone Price : $143.21Info Icon
    Minus Item
    Qty
    Plus Item
  • Fuse for Whirlpool WOC75EC0HS22 - Part W11188752

    Cabinet and stirrer parts diagram

    Fuse Mda 20a

    Part #241908600053

    Replaced by #W11188752

    Info Icon
    Manufacturer substitution
    This part replaces 241908600053. Substitute parts can look different from the original.
    This item is not returnable
    In Stock
    $11.41
    15% OFF Phone Price : $13.41Info Icon
    Minus Item
    Qty
    Plus Item
  • Interlock for Whirlpool WOC75EC0HS22 - Part W11214928

    Cabinet and stirrer parts diagram

    Holder, Switch

    Part #W10876593

    Replaced by #W11214928

    Info Icon
    Manufacturer substitution
    This part replaces W10876593. Substitute parts can look different from the original.
    In Stock
    $48.16
    Minus Item
    Qty
    Plus Item
  • Microwave Turntable Tray Support for Whirlpool WOC75EC0HS22 - Part W11110134

    Internal microwave parts diagram

    Microwave Turntable Tray Support

    Part #W10367316

    Replaced by #W11110134

    Info Icon
    Manufacturer substitution
    This part replaces W10367316. Substitute parts can look different from the original.
    In Stock
    $61.17
    9% OFF Phone Price : $67.17Info Icon
    Minus Item
    Qty
    Plus Item
  • Microwave Door Inner Panel Assembly for Whirlpool WOC75EC0HS22 - Part W11684570

    Microwave door parts diagram

    Inner Door Assembly

    Part #W11328745

    Replaced by #W11684570

    Info Icon
    Manufacturer substitution
    This part replaces W11328745. Substitute parts can look different from the original.
    In Stock
    $441.53
    Minus Item
    Qty
    Plus Item

Whirlpool Electric Oven/Microwave Combo WOC75EC0HS22 FAQs

On a Whirlpool electric oven/microwave combo like model WOC75EC0HS22, a failing oven control board commonly shows up as a dead or flickering display, buttons that do not respond (or respond randomly), error codes, or heating that is inconsistent (no heat, weak heat, or overheating).

Common symptoms you can expect

  • Display goes blank, flickers, or resets by itself
  • Touchpad keys do nothing, beep without starting, or trigger the wrong function
  • Oven will not start a bake or broil cycle, or shuts off shortly after starting
  • Temperature is unstable (runs too hot or too cool) even after preheat
  • Error codes appear repeatedly after clearing power
  • Cooling fan or relays click inconsistently when a function is selected

Quick checks before you blame the control board

These checks help separate a control issue from a power, safety, or component problem.

  • Reset power: turn the breaker off for 1 minute, then back on; retest
  • Confirm proper power: a weak or missing leg of 240V can cause odd display and no-heat symptoms
  • Look for a blown fuse: if the unit is completely dead, test the fuse mda 20a W11188752
  • Check for overheating protection trips: if it quits during or after high heat, test the range high-limit thermostat WP4449751
  • Rule out a simple heating failure: if the oven runs but will not heat, inspect the range bake element W11545804 for visible damage and test continuity

Symptom-to-likely-cause guide

What you see More likely Less likely
Display dead, no response Blown fuse, power issue Control board failure
Oven runs but no heat Bake element, wiring Control board
Random beeping, wrong selections Control board or keypad issue Bake element
Shuts down when hot High-limit thermostat, cooling airflow Control board

Why it matters

The control board is the “traffic controller” for heating relays, sensors, and user inputs. Misdiagnosing it can lead to replacing an expensive electronic part when the real issue is a fuse, thermostat, wiring connection, or a failed bake element.

Last updated: February 2026

A microwave oven uses a high-voltage system to power a magnetron that creates microwave energy, plus safety interlocks and a turntable system to heat food evenly. In your Whirlpool WOC75EC0HS22 wall oven/microwave combo, common serviceable microwave parts include the door interlock components and turntable drive parts.

Main microwave parts (what they do)

  • Magnetron: generates microwave energy for heating.
  • High-voltage power system: typically includes an inverter or transformer-style components that power the magnetron.
  • Door and interlock system: prevents the microwave from running with the door open.
  • Control system: user interface and electronic control that manages time, power, and safety logic.
  • Cooling and airflow: moves heat away from internal components.
  • Cooking cavity and door window: contains energy and supports safe viewing.
  • Turntable system: rotates food for more even heating.

Parts you can match to this model (WOC75EC0HS22)

If you are troubleshooting a no-heat, no-run, or turntable issue, these model-matched parts are common starting points:

Quick symptom-to-part guide

Symptom Most likely area Example model-matched part
Won’t run with door closed Door interlock circuit Switch W10211972
Runs but turntable doesn’t move Turntable drive Microwave turntable motor W10911403
No power at all Line fuse or power feed Fuse mda 20a W11188752
Heats poorly or unevenly High-voltage system or airflow Inverter W11578579

Why it matters

Microwaves combine high voltage, heat, and safety interlocks. Identifying which “system” is involved (interlock, turntable, power, or cooling) helps you choose the right Whirlpool parts and avoid replacing good components.

Last updated: February 2026

To replace the control panel on your Whirlpool WOC75EC0HS22 wall oven/microwave combo, we remove power, pull the unit forward enough to access the top console area, then swap the control assembly and reconnect the wiring exactly as found. This is a moderate-to-advanced repair because of tight access and electrical connections.

Safety first (do this before touching anything)

  • Turn off the circuit breaker(s) for the wall oven; confirm the display is fully off.
  • Let the oven cool completely.
  • Use cut-resistant gloves; sheet metal edges are sharp.
  • Support the oven when sliding it out; these units are heavy.
  • Take clear photos of every connector before unplugging anything.

Basic replacement steps (typical for this style of combo unit)

  1. Shut off power at the breaker.
  2. Open the oven door and remove the mounting screws that secure the oven to the cabinet (usually along the side trim).
  3. With a helper, slide the unit forward a few inches to access the top and side panels.
  4. Remove the screws holding the top cover or console cover; lift the cover off.
  5. Label and disconnect wire harness plugs from the control panel or control board.
  6. Remove the fasteners securing the control panel assembly; transfer any brackets or trim pieces.
  7. Reinstall the replacement control panel, reconnect wiring, reassemble covers, and slide the unit back into the cabinet.
  8. Restore power and test Bake, Broil, convection fan operation, and microwave functions.

Parts that are commonly involved (and why)

Depending on what failed, the “control panel” repair can involve more than one component:

Symptom Most likely area Example part on this model page
Dead display, no response Fuse or power feed to controls Fuse mda 20a W11188752
Random resets, overheating shutdown Cooling/thermal protection Range high-limit thermostat WP4449751 or assembly, cooling fan W11344874
Microwave runs only with door held, door error Door interlock circuit Switch W10211972 or interlock W11033422

Why it matters

The control panel is the user interface for both the oven and microwave. A loose connector, overheated console area, or a failing interlock circuit can mimic a “bad panel”, so confirming the failure point helps avoid replacing the wrong part.

Helpful DIY reference

If you need to test wiring or confirm power to the control area before replacing parts, use our guide: how to use a multimeter to test electrical parts video.

Last updated: February 2026

Symptoms for gas snowblowers

Choose a symptom to see related snowblower repairs.

Main causes: stale gas, clogged carburetor, clogged or broken fuel line, dirty spark plug, bad rewind starter, incorrect…

Main causes: punctured tire, damaged rim…

Main causes: snow build-up in chute, chute drive mechanism failure, bad chute control assembly…

Main causes: clogged chute, damaged auger blades, broken shear pins, worn auger belt, damaged gear case, engine problems…

Things to do: replace the spark plug, change the oil, rebuild the carburetor, adjust valve lash, adjust or replace the b…

Main causes: dirty carburetor, stale fuel…

Main causes: clogged chute, snow build-up in auger housing, broken auger shear pins, auger drive belt needs adjustment, …

Main causes: broken shear pins, worn or loose auger drive belt, auger drive cable failure, damaged auger, bad gear case…

Main causes: loose drive clutch cable, damaged drive clutch cable, worn friction disc, scraper blade scraping the ground…

Repair guides for gas snowblowers

These step-by-step repair guides will help you safely fix what’s broken on your snowblower.

How to adjust snowblower skid shoes

How to adjust snowblower skid shoes

To prevent snowblower auger and shave plate damage, adjust the skid shoes regularly to keep the shave plate ¼-inch high.…

Repair time and Difficulty

 15 minutes or less
How to rebuild a snowblower carburetor

How to rebuild a snowblower carburetor

Rebuild the carburetor on your snowblower if the engine isn't getting fuel.…

Repair time and Difficulty

 45 minutes or less
How to replace a snowblower 4-way chute control assembly

How to replace a snowblower 4-way chute control assembly

Replace the 4-way chute control assembly on your snowblower if it’s damaged.…

Repair time and Difficulty

 30 minutes or less

Articles and videos for gas snowblowers

Use the advice and tips in these articles and videos to get the most out of your snowblower.

Snowblower won't blow snow: troubleshooting chute and auger issues video

Snowblower won't blow snow: troubleshooting chute and auger issues video

Get your snowblower throwing snow again with this quick video on diagnosing clogged chutes, broken shear pins, and auger…

Snowblower won’t start: 4 easy DIY fixes

Snowblower won’t start: 4 easy DIY fixes

Find easy DIY tips to fix your snowblower when it won't start…

Find the right carburetor assembly for a Craftsman snowblower, tiller or log splitter

Find the right carburetor assembly for a Craftsman snowblower, tiller or log splitter

This chart will help you find the right carburetor for your Craftsman snowblower, tiller or log splitter.…