Owner’s manual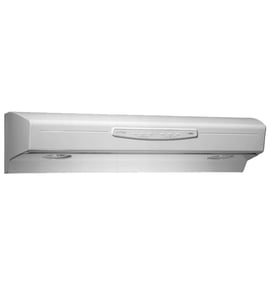



Does KitchenAid sell replacement parts?
Yes. For the KitchenAid range hood model KVWB406DSS4, KitchenAid supports accessory and repair parts sales through its Customer eXperience Center, and we also offer model-matched replacement parts so you can restore ventilation performance, lighting, and fit.
Best ways to get the right replacement part
- Match the model number KVWB406DSS4 first; then confirm the part name and ID.
- Use the exploded-view diagrams and part lists in the KVWB406DSS4 owner's manual.
- Replace common wear items first (filters, dampers, lighting components).
- Compare the old part’s markings to the replacement listing (part ID and manufacturer part number).
- If the hood is noisy or weak, check airflow parts before electrical parts.
Common KVWB406DSS4 parts customers replace
Here are examples of parts available for this model:
| What it affects | Example part for this model | When to replace |
|---|---|---|
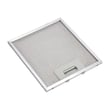
| Grease capture | Range hood grease filter W10915369 | Filter is bent, clogged, or won’t clean up well |
| Venting/backdraft | Range Hood Damper (W10847841) | Flapper sticks, rattles, or won’t seal |
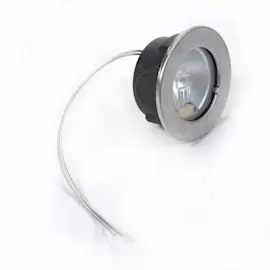
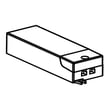
| Lighting power | Driver, Led (W11282989) | Lights flicker or won’t turn on |
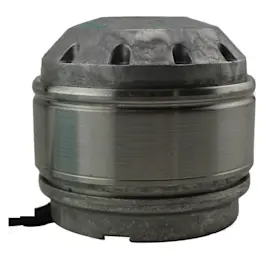
| Blower performance | Motor, Blower (W11351717) | Fan hums, won’t start, or airflow is weak |
Why it matters
Using the correct KitchenAid replacement part for KVWB406DSS4 keeps the hood venting properly, reduces smoke and odors, and helps prevent vibration, rattling, and premature motor wear.
Last updated: February 2026
What is the life expectancy of a range hood?
A range hood typically lasts 10 to 20 years (about 15 years on average). For KitchenAid model KVWB406DSS4, lifespan depends most on how often you cook and how consistently you clean the grease filters and keep airflow (venting or recirculation) unrestricted; see the KVWB406DSS4 owner's manual.
Typical lifespan and what wears out first
Most range hoods reach the end of their service life because of normal wear on a few key components:
- Blower motor wear (noise, slow speeds, intermittent operation)
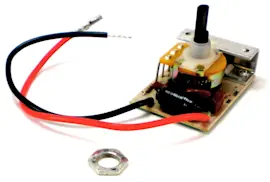
- Controls (buttons not responding, fan speeds not changing)
- Lighting system (LED module or driver failures)
- Grease buildup restricting airflow and overheating components
- Venting issues (damper sticking, duct restrictions)
Maintenance that helps you reach 15 to 20 years
Regular care matters more than brand name for long-term reliability.
- Clean the hood exterior and underside routinely to prevent grease film buildup
- Wash or replace the grease filters on a consistent schedule (monthly for heavy cooking is common)
- Run the hood before cooking and keep it running a few minutes after cooking to clear heat and vapors
- Keep the vent path clear (or keep recirculation filters fresh if configured that way)
- Address new noises early; vibration often points to a loose filter, cover, or blower mounting
Quick maintenance guide (typical)
| Cooking habits | Grease filter care | What you’ll notice if overdue |
|---|---|---|
| Light (few times/week) | Every 1 to 2 months | Lingering odors, light grease film |
| Moderate (daily) | Every 3 to 4 weeks | Reduced airflow, louder fan |
| Heavy (frying, high heat often) | Every 2 to 3 weeks | Smoke not clearing, greasy residue |
If your filter is damaged or won’t come clean, replacing it restores airflow; use the range hood grease filter W10915369.
Why it matters
A clean filter and clear airflow reduce strain on the blower motor and electronics, improve smoke and odor removal, and help the KVWB406DSS4 run quieter at the same fan speed.
Last updated: February 2026
How to clean filters on KitchenAid vent hood?
For KitchenAid model KVWB406DSS4, we clean the metal grease filters by opening the stainless steel panel, removing each filter with the spring-release handle, then washing the filters in a dishwasher or hot detergent solution; reinstall them before using the hood again. See the steps in the KVWB406DSS4 owner's manual.
Steps to remove, clean, and reinstall the grease filters
- Turn the hood off and let surfaces cool.
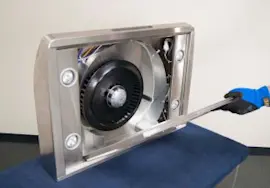
- Open the stainless steel panel; pull down at the front corners to release the catch pins.
- Remove each metal filter: pull the spring-release handle, then pull the filter down.
- Wash filters:
- Dishwasher safe, or
- Hot water plus detergent (soak, then rinse)
- Dry completely.
- Reinstall:
- Keep spring-release handles facing the front.
- Insert filter into the upper track, push up, then release the handle to latch.
- Close the stainless steel panel and re-engage the pins.
Cleaning frequency and what to avoid
Cleaning the hood and filters regularly keeps airflow strong and reduces grease buildup.
| Item | What to use | What to avoid |
|---|---|---|
| Metal grease filters | Dishwasher or hot detergent solution | Operating the hood with filters removed |
| Stainless steel surfaces | Mild liquid detergent and water; soft cloth | Steel wool; soap-filled scouring pads |
If your hood is set up for recirculating (charcoal filters)
If KVWB406DSS4 is installed as non-vented (recirculating), charcoal filters are not washable and are typically replaced about every 6 months with normal use.
Why it matters
Clean filters protect the blower motor, reduce odors and smoke lingering in the kitchen, and help the damper and venting system move air efficiently.
Last updated: February 2026
What are the parts of a range hood called?
On the KitchenAid KVWB406DSS4 range hood, the main parts are typically the hood canopy (body), venting components, controls, lights, and filters. These names match how parts are listed in diagrams and how-to steps in the KVWB406DSS4 owner's manual.
Common range hood part names (and what they do)
- Hood canopy: the main metal body that captures smoke and cooking vapors
- Chimney/duct cover (upper and lower vent covers): decorative covers that hide the vent ducting
- Vent system: ductwork and fittings that route air to a roof cap or wall cap (or a recirculation path)
- Damper: helps prevent backdraft when the blower is off
- Blower (fan) and motor: moves air through the vent system
- Control panel/buttons: turns the blower and lights on/off and sets fan speed
- Lights and LED driver: illuminates the cooktop area
- Grease filters: capture grease before it reaches the blower and ductwork
KVWB406DSS4 parts you will see listed most often
| Part name (common term) | What it affects | Example part for this model |
|---|---|---|
| Grease filter | Airflow, grease capture, odors | Range hood grease filter W10915369 |
| Damper | Backdraft prevention, airflow direction | Range hood damper W10847841 |
| Blower motor | Fan operation and noise | Motor, blower W11351717 |
| LED driver | Lights not working or flickering | Driver, led W11282989 |
Why the names matter when ordering parts
Using the correct part name helps us match the right diagram section and avoid ordering the wrong item, especially on a stainless canopy hood where similar-looking covers, clips, and insulation pieces can vary by revision.
Quick tip for identifying the right part on your hood
- Unplug power at the breaker before inspecting
- Remove the metal filters to view internal components
- Look for the model/serial/rating plate inside the hood (commonly behind a filter)
- Match what you see to the exploded-view names in the KVWB406DSS4 owner's manual
Last updated: February 2026
Why would a range hood fan stop working?
On the KitchenAid KVWB406DSS4 range hood, the fan (blower) usually stops working because power is interrupted, the controls are not set correctly, airflow is restricted by dirty filters, or an internal electrical part (like the blower motor or capacitor) has failed. Use the steps below to pinpoint the cause.
Quick checks first (most common)
- Confirm the hood has power: check the circuit breaker or fused disconnect.
- Make sure the blower is actually being turned on: press Blower On/Off, then press a speed button (the hood runs at the highest speed button selected).
- If multiple speed buttons are pressed, release the higher speeds to allow a lower speed to run.
- If the hood is newly installed or recently serviced, verify the wiring connections in the terminal box match the wiring diagram in the KVWB406DSS4 owner’s manual.
Airflow problems that can make the fan seem “dead”
Restricted airflow can overload the blower and reduce performance.
- Remove and clean the metal grease filters; heavy grease buildup can choke airflow.
- If your setup is recirculating, confirm charcoal filters (if used) are not saturated.
- Check the damper for sticking or blockage; a jammed damper can restrict exhaust. Consider inspecting the range hood damper W10847841 if the flap does not move freely.
Electrical and motor causes
If power and controls are correct and airflow is clear, the issue is typically in the blower circuit.
- Loose or burned wire connection in the terminal box or control area
- Failed blower motor assembly
- Failed capacitor (motor may hum, start slowly, or not start)
- Failed control or speed switch (fan does not respond to button presses)
Symptom-to-cause guide
| What you notice | Most likely cause | What to do next |
|---|---|---|
| No lights and no fan | No power supply | Reset breaker, verify supply wiring |
| Lights work, fan does nothing | Control or blower circuit issue | Check button operation, wiring, capacitor, motor |
| Fan hums but won’t spin | Capacitor or seized blower | Inspect capacitor, check blower wheel for binding |
| Fan runs but airflow is weak | Filters or damper restricted | Clean filters, inspect damper and venting |
Why it matters
A non-working range hood fan reduces smoke and odor removal and can allow grease and moisture to build up on cabinets and surfaces. Restoring proper airflow also helps the blower run cooler and last longer.
Last updated: February 2026
How do I know what model range hood I have?
To identify your KitchenAid range hood model, look for the model/serial/rating plate inside the hood. On KVWB406DSS4, it’s located on the rear wall inside the range hood; you’ll use that exact model number to match the correct parts and manual.
Where to look on a range hood
On most canopy-style range hoods (including KitchenAid models like KVWB406DSS4), the model label is inside the hood body, not on the outside.
- Turn the hood off, then switch off power at the breaker for safety
- Remove the metal grease filter(s) to improve visibility
- Look on the rear wall inside the hood for the model/serial/rating plate
- Write down the full model number and serial number exactly as shown
- Use the model number to confirm compatible parts like a grease filter or damper
For diagrams and label location details, use the KVWB406DSS4 owner's manual.
Quick checklist: what to record
| Item on label | Why it matters |
|---|---|
| Model number (example: KVWB406DSS4) | Ensures correct part fit and wiring/installation info |
| Serial number | Helps match production version when parts changed |
| Electrical ratings | Confirms correct power supply and safe servicing |
If you can’t find the label right away
These spots are common on many range hoods:
- Behind or above the grease filters
- On an interior side wall near the light housing
- Near the wiring/terminal box cover area
If your filters are damaged or missing, replacing them can also make the label easier to access; KVWB406DSS4 uses a metal filter such as the range hood grease filter W10915369.
Why it matters
Range hood parts (filters, blower components, LED driver, dampers) are model-specific. Using the exact model number from the rating plate prevents ordering the wrong KitchenAid part and helps you follow the correct safety and installation clearances.
Last updated: February 2026