Get free shipping on your order, with any water filter subscription. Find my filter

Open Hamburger Menu
Sears Parts Direct
Tips to find your model number

Jenn-Air JMW2430IL02 electric oven/microwave combo Parts

Here are the diagrams and repair parts for Jenn-Air JMW2430IL02 electric oven/microwave combo, as well as links to manuals and error code tables, if available.

Jenn-Air JMW2430IL02 electric oven/microwave combo
By Schematic
By Part
SELECT DIAGRAM
?

This is the number corresponding to the part on the diagram / schematic

Browse Parts for JMW2430IL02 Electric Oven/Microwave Combo

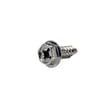
  • Range Screw for Jenn-Air JMW2430IL02 - Part WP7101P434-60

    Screw- Sho

    Part #7101P434-60

    Replaced by #WP7101P434-60

    Info Icon
    Manufacturer substitution
    This part replaces 7101P434-60. Substitute parts can look different from the original.
    In Stock
    $28.50
    Minus Item
    Qty
    Plus Item
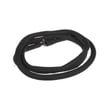
  • Wall Oven Door Gasket for Jenn-Air JMW2430IL02 - Part W11623080

    Oven parts diagram

    Pyro Gasket

    Part #W10739089

    Replaced by #W11623080

    Info Icon
    Manufacturer substitution
    This part replaces W10739089. Substitute parts can look different from the original.
    In Stock
    $106.18
    Minus Item
    Qty
    Plus Item
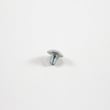
  • Wall Oven Screw for Jenn-Air JMW2430IL02 - Part WP3196183

    Oven door parts diagram

    Screw

    Part #3196183

    Replaced by #WP3196183

    Info Icon
    Manufacturer substitution
    This part replaces 3196183. Substitute parts can look different from the original.
    This item is not returnable
    In Stock
    $5.21
    16% OFF Phone Price : $6.21Info Icon
    Minus Item
    Qty
    Plus Item
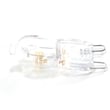
  • Wall Oven Light Bulb for Jenn-Air JMW2430IL02 - Part WPW10472384

    Oven parts diagram

    Oven Light Bulb

    Part #W10472384

    Replaced by #WPW10472384

    Info Icon
    Manufacturer substitution
    This part replaces W10472384. Substitute parts can look different from the original.
    In Stock
    $76.09
    7% OFF Phone Price : $82.09Info Icon
    Minus Item
    Qty
    Plus Item
  • Range Screw for Jenn-Air JMW2430IL02 - Part WPW10254050

    Oven parts diagram

    Range Screw

    Part #W10254050

    Replaced by #WPW10254050

    Info Icon
    Manufacturer substitution
    This part replaces W10254050. Substitute parts can look different from the original.
    This item is not returnable
    In Stock
    $4.91
    17% OFF Phone Price : $5.91Info Icon
    Minus Item
    Qty
    Plus Item
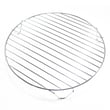
  • Microwave Metal Rack for Jenn-Air JMW2430IL02 - Part W11175831

    Internal microwave parts diagram

    Microwave Metal Rack

    Part #W10748279

    Replaced by #W11175831

    Info Icon
    Manufacturer substitution
    This part replaces W10748279. Substitute parts can look different from the original.
    This item is not returnable
    In Stock
    $25.81
    19% OFF Phone Price : $31.81Info Icon
    Minus Item
    Qty
    Plus Item
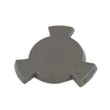
  • Microwave Turntable Motor Coupler for Jenn-Air JMW2430IL02 - Part W11179756

    Internal microwave parts diagram

    Tt Drive Ht

    Part #W10545578

    Replaced by #W11179756

    Info Icon
    Manufacturer substitution
    This part replaces W10545578. Substitute parts can look different from the original.
    This item is not returnable
    In Stock
    $26.39
    19% OFF Phone Price : $32.39Info Icon
    Minus Item
    Qty
    Plus Item
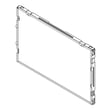
  • Wall Oven Door Window Assembly for Jenn-Air JMW2430IL02 - Part W11295339

    Oven door parts diagram

    Instr - Wind

    Part #W11213479

    Replaced by #W11295339

    Info Icon
    Manufacturer substitution
    This part replaces W11213479. Substitute parts can look different from the original.
    This item is not returnable
    In Stock
    $237.35
    5% OFF Phone Price : $249.35Info Icon
    Minus Item
    Qty
    Plus Item
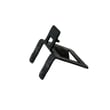
  • Wall Oven Door Outer Panel Retainer for Jenn-Air JMW2430IL02 - Part WPW10549747

    Oven door parts diagram

    Oven Bumper

    Part #W10549747

    Replaced by #WPW10549747

    Info Icon
    Manufacturer substitution
    This part replaces W10549747. Substitute parts can look different from the original.
    In Stock
    $40.07
    Minus Item
    Qty
    Plus Item
  • Support for Jenn-Air JMW2430IL02 - Part 8205707

    Cabinet and stirrer parts diagram

    Bottom Bar O

    Part #461967008461

    Replaced by #8205707

    Info Icon
    Manufacturer substitution
    This part replaces 461967008461. Substitute parts can look different from the original.
    In Stock
    $93.75
    Minus Item
    Qty
    Plus Item

Jenn-Air Electric Oven/Microwave Combo JMW2430IL02 FAQs

A Jenn-Air wall oven typically lasts 15 years with normal household use and basic care. For the JMW2430IL02 wall oven/microwave combo, consistent cleaning, keeping vents unblocked, and avoiding excessive door openings during cooking help protect key components and extend service life.

Typical lifespan and what affects it

Most wall ovens land in a predictable range; how you use and maintain the oven determines where you fall.

  • Typical lifespan: 15 years
  • Heavy use (daily high-heat cooking): closer to 12 to 15 years
  • Light use (occasional baking): 15 to 20 years
  • Poor airflow or skipped cleaning: shortens lifespan by overheating controls and wiring
Usage pattern What we see most often Main wear drivers
Light 15 to 20 years Door gasket wear, light bulbs
Normal 15 years Heating element cycling, fan runtime
Heavy 12 to 15 years Higher heat exposure, more thermal cycling

Care steps that extend the life of JMW2430IL02

The manual calls out airflow and operating behaviors that directly impact performance and cooling.

  • Keep the oven vents and bottom vent clear; blocked vents cause poor air circulation and can affect cooking, cleaning, and cooling results.
  • Expect the cooling fan to run during and after a cycle; that warm air at the vent is normal and protects internal electronics.
  • Remove unused racks before preheating to reduce preheat time and heat load.
  • Avoid opening the door during preheat; wait for the preheat tone so the oven reaches a stable temperature.
  • Follow the cleaning guidance in the JMW2430IL02 owner’s manual to prevent baked-on residue from stressing components.

Why it matters

Wall ovens fail most often from heat stress over time. Good airflow (vents not blocked), normal fan operation, and routine oven care reduce overheating of the control area, wiring, and heating system, which is the biggest factor in reaching the full 15-year lifespan.

Last updated: January 2026

On the Jenn-Air JMW2430IL02 wall oven/microwave combo, we calibrate (offset) the oven temperature through the Tools menu, then select the oven (upper or lower) and adjust the temperature offset in °F or °C. This changes how the oven heats, even though the display still shows the set temperature.

How to adjust oven temperature calibration (offset)

  1. Turn the oven on (Power).
  2. Touch TOOLS.
  3. Find the option for oven calibration or Oven temperature control.
  4. If prompted, choose Upper or Lower oven (they calibrate independently on double ovens).
  5. Adjust the offset warmer or cooler, then save/exit.

Use the steps and exact screen prompts in the JMW2430IL02 owner’s manual.

Choosing the right offset

We recommend making small changes first, then retesting the same recipe.

  • Start with 10°F if food is slightly underbaked or overbrowned
  • Use 20°F for a moderate difference
  • Use 30°F only when results are consistently far off
  • A minus offset makes the oven cook cooler
  • No minus sign means the oven cooks warmer
Offset change What you typically see
+10°F to +20°F More browning, faster baking
0°F Factory default behavior
-10°F to -20°F Less browning, slower baking

Why the display does not change

Even after calibration, the control continues to show the original set temperature (example: set to 350°F still displays 350°F). The offset is applied behind the scenes to how the elements cycle.

Why it matters

Calibration is the correct fix when the oven heats consistently a little hot or a little cool. It is faster and more accurate than chasing temperatures with an oven thermometer, since normal element cycling and door openings can skew thermometer readings.

Last updated: January 2026

To reset your Jenn-Air JMW2430IL02 wall oven/microwave combo, we recommend a simple power reset: turn the oven’s circuit breaker(s) off for 1 minute, restore power, then start a Bake cycle and watch the display briefly to confirm normal operation. Use the JMW2430IL02 owner’s manual for the exact keypad and Tools menu steps.

Quick reset steps (power reset)

  • Turn OFF the oven’s circuit breaker(s) (both breakers if it is on a 240V circuit).
  • Wait 1 full minute.
  • Turn the breaker(s) ON.
  • Touch Power (if applicable), then start a Bake cycle.
  • Monitor the display for about 1 minute to confirm the message or error does not return.

If the oven still will not respond

Some modes can make the control panel seem “stuck” even after power is restored.

  • Button Lock: When locked, only the Power keypad works; unlock it from the Tools menu.
  • Sabbath Mode: After a longer power interruption, the oven returns to an idle state and Sabbath Mode is no longer active.
  • Self-clean status: During Self Clean, the door locks and the oven follows on-screen confirmations; the oven lights do not operate during the cycle.

What “reset” means (common types)

Reset type What it does When to use it
Breaker reset Reboots the electronic control by removing power Frozen screen, random control glitch, after a brief outage
Cancel/Stop (if shown) Stops the current cooking cycle Wrong mode selected, need to clear a running cycle
Unlock Button Lock Restores normal keypad operation Control locked message, most keys do not respond

Why it matters

A breaker reset clears temporary electronic glitches and helps you confirm whether the issue was a one-time control hiccup or a repeat problem. If the same error returns right away, focus on control settings, wiring connections, or a failing component.

Last updated: January 2026

Symptoms for top-mount refrigerators

Main causes: frozen or clogged defrost drain tube, cracked water system tubing…

Repair guides for top-mount refrigerators

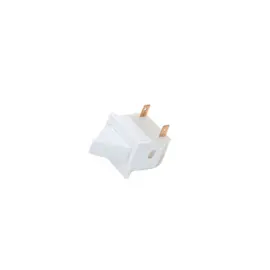
How to replace the light switch in a top-freezer refrigerator

How to replace the light switch in a top-freezer refrigerator

The light switch turns the refrigerator light on and off and monitors door position. Replace the light switch if it does…

Repair time and Difficulty

 15 minutes or less
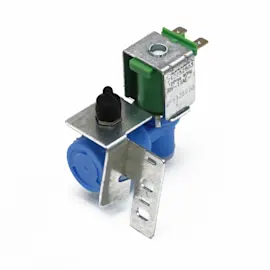
How to replace the water inlet valve in a top-freezer refrigerator

How to replace the water inlet valve in a top-freezer refrigerator

The water inlet valve controls water flow to the ice maker. Replace the water valve if it doesn't open or shut properly.…

Repair time and Difficulty

 15 minutes or less
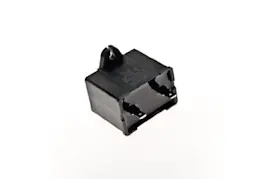
How to replace the compressor run capacitor in a top-freezer refrigerator

How to replace the compressor run capacitor in a top-freezer refrigerator

The run capacitor sends electric current to the compressor motor to help the motor run efficiently. Replace the run capa…

Repair time and Difficulty

 15 minutes or less

Articles and videos for top-mount refrigerators

Can I fix my own fridge?

Can I fix my own fridge?

Find DIY repair tips to fix your refrigerator when it breaks down.…

How to replace Whirlpool refrigerator water filter EDR1RXD1 (EveryDrop Type 1)

How to replace Whirlpool refrigerator water filter EDR1RXD1 (EveryDrop Type 1)

Learn how to replace the Whirlpool EveryDrop 1 refrigerator water filter.…

How to replace open-tray-and-twist-out refrigerator water filters

How to replace open-tray-and-twist-out refrigerator water filters

Watch our video to see how to replace a refrigerator water filter located in a tray you open and then twist out the filt…

Parts & More

Electric Leaf Blower
Front-Engine Lawn Tractor
Gas Leaf Blower
Gas Range
Gas Snowblower
Parts
Washer