Owner’s manual
 Error Codes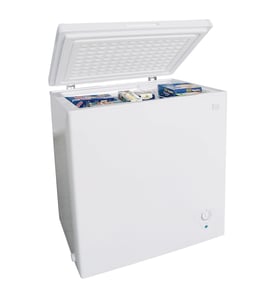

How many cubic feet is my chest freezer?
To find the cubic feet of your Kenmore 25316922100 chest freezer, measure the usable inside width, depth, and height (in inches), multiply them together, then divide by 1,728. This gives you the freezer’s approximate storage capacity in cubic feet.
How to measure it correctly
Use a tape measure and measure the interior space, not the outside cabinet.
- Unplug the freezer and remove baskets or dividers so you can measure cleanly
- Measure width (left to right) at the widest usable point
- Measure depth (front to back) at the bottom, not at the lid opening
- Measure height (bottom to the underside of the lid seal area)
- Subtract space taken up by interior humps, liners, or fixed components if they reduce usable volume
Cubic feet formula (with an example)
Formula:
- Cubic feet = (W × D × H) ÷ 1,728
| What you measure | In inches | Multiply | Result |
|---|---|---|---|
| Width (W) | 40 | W × D × H | 40 × 20 × 30 = 24,000 |
| Depth (D) | 20 | Divide by 1,728 | 24,000 ÷ 1,728 = 13.9 cu. ft. |
| Height (H) | 30 |
Why it matters
Knowing cubic feet helps us load and freeze food safely and efficiently. For this style of freezer, a good rule is to freeze about 3 pounds of fresh food per cubic foot at one time, and allow about 4 hours for the freezer to cool down fully before loading unfrozen food (per the guidance in the owner's manual).
Quick tips for best accuracy
- Measure in inches, then convert using 1,728
- Use usable interior dimensions, not exterior dimensions
- If your freezer has a divider system, measure the main cavity and ignore removable bins
Last updated: February 2026
Where is the model number on a Kenmore chest freezer?
On the Kenmore 25316922100 chest freezer, the model and serial number plate is typically on the left exterior wall of the cabinet. Use the information exactly as shown on the plate when ordering parts or checking specifications in the owner's manual.
Quick places to check
Look for a paper or metal rating plate in these common spots:
- Left exterior wall of the freezer cabinet (most common for chest models)
- Near the back edge of the cabinet on the left side
- Lower left side area where the cabinet is easiest to see
- If the label is hard to spot, wipe dust and look for a reflective plate
How to use the model number once you find it
The model number helps us match the correct Kenmore parts and diagrams for your exact freezer.
- Write down the full model number and serial number
- Use the model number to confirm fit before ordering items like a thermostat or lid switch
- Keep a photo of the plate for future repairs
Common parts you may match by model
| What you are fixing | Part to look up for model 25316922100 | What it affects |
|---|---|---|
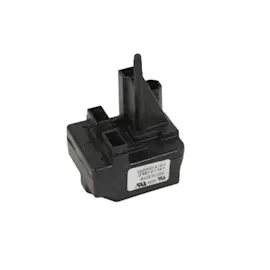
| Freezer not cooling or runs oddly | Freezer compressor start relay 216954200 | Compressor starting and running |
| Interior light or lid-activated function issues | Freezer door switch 216822900 | Lid switch operation |
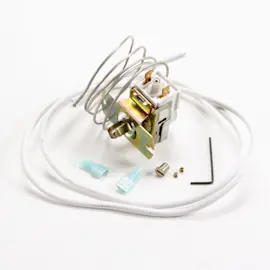
| Temperature won’t adjust correctly | Freezer temperature control thermostat 5304496559 | Temperature regulation |
Why it matters
Kenmore model numbers can look similar across different freezer sizes and series. Using the exact model and serial from the rating plate helps ensure the right part number, wiring, and temperature control style for your specific chest freezer.
Last updated: February 2026
Can you replace the rubber seal on a chest freezer?
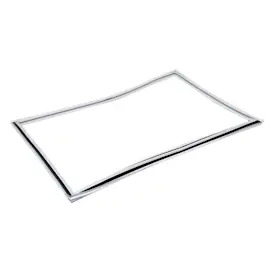
Yes. On the Kenmore 25316922100 chest freezer, you can replace the rubber lid seal (gasket) when it’s torn, stiff, or leaking air. A good seal helps the freezer hold temperature, reduces frost buildup, and prevents moisture around the lid.
What to check before you replace the seal
A “bad gasket” symptom is often caused by alignment or loading issues. Our manual notes the freezer must be level so the lid closes and seals properly, and food packages should not extend past the edge where the lid seals. Use the 25316922100 owner's manual to confirm leveling and loading guidance.
- Make sure the freezer is level; add shims under the foot pads if needed.
- Confirm nothing is sticking up past the top edge of the cabinet.
- Look for debris, sticky residue, or ice on the sealing surface.
- Check for gaps by closing the lid on a strip of paper; it should drag when you pull.
Basic replacement steps (typical chest freezer gasket)
Exact attachment varies by design, but most chest freezer gaskets are either pressed into a channel or secured by a liner/retainer.
- Unplug the freezer.
- Warm the new gasket (room temperature or warm water) so it lays flat.
- Remove the old gasket by pulling it out of the channel or loosening the retainer.
- Clean and dry the mating surfaces with mild detergent and warm water.
- Install the new gasket evenly, working corners first, then the sides.
- Close the lid for several hours to help the gasket “set” into shape.
Troubleshooting after installation
If the lid still does not seal, focus on fit and alignment.
| Symptom | Most common cause | What to do |
|---|---|---|
| Frost near the lid edge | Small air leak | Re-seat the gasket; check corners for twists |
| Lid pops up or won’t sit flat | Freezer not level or overfilled | Level the cabinet; rearrange food below the rim |
| Moisture around lid | Warm air infiltration | Clean sealing surfaces; repeat paper test |
Why it matters
A tight lid seal keeps warm, humid air out. That protects food quality, reduces compressor run time, and helps prevent heavy frost that can lead to frequent defrosting.
Last updated: February 2026
How to clean condenser coils on a chest freezer?
For your Kenmore chest freezer model 25316922100, we recommend unplugging the freezer, then vacuuming dust from the condenser area using a soft brush attachment so airflow stays strong and the compressor runs efficiently. For model-specific access and safety notes, follow the steps in the 25316922100 owner's manual.
Before you start (safety and prep)
- Unplug the freezer from the wall outlet.
- Protect the floor with a towel or cardboard if you will slide the freezer.
- Use a vacuum with a brush attachment or a coil-cleaning brush.
- Avoid harsh cleaners on the cabinet surfaces.
- Keep water away from controls and electrical parts.
How to clean the condenser area
Chest freezers commonly have the condenser tubing and airflow path underneath or behind the cabinet.
- Unplug the freezer.
- Move the freezer enough to access the lower rear or bottom area.
- Vacuum loose dust first (gentle passes).
- Brush and vacuum again to pull dust out of tight spaces.
- Wipe exterior surfaces with mild detergent and warm water; rinse and dry.
- Restore clearance around the freezer so air can circulate.
What to use (and what to avoid)
| Item | Good choice? | Why |
|---|---|---|
| Vacuum with brush attachment | Yes | Removes dust without bending tubing |
| Coil-cleaning brush | Yes | Reaches deeper into tight areas |
| Mild detergent + warm water (exterior) | Yes | Matches the manual’s cleaning guidance |
| Abrasive cleaners or scouring pads | No | Can damage finishes and surfaces |
If you still have cooling problems after cleaning
Cleaning helps, but it will not fix a failed start device or temperature control.
- Confirm the temperature control is set correctly; if the knob is cracked or missing, see freezer temperature control knob 216707200.
- If the compressor clicks on and off, a start device issue is common; see how to replace a freezer compressor start relay and consider universal/multiflex (frigidaire) freezer compressor start relay 216954200.
- If the freezer will not maintain temperature, the control thermostat can be a suspect; see freezer temperature control thermostat 5304496559.
Why it matters
Dust buildup restricts airflow and heat release, which increases run time, raises energy use, and can shorten compressor life. Keeping the condenser area clean helps your Kenmore 25316922100 cool faster and run more consistently.
Last updated: February 2026
Is it worth repairing a chest freezer?
Yes, repairing a Kenmore 25316922100 chest freezer is usually worth it when the problem is a small, replaceable part (like a lid switch or thermostat) and the cabinet is in good shape. If the sealed system or compressor is failing, repair costs can approach replacement cost, so replacement is often the better value.
Quick way to decide
We use this simple rule of thumb for chest freezers:
- Repair it when the issue is electrical or mechanical and parts are readily available (control, switch, relay, gasket-related air leaks).
- Replace it when the issue points to a sealed-system problem (refrigerant leak, restriction, weak compressor) or when repair cost is high compared to the freezer’s age and condition.
- Start with basics first; many “won’t run” complaints are power, control setting, or lid not fully closed.
Common repairs that are usually worth it
These are typical, cost-effective fixes for this model:
- Replace a failed lid switch such as the freezer door switch 216822900
- Replace a temperature control issue such as the freezer temperature control thermostat 5304496559
- Fix a no-start condition by replacing the universal/multiflex (frigidaire) freezer compressor start relay 216954200
- Restore organization and airflow with a damaged basket such as the freezer basket 216848200
When replacement is often the smarter choice
Sealed-system repairs tend to be expensive and labor-heavy. Consider replacement when you see:
- Freezer runs constantly but never reaches safe temps
- Warm cabinet with a hot compressor and little cooling
- Oil residue near tubing joints (often a leak indicator)
- Repeated tripping or hard-start symptoms even after relay/overload checks
| Symptom | More likely repair | More likely replace |
|---|---|---|
| Won’t run at all | Switch, control, relay, wiring | Compressor locked or sealed-system issue |
| Runs too long | Dirty/worn gasket, control setting, frequent openings | Low refrigerant or restriction |
| Frost or moisture around lid | Gasket/closure issue | Cabinet damage or warped lid |
Why it matters
A chest freezer is one of the most energy-efficient ways to store frozen food. A targeted repair can restore temperature stability, reduce run time, and help prevent food loss during power or freezer failures (see guidance in the owner's manual).
Last updated: February 2026