
Get free shipping on your order, with any water filter subscription. Find my filter

Open Hamburger Menu
Sears Parts Direct
Tips to find your model number

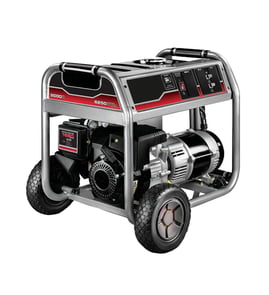
Briggs & Stratton 030592-01 generator Parts

Here are the diagrams and repair parts for Briggs & Stratton 030592-01 generator, as well as links to manuals and error code tables, if available.

Briggs & Stratton 030592-01 generator
By Schematic
SELECT DIAGRAM
?

This is the number corresponding to the part on the diagram / schematic

Browse Parts for 030592-01 Generator

  • Blck,jnction for Briggs & Stratton 030592-01 - Part 316945GS

    Main unit diagram

    Blck,jnction

    Part #316945GS

    Replaced by #316945GS

    Info Icon
    Manufacturer substitution
    This part replaces 316945GS. Substitute parts can look different from the original.
    In Stock
    $18.20
    Minus Item
    Qty
    Plus Item
  • Decal for Briggs & Stratton 030592-01 - Part 313461GS

    Main unit diagram

    Decal

    Part #313461GS

    Replaced by #313461GS

    Info Icon
    Manufacturer substitution
    This part replaces 313461GS. Substitute parts can look different from the original.
    In Stock
    $20.69
    Minus Item
    Qty
    Plus Item
  • Bolt for Briggs & Stratton 030592-01 - Part 318677GS

    Wheel kit diagram

    Bolt

    Part #318677GS

    Replaced by #318677GS

    Info Icon
    Manufacturer substitution
    This part replaces 318677GS. Substitute parts can look different from the original.
    This item is not returnable
    In Stock
    $7.40
    Minus Item
    Qty
    Plus Item
  • Tank-fuel for Briggs & Stratton 030592-01 - Part 704184

    Main unit diagram

    Briggs & Stratton Fuel Tank Assembly

    Part #704184

    Replaced by #704184

    Info Icon
    Manufacturer substitution
    This part replaces 704184. Substitute parts can look different from the original.
    In Stock
    $485.92
    Minus Item
    Qty
    Plus Item
  • Bttn,selct for Briggs & Stratton 030592-01 - Part 319463GS

    Control panel diagram

    Bttn,selct

    Part #319463GS

    Replaced by #319463GS

    Info Icon
    Manufacturer substitution
    This part replaces 319463GS. Substitute parts can look different from the original.
    In Stock
    $56.80
    Minus Item
    Qty
    Plus Item
  • Grommet for Briggs & Stratton 030592-01 - Part 319529GS

    Control panel diagram

    Grommet

    Part #319529GS

    Replaced by #319529GS

    Info Icon
    Manufacturer substitution
    This part replaces 319529GS. Substitute parts can look different from the original.
    In Stock
    $13.31
    Minus Item
    Qty
    Plus Item
  • Washer for Briggs & Stratton 030592-01 - Part 312005GS

    Main unit diagram

    Lawn & Garden Equipment Washer

    Part #312005GS

    Replaced by #312005GS

    Info Icon
    Manufacturer substitution
    This part replaces 312005GS. Substitute parts can look different from the original.
    This item is not returnable
    In Stock
    $7.09
    Minus Item
    Qty
    Plus Item
  • Grip-handle for Briggs & Stratton 030592-01 - Part 319360GS

    Wheel kit diagram

    Line Trimmer Handle Grip

    Part #319360GS

    Replaced by #319360GS

    Info Icon
    Manufacturer substitution
    This part replaces 319360GS. Substitute parts can look different from the original.
    In Stock
    $32.00
    Minus Item
    Qty
    Plus Item
  • Wing Nut for Briggs & Stratton 030592-01 - Part 87680GS

    Main unit diagram

    Wing Nut

    Part #87680GS

    Replaced by #87680GS

    Info Icon
    Manufacturer substitution
    This part replaces 87680GS. Substitute parts can look different from the original.
    In Stock
    $14.20
    Minus Item
    Qty
    Plus Item
  • Monitor for Briggs & Stratton 030592-01 - Part 318458GS

    Control panel diagram

    Monitor

    Part #318458GS

    Replaced by #318458GS

    Info Icon
    Manufacturer substitution
    This part replaces 318458GS. Substitute parts can look different from the original.
    In Stock
    $338.44
    Minus Item
    Qty
    Plus Item

Briggs & Stratton Generator 030592-01 FAQs

A 5,500-watt generator can power essential circuits in a typical home, but it will not run an entire house like utility power. With a Briggs 030592-01 generator, plan to run a few high-priority loads (refrigerator, some lights, internet, a sump pump) and avoid stacking large motor and heating loads at the same time.

What a 5,500-watt generator can usually handle

Most homes do best when you treat 5,500 watts as “critical loads only,” not “whole-home.” Prioritize items with moderate running watts and manage motor start-up surges.

  • Refrigerator or freezer (cycles on and off)
  • A few LED lights
  • TV, modem/router, phone chargers
  • Sump pump (if the starting surge fits)
  • Small microwave or coffee maker (one at a time)
Loads that usually push you over the limit

These either have very high wattage, high starting surge, or both.

  • Central air conditioning or large well pumps
  • Electric water heater
  • Electric range/oven or electric dryer
  • Space heaters (they consume watts continuously)
Quick planning table (typical watt ranges)

Use this to estimate what you can run at once; always add starting watts for motors.

Load type Typical running watts Typical starting surge Notes
LED lighting (several rooms) 50 to 300 Low Easy to support
Refrigerator/freezer 150 to 800 1,200 to 2,500 Surge matters most
Sump pump (1/3 to 1/2 HP) 800 to 1,500 1,300 to 3,000+ Varies by pump
Microwave 900 to 1,500 Low Run alone if needed
Space heater 1,000 to 1,500 None Continuous heavy load
Safe way to connect power (why it matters)

Backfeeding a panel through an outlet is dangerous and can damage equipment. The safe approach is a properly installed transfer switch or interlock with an inlet, so you can select only the circuits your 5,500-watt generator can support.

If your generator bogs down or trips breakers

This usually means you exceeded available watts or hit a motor start surge.

  • Turn off large loads, then add loads back one at a time
  • Start motor loads one at a time (fridge, then sump pump, etc.)
  • Check for loose or damaged cords and connections
  • If you suspect an electrical issue, test with a meter using how to use a multimeter to test electrical parts video

Last updated: February 2026

On a Briggs generator like model 030592-01, the model number is typically printed on the equipment ID label (data plate) attached to the generator frame or engine shroud. We use that exact model number to match the correct parts list and diagrams for your generator.

Common places to look on model 030592-01

Check these spots first; the label is usually a sticker or metal tag:

  • On the generator frame rail near the engine
  • Near the control panel housing (side or back of the panel)
  • On the engine blower housing (recoil starter side)
  • Near the fuel tank mounting area
  • On a lower crossmember where it is protected from heat
What you should write down (and why)

We recommend recording the full ID information so you get the right Briggs & Stratton generator parts.

What to capture Example Why it matters
Model number 030592-01 Identifies the correct parts breakdown
Type / trim code (if shown) Varies Separates similar versions of the same model
Code / serial (if shown) Varies Helps confirm production run and compatible parts
Tips if the label is dirty or hard to read
  • Wipe the label gently with a damp cloth; avoid soaking it
  • Use a flashlight at an angle to make faint printing stand out
  • Take a close-up photo and zoom in
  • If the sticker is scratched, look for a second label on another side of the frame
Why it matters

Generators often have multiple versions that look the same but use different gaskets, fuel lines, or electrical parts. Using the exact model number helps you avoid ordering the wrong replacement part.

If you are tracking down a fuel leak while identifying the model, a common maintenance item is the Briggs & statton husqvarna lawn & garden equipment fuel line kit 791745.

Last updated: February 2026

The generator 20-20-20 rule is a simple safety reminder for using your Briggs 030592-01 generator during an outage: keep the generator at least 20 feet from the home, let it cool about 20 minutes before refueling, and use a CO alarm (often around $20) to help detect carbon monoxide.

What each “20” means
  • 20 feet away: Place the generator outdoors at least 20 feet from doors, windows, soffit vents, crawlspace vents, and garage doors.
  • 20-minute cooldown: Shut the generator off and wait about 20 minutes before adding gasoline.
  • $20 CO alarm: Use a battery-powered carbon monoxide alarm in the home (and replace batteries as needed).
Quick placement and refueling checklist
  • Run the generator outside only, never in a garage, shed, basement, or enclosed porch.
  • Point the exhaust away from the house and away from neighbors.
  • Shut the unit down before refueling; wipe up any spilled fuel before restarting.
  • Store gasoline in an approved container, away from ignition sources.
  • Use heavy-duty outdoor-rated cords sized for the load.
Why it matters

Carbon monoxide can build up quickly and is dangerous even when you cannot smell it. Refueling a hot engine can also ignite fuel vapors. Following the 20-20-20 rule reduces CO exposure risk and helps prevent fires.

Helpful reference table
“20” What to do What it helps prevent
20 feet Keep generator away from openings CO entering the home
20 minutes Cool down before refueling Fuel ignition and burns
$20 CO alarm Use a battery CO alarm Undetected CO exposure
Parts that commonly come up during generator upkeep

If you are troubleshooting fuel delivery or doing a refresh on the Briggs 030592-01, these parts on our page are common starting points:

Last updated: February 2026
Symptoms for electric ranges

Main causes: faulty surface element, burner control switch failure, temperature limiter not working properly, loose wiri…

Main causes: impact from dropping an item on the glass surface, ceramic glass surface flaw, surface element temperature …

Repair guides for electric ranges

How to replace an oven temperature sensor on an electric range

How to replace an oven temperature sensor on an electric range

These step-by-step instructions guide you through replacing an oven temperature sensing probe.…

Repair time and Difficulty

 15 minutes or less
How to replace an electric range oven control board

How to replace an electric range oven control board

If the electronic oven control board isn't powering the bake and broil functions, you can replace it in less than half a…

Repair time and Difficulty

 15 minutes or less
How to replace a range surface element control switch

How to replace a range surface element control switch

The surface element control switch lets you turn the stovetop elements on and off, and to set the heat level. These step…

Repair time and Difficulty

 15 minutes or less

Articles and videos for electric ranges

How to disassemble an Electrolux EW30 freestanding electric range

How to disassemble an Electrolux EW30 freestanding electric range

See how to access control boards and oven components in an Electrolux electric range.…

Radiant surface element on range not working video

Radiant surface element on range not working video

Troubleshoot the likely causes why a stovetop burner won’t heat.…

Hidden bake element has long preheat

Hidden bake element has long preheat

Here's why ovens with hidden bake elements take longer to preheat.…

Parts & More

Dryer
Electric Range
Electric Wall Oven
Gas Grill
Parts
Side-By-Side Refrigerator
Table Saw
Washer