- Kenmore refrigerator water filters
- Whirlpool refrigerator water filters
- Samsung refrigerator water filters
- GE refrigerator water filters
- LG refrigerator water filters
- Frigidaire refrigerator water filters
- KitchenAid refrigerator water filters
- Maytag refrigerator water filters
- Kenmore Elite refrigerator water filters
- Estate refrigerator water filters
- GE Profile refrigerator water filters
- Amana refrigerator water filters
- Bosch refrigerator water filters
- Dacor refrigerator water filters
- Electrolux refrigerator water filters
How to replace a laundry center dryer drive belt
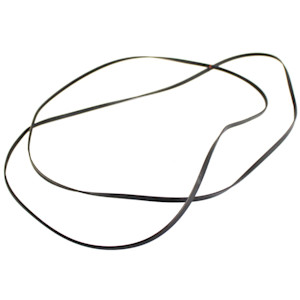
This DIY repair guide explains how to replace the dryer drive belt in a laundry center. The dryer drive belt turns the dryer drum when the drive motor pulley turns. If the dryer belt breaks, the motor runs but the drum won't move. Replace a broken dryer drive belt with the manufacturer-approved laundry center part.
This procedure shows how to replace the dryer drive belt in Kenmore, Frigidaire, Gibson, Crosley and White-Westinghouse laundry centers.
Quick links
Video
Instructions
Tools required
Phillips screwdriver
#2 Square-head screwdriver
Step ladder
Work gloves
Repair difficulty
Time required
60 minutes or less
Repair difficulty
Time required
60 minutes or less
Replacing a dryer drive belt on a laundry center
This video shows how to replace the dryer drive belt on a laundry center.
Instructions
- 01.
Shut off the power
Unplug the laundry center. If the dryer uses gas, shut off the gas supply.
Wear work gloves to protect your hands. Enlist a helper to assist you when moving the laundry center.
- 02.
Remove the rear access panel
With your helper, pull the laundry center away from the wall to access the rear dryer panel.
Remove the screws from the rear access panel and pull off the access panel.
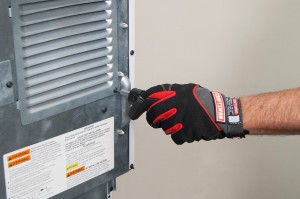
PHOTO: Remove the screws from the rear access panel.

PHOTO: Remove the rear access panel.
- 03.
Remove the heat shield
Remove the mounting screws from the front access panel and pull off the panel.
Remove the mounting screws from the heat shield and pull the heat shield off.
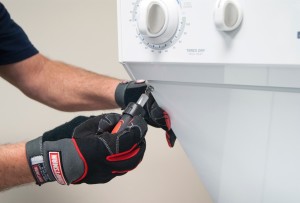
PHOTO: Remove the access panel mounting screws.
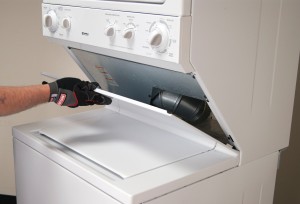
PHOTO: Remove the front access panel.
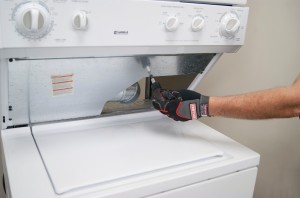
PHOTO: Remove the heat shield screws.

PHOTO: Remove the heat shield.
- 04.
Release the control panel
Remove the mounting screws holding the control panel to the laundry center frame.
Pull the control panel down and forward to release it from the laundry center frame.
Let the control panel hang by the wires below the dryer front panel.
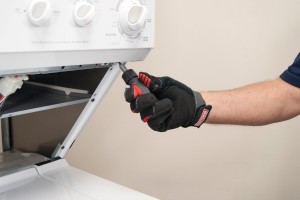
PHOTO: Remove the control panel mounting screws.
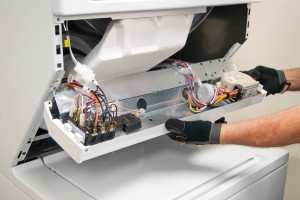
PHOTO: Release the control panel from the laundry center frame.
- 05.
Remove the front panel
Remove the 2 mounting screws at the bottom of the front panel.
Unplug the door switch wire harness.
Remove the 4 mounting screws from the top of the front panel and pull off the front panel.
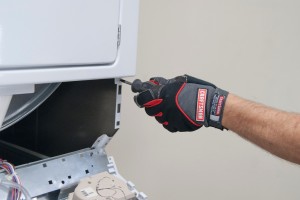
PHOTO: Remove the bottom screws from the dryer front panel.
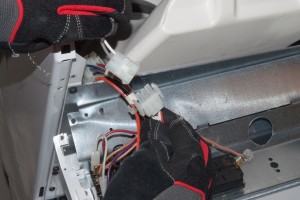
PHOTO: Unplug the dryer door switch harness.
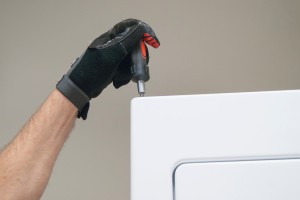
PHOTO: Remove the top screws from the dryer front panel.
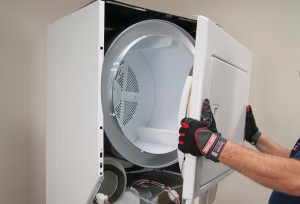
PHOTO: Remove the dryer front panel.
- 06.
Remove the dryer drive belt
If the belt isn’t broken, reach into the dryer through the rear access panel and release the drive belt from the motor pulley.
From the front of the dryer, raise the dryer drum slightly and pull the drive belt out of the dryer.
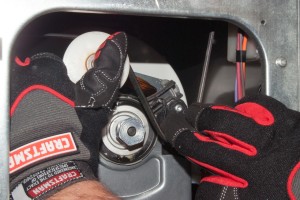
PHOTO: Release the dryer belt from the motor pulley.
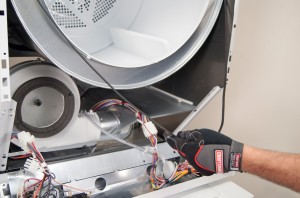
PHOTO: Remove the belt from the dryer.
- 07.
Install the new dryer drive belt
From the front of the dryer, slightly raise the drum and slide the new belt over the drum.
From the back of the dryer, reach into the dryer and route the belt over the idler pulley and around the motor pulley.
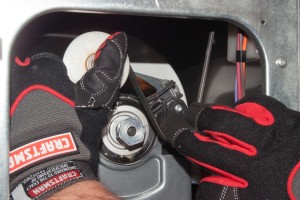
PHOTO: Install the new dryer belt.
- 08.
Reinstall the front panel
Position the front panel on the laundry center frame and reinstall the top mounting screws.
Reconnect the door switch wire harness.
Reinstall the bottom mounting screws on the front panel.
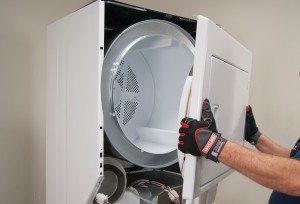
PHOTO: Reinstall the dryer front panel.
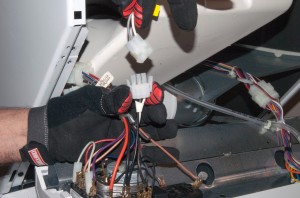
PHOTO: Reconnect the door switch wires.
- 09.
Reinstall the control panel
Push the control panel into the laundry center frame and reinstall the control panel mounting screws.
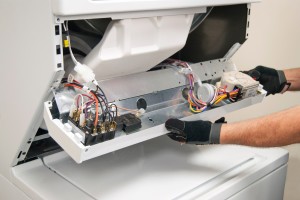
PHOTO: Reinstall the control panel.
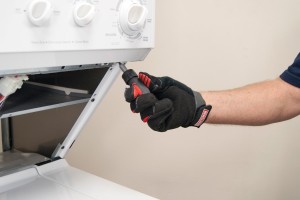
PHOTO: Reinstall the control panel screws.
- 10.
Reinstall the heat shield
Position the heat shield on the frame and reinstall the mounting screws.
Position the front access panel on the laundry center frame and reinstall the mounting screws.
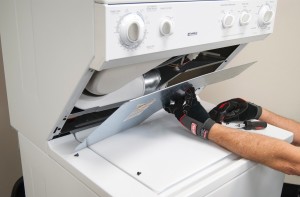
PHOTO: Reinstall the heat shield.

PHOTO: Reinstall the heat shield screws.
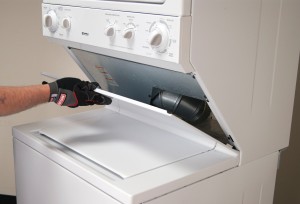
PHOTO: Reinstall the front access panel.
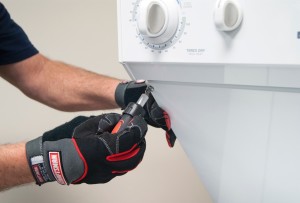
PHOTO: Reinstall the access panel mounting screws.
- 11.
Reinstall the rear access panel
Push the motor access panel into the rear panel of the dryer and reinstall the mounting screws.
Move the laundry center back into place.
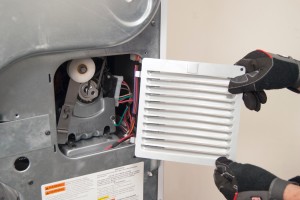
PHOTO: Reinstall the rear access panel.
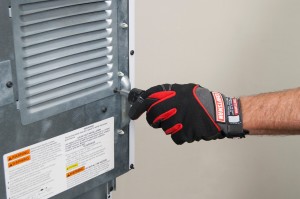
PHOTO: Reinstall the rear access panel screws.
- 12.
Restore power to the laundry center
Plug the laundry center into the wall outlet. If the dryer uses gas, turn on the gas supply.
Warning: Undertaking repairs to appliances can be hazardous. Use the proper tools and safety equipment noted in the guide and follow all instructions. Do not proceed until you are confident that you understand all of the steps and are capable of completing the repair. Some repairs should only be performed by a qualified technician.
Most common symptoms to help you fix your laundry centers
Choose a symptom to see related laundry center repairs.
Main causes: lack of water supply, failed lid switch or lid lock, bad water level pressure switch, control system failur…
Main causes: bad lid switch or lid lock, drive motor failure, broken motor coupler, bad timer, faulty electronic control…
Main causes: blocked exhaust vent, clogged lint screen, bad timer, moisture sensing problems, weak gas valve coils, bad …
Main causes: broken dryer drive belt, weak drive motor, binding drum seals…
Main causes: control system failure, broken heating element, bad gas valve coils, gas supply failure, voltage supply pro…
Main causes: unbalanced load, broken suspension springs or shocks, worn snubber ring…
Main causes: door not fully shut, bad door switch, faulty push-to-start switch, wiring failure, bad drive motor, blown f…
Main causes: clogged drain system, blocked drain hose, bad drain pump…
Main causes: broken lid switch or lid lock, faulty drive motor, drain system problem, broken drive system components…
Most common repair guides to help fix your laundry centers
These step-by-step repair guides will help you safely fix what’s broken on your laundry center.
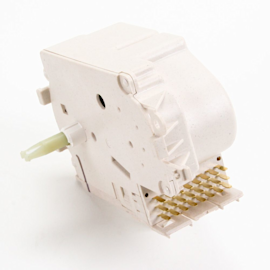
How to replace a laundry center washer timer
If the washer doesn't fill, spin or drain, the timer could be the problem. …
Repair difficulty
Time required
15 minutes or less
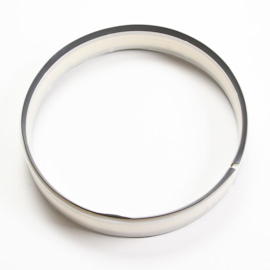
How to replace a laundry center washer snubber ring
If the washer tub bangs the cabinet during the spin cycle even though the load is balanced, you might need to replace th…
Repair difficulty
Time required
15 minutes or less
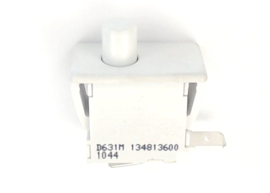
How to replace a laundry center dryer door switch
The dryer won’t start if the door switch is defective. Your can replace it in about 15 minutes.…
Repair difficulty
Time required
15 minutes or less
Effective articles & videos to help repair your laundry centers
Use the advice and tips in these articles and videos to get the most out of your laundry center.

Learn about all the convenient features on our Sears PartsDirect website that make your parts purchases easier.…

Get answers to frequently asked questions about Sears and Sears PartsDirect.…
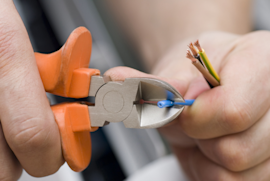
Learn how to repair broken, frayed or damaged wires in your appliances.…
