Owner’s manual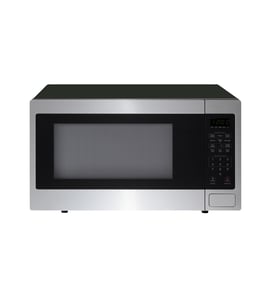





What is the average lifespan of a GE microwave?
A GE microwave typically lasts about 8 years. Most countertop microwaves fall in the 5 to 10 year range depending on daily use, ventilation, and how well the cavity and door surfaces are kept clean. For model PEB2060SM1SS, following the care and safety guidance in the PEB2060SM1SS owner’s manual helps maximize service life.
The magnetron, door system, and high-voltage components do the hardest work; heavy use and poor airflow shorten their life.
- Daily run time (multiple long heat cycles per day wears components faster)
- Blocked vents or grease buildup (raises internal temperatures)
- Door slamming or misalignment (stresses interlock switches)
- Running the microwave empty (can damage internal components)
- Cleaning habits (food splatter and arcing damage the cavity and waveguide area)
We recommend these habits for GE countertop microwaves like the PEB2060SM1SS:
- Unplug before cleaning; wipe interior regularly with mild solutions (avoid abrasives)
- Keep the door sealing surfaces clean and dry
- Use microwave-safe cookware and vent plastic wrap as directed
- Stop use if you see arcing or burning; inspect the waveguide cover area
- Ensure the unit has breathing room around vents (do not crowd it in a tight space)
These symptoms often appear as a microwave approaches failure; some are repairable.
| Symptom | Common cause area | What to check first |
|---|---|---|
| Runs but does not heat | High-voltage system | Heating performance consistency across multiple cups of water |
| Dead display or no power | Power supply or protection device | Outlet, cord fit, and signs of intermittent power |
| Stops when door moves | Door interlock circuit | Door alignment and switch behavior |
| Loud hum or burning smell | High-voltage components or fan | Stop use and have it serviced |
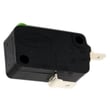
If the door must be lifted or pushed to start, the interlock circuit is a frequent culprit; the microwave primary interlock switch WB24X10047 is one of the model-specific parts used in that safety system.
Microwaves rely on door interlocks and high-voltage parts for safe operation. Keeping the cavity clean, maintaining airflow, and addressing door issues early helps prevent repeat failures and protects key components.
Last updated: February 2026
What are common problems with GE profile microwaves?
Common problems we see on GE Profile-style countertop microwaves like model PEB2060SM1SS include not heating, a dead display or keypad issues, a turntable that will not rotate, door-latch problems, and sparking or arcing. Many symptoms trace back to door interlock safety switches, overheating protection devices, or high-voltage components.
- Runs but does not heat: high-voltage circuit issue (diode, capacitor, transformer, magnetron) or a safety device opening under load
- Will not start, or stops when you close the door: door interlock switch or door alignment issue
- Turntable not spinning: turntable motor or coupler/support problem
- Random shutoff during cooking: overheating, blocked airflow, or a thermal cut-off opening
- Sparking/arcing inside the cavity: metal/foil contact, food splatter buildup, or a damaged waveguide cover
For model-specific operating and care guidance, use the PEB2060SM1SS owner's manual.
- Power reset: unplug for 2 minutes, then plug back in.
- Outlet check: confirm the outlet is working (try a lamp) and the breaker is not tripped.
- Door close feel: the door should close firmly and evenly; no sagging or rubbing.
- Clean the door mating surfaces: use mild soap and a soft cloth; avoid abrasives (this helps the door seal and latch surfaces).
- Remove metal causes of arcing: no foil, no metal twist ties, and keep racks/metal accessories out unless the manual allows them.
If symptoms match, these parts are frequent culprits on countertop microwaves:
| Symptom | Common suspect | Example part for PEB2060SM1SS |
|---|---|---|
| Will not start, door-related behavior | Primary interlock switch | Microwave primary interlock switch WB24X10047 |
| Random shutoff or no heat after running | Thermal protection opens | Microwave thermal cut-off WB24X10163 |
| Turntable will not rotate | Turntable motor | Microwave turntable motor WB26X10143 |
| Sparking near the side wall | Waveguide cover damaged/dirty | Microwave waveguide cover WB06X10764 |
Microwaves use door interlocks and thermal protection to prevent unsafe operation. When a switch, thermal cut-off, or airflow issue develops, the oven may refuse to run, stop mid-cycle, or run without heating. Addressing the root cause helps prevent repeat failures and nuisance shutdowns.
Last updated: February 2026
What replaced PEB2060SM1SS?
GE does not use a single universal “replacement model” for the GE PEB2060SM1SS countertop microwave; the right replacement depends on whether you are keeping it as a countertop unit or converting it to a built-in using a trim kit. For exact fit and electrical requirements, we follow the specifications and accessory guidance in the PEB2060SM1SS owner’s manual.
Start by matching the items that control real-world fit and usability, not just cubic feet.
- Installation type: countertop vs. built-in (trim kit conversion)
- Cutout and trim kit compatibility: 27-inch vs. 30-inch built-in opening
- Power requirements: dedicated, properly grounded outlet (no adapter plug)
- Door swing and clearance: cabinet depth and nearby walls
- Feature match: sensor cooking, turntable, control layout
If your PEB2060SM1SS is installed as a built-in, the trim kit and cutout drive the replacement decision. The manual lists optional installation kits for 27-inch and 30-inch installations for the PEB2060 series; matching that opening is the key to avoiding gaps, interference, or overheating.
| Your current setup | What to match first | What to verify next |
|---|---|---|
| Countertop | Exterior footprint and vent clearance | Outlet location and cord reach |
| Built-in (27-inch opening) | 27-inch trim kit and cutout spec | Cabinet depth and airflow path |
| Built-in (30-inch opening) | 30-inch trim kit and cutout spec | Door clearance and trim overlap |
Use these steps to confirm you are comparing the right specs.
- Locate the model and serial label inside the oven.
- Measure the cabinet opening (if built-in): width, height, depth.
- Confirm the microwave is on a properly grounded outlet; avoid adapters and extension cords.
- Compare replacement model installation requirements to your measurements.
Microwaves that “almost fit” can create clearance and ventilation problems, and built-in installs are especially sensitive to cutout and trim kit requirements. Matching the opening and power setup first prevents returns and repeat repairs.
Last updated: February 2026