

Get free shipping on your order, with any water filter subscription. Find my filter

Open Hamburger Menu
Sears Parts Direct
Tips to find your model number

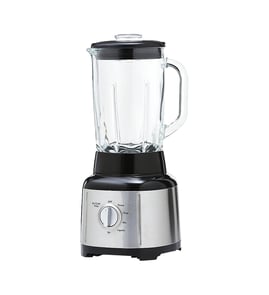
KitchenAid KSB6060BM0 blender Parts

Here are the diagrams and repair parts for KitchenAid KSB6060BM0 blender, as well as links to manuals and error code tables, if available.

KitchenAid KSB6060BM0 blender
By Schematic
By Part
SELECT DIAGRAM
?

This is the number corresponding to the part on the diagram / schematic

Browse Parts for KSB6060BM0 Blender

  • Upper Base (matte White) for KitchenAid KSB6060BM0 - Part W11096376

    Unit parts diagram

  • Upper Base (matte Gray) for KitchenAid KSB6060BM0 - Part W11096375

    Unit parts diagram

  • Blender Blade Assembly for KitchenAid KSB6060BM0 - Part W10793007

    Jar assembly parts diagram

    Blender Blade Assembly

    In Stock
    $90.67
    6% OFF Phone Price : $96.67Info Icon
    Minus Item
    Qty
    Plus Item
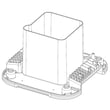
  • Blender Base for KitchenAid KSB6060BM0 - Part W10811507

    Unit parts diagram

    Blender Base

    In Stock
    $109.08
    Minus Item
    Qty
    Plus Item
  • Control for KitchenAid KSB6060BM0 - Part W11186088

    Unit parts diagram

    Electronic Control

    Part #W11084719

    Replaced by #W11186088

    Info Icon
    Manufacturer substitution
    This part replaces W11084719. Substitute parts can look different from the original.
    In Stock
    $190.46
    Minus Item
    Qty
    Plus Item
  • Lid Asm for KitchenAid KSB6060BM0 - Part W11287525

    Jar assembly parts diagram

    Blender Lid

    Part #W10703913

    Replaced by #W11287525

    Info Icon
    Manufacturer substitution
    This part replaces W10703913. Substitute parts can look different from the original.
    In Stock
    $84.85
    7% OFF Phone Price : $90.85Info Icon
    Minus Item
    Qty
    Plus Item
  • Lens for KitchenAid KSB6060BM0 - Part W11179304

    Unit parts diagram

    Blender Toggle Switch Led Lens

    Part #W10732369

    Replaced by #W11179304

    Info Icon
    Manufacturer substitution
    This part replaces W10732369. Substitute parts can look different from the original.
    In Stock
    $28.02
    Minus Item
    Qty
    Plus Item
  • Nut for KitchenAid KSB6060BM0 - Part W11109412

    Jar assembly parts diagram

    M6-1 X 11.99

    Part #W10842608

    Replaced by #W11109412

    Info Icon
    Manufacturer substitution
    This part replaces W10842608. Substitute parts can look different from the original.
    In Stock
    $28.29
    Minus Item
    Qty
    Plus Item
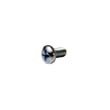
  • Appliance Screw, #8-32 X 0.29-in for KitchenAid KSB6060BM0 - Part WPW10068250

    Unit parts diagram

    Screw

    Part #W10584177

    Replaced by #WPW10068250

    Info Icon
    Manufacturer substitution
    This part replaces W10584177. Substitute parts can look different from the original.
    This item is not returnable
    In Stock
    $5.89
    15% OFF Phone Price : $6.89Info Icon
    Minus Item
    Qty
    Plus Item
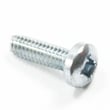
  • Screw for KitchenAid KSB6060BM0 - Part W10853069

    Unit parts diagram

    Screw

    Part #3400617

    Replaced by #W10853069

    Info Icon
    Manufacturer substitution
    This part replaces 3400617. Substitute parts can look different from the original.
    In Stock
    $28.70
    Minus Item
    Qty
    Plus Item

KitchenAid Blender KSB6060BM0 FAQs

For a good home blender, we recommend 300 to 700 watts for everyday jobs like smoothies, sauces, and soups; step up to 900+ watts if you regularly crush ice, blend frozen fruit, or make nut butters on your KitchenAid KSB6060BM0.

Quick wattage guide (what to buy for your needs)

  • 300 to 500 watts: light blending (protein shakes, soft fruits, simple sauces)
  • 500 to 700 watts: most households (smoothies, soups, salsa, pancake batter)
  • 700 to 1,000 watts: frequent ice crushing and thicker blends
  • 1,000+ watts: heavy-duty use (frozen desserts, nut butters, very thick mixtures)

What matters as much as watts

Wattage is only one piece of performance. These factors often make a bigger difference in real-world blending:

  • Blade design and sharpness (a worn blade struggles even with higher wattage)
  • Jar shape and capacity (vortex formation and circulation)
  • Speed control and pulse behavior
  • Motor condition (overheating, unusual noise, burning smell)
  • Stable jar-to-base fit (reduces vibration and improves blending consistency)

Common symptoms and the part that often fixes it

If your blender feels weak, stalls, or struggles with ice, these checks help narrow it down:

Symptom Most likely cause Part to consider for KSB6060BM0
Blends unevenly, leaves chunks Dull or damaged blades Blender blade assembly W10793007
Runs but power seems inconsistent Worn control or switch issue Rotary switch W10897392
Won’t run or cuts out Electrical or motor problem Motor W11186091

Why it matters

Choosing the right wattage helps you avoid stalling, overheating, and inconsistent results. Matching power to your typical ingredients also reduces wear on key components like the motor, rotary switch, and blade assembly.

Last updated: February 2026

Many top chefs use high-performance blenders built for heavy daily use, most commonly Vitamix and Blendtec. For a KitchenAid KSB6060BM0, the best choice depends on your workload (smoothies vs. nut butters), batch size, and whether you need commercial-duty run time.

What “top chef” usually means in blender terms

Chefs pick blenders that can handle dense loads, run longer without overheating, and deliver consistent texture.

  • Strong motor and cooling for repeated blends
  • Durable jar and blade design for ice, frozen fruit, and thick purees
  • Reliable controls (variable speed, pulse, preset programs)
  • Easy-to-clean jar and lid
  • Readily available replacement parts for fast repairs

Quick comparison: common chef picks vs. a premium home blender

Feature Chef-favorite pro blenders (typical) Premium home blenders (typical)
Daily volume High Medium to high
Thick blends (nut butter) Excellent Good to excellent
Noise Loud Moderate to loud
Serviceability Strong parts ecosystem Varies by brand

If you already own the KitchenAid KSB6060BM0

You can often get “chef-level” results by keeping the blender in top condition and replacing wear items when performance drops.

  • If blending gets uneven or leaves chunks, inspect the jar and blade area; consider replacing the blender blade assembly W10793007.
  • If the unit will not power on or cuts out, check the cord and internal connections; the blender power cord W10827142 is a common fix when the cord is damaged.
  • If the controls feel loose or do not respond correctly, the rotary switch W10897392 or a matching knob (color-specific) may be needed.

Why it matters

In a busy kitchen, downtime costs time and consistency. Choosing a blender with the right power and maintaining key parts (blade assembly, switch, cord) keeps textures consistent for soups, sauces, smoothies, and purees.

Last updated: February 2026

The model number for your KitchenAid blender is printed on the rating label on the blender base (not the jar). On a KSB6060BM0, check the underside of the base first, then the back or bottom edge of the motor housing.

Where to look on the blender

Check these common label locations on KitchenAid countertop blenders:

  • Bottom of the blender base (most common)
  • Back of the base near the power cord exit
  • Under the base trim area (look for a printed sticker or plate)
  • On the motor housing near the control dial

What the model number looks like

Use the full model number exactly as shown on the label. For this unit, it should read KSB6060BM0.

Label item Example What it’s used for
Model number KSB6060BM0 Ensures parts fit your exact blender
Part number W10827142 Identifies a specific replacement part
Part name Blender power cord Helps confirm you picked the right item

Why it matters for parts

KitchenAid blenders can have similar-looking bases and jars, but internal parts and finishes vary by model. Using the exact model number helps us match the correct components, like the blender power cord W10827142 or the blender blade assembly W10793007, to your KSB6060BM0.

Quick tips if the label is hard to read

  • Unplug the blender and wipe the label with a damp cloth, then dry it
  • Use your phone camera zoom or flashlight to improve contrast
  • Write down the model number and any additional numbers on the same label

Last updated: March 2026

Symptoms for gas ranges

Main causes: gas supply problem, faulty pressure regulator, clogs in burner or orifice, control system failure, faulty t…

Main causes: burner igniter switch failure, bad spark module, dirty or damaged spark electrode, wiring failure…

Repair guides for gas ranges

How to replace a gas range oven igniter

How to replace a gas range oven igniter

If your gas oven doesn't heat up, the problem could be a faulty oven igniter. These step-by-step instructions guide you …

Repair time and Difficulty

 45 minutes or less
How to replace an oven temperature sensor on a gas range

How to replace an oven temperature sensor on a gas range

See how to replace an oven temperature sensor on a gas range.…

Repair time and Difficulty

 15 minutes or less
How to replace a gas range oven control board

How to replace a gas range oven control board

These step-by-step instructions explain how to replace an oven control board on a gas range…

Repair time and Difficulty

 15 minutes or less

Articles and videos for gas ranges

Oven keeps beeping? What those alerts might mean

Oven keeps beeping? What those alerts might mean

Beeping oven driving you nuts? Find out what your oven is trying to tell you.…

Tapping into a new feature in the Search Bar on Sears PartsDirect

Tapping into a new feature in the Search Bar on Sears PartsDirect

Learn about a new feature added to the Search Bar on Sears PartsDirect…

Parts & More

Air Compressor
Bottom-Mount Refrigerator
Dishwasher
Dryer
Gas Range
Gas Walk-Behind Mower
Gas Water Heater
Parts
Refrigerator
Side-By-Side Refrigerator
Washer
Water Heater
Weight System
Wet/Dry Vacuum