


Why does my KitchenAid blender leak?
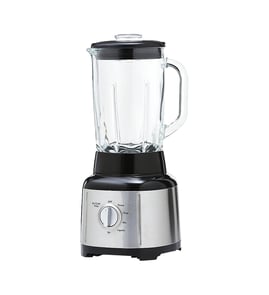
A KitchenAid blender like model KSB4028BM0 usually leaks when the jar assembly is not sealing tightly, the jar is cracked, or the drive area is letting liquid migrate downward. In most cases, correcting jar seating and replacing the worn jar-related component stops the leak.
- Unplug the blender and remove the jar.
- Inspect the jar for hairline cracks, especially near the bottom and around the blade area.
- Re-seat the jar fully on the base; a jar that is slightly off-center can drip.
- Confirm the lid is installed correctly; overfilling can force liquid out at the lid.
- Clean and dry all mating surfaces (jar bottom and base top) so the jar sits flat.
| What you see | Most likely cause | What to do next |
|---|---|---|
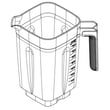
| Drips from the bottom of the jar | Jar assembly wear or damage | Replace the jar assembly W11433178 |
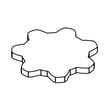
| Liquid appears around the drive area on the base | Coupling area worn or not fitting tightly | Inspect and replace the blender drive coupling W11627528 if rounded or loose |
| Leak only when blending hot liquids or very full jar | Overfill, steam pressure, or lid not seated | Fill less, vent per recipe, confirm lid fit |
If cleaning and re-seating do not stop the leak, these are the most common replacements for this model:
- Jar assembly W11433178 (most common fix for bottom-of-jar leaks)
- Blender drive coupling W11627528 (helps when liquid migrates down toward the drive)
Leaks can let liquid reach the drive coupling and motor area, which leads to slipping, unusual noise, and premature wear. Stopping the leak early protects the electronic control and motor.
Last updated: February 2026
Does KitchenAid sell replacement parts?
Yes. For your KitchenAid KSB4028BM0 blender, replacement parts are sold for common wear items and assemblies (like the jar, lid, and drive components) so you can restore blending performance instead of replacing the whole unit.
These are typical fixes when a blender leaks, won’t blend smoothly, or the jar won’t drive correctly:
- Jar or lid damage/leaks: replace the jar assembly W11433178 or lid assembly W11752211
- Jar not turning or slipping: inspect and replace the blender drive coupling W11627528
- Base issues after impact or wear: check the base W11684609
- Electrical or speed control problems: the electronic control W11580224 is a common service part
- Motor problems (hums, stalls, won’t run): the motor W11433014 may be needed
Use this checklist to avoid ordering the wrong KitchenAid blender part:
- Match the model number exactly: KSB4028BM0
- Confirm the symptom (leak, no power, slipping drive, cracked jar)
- Compare the part name and part ID to what you’re replacing
- Check whether you need an assembly (jar, lid) versus a small component (coupler, screw)
- Inspect for visible wear: stripped coupling teeth, cracks, burning smell, loose connections
| Symptom | Most likely area | Part to check first |
|---|---|---|
| Jar leaks or is cracked | Jar/lid sealing surfaces | Jar assembly, lid assembly |
| Blades don’t spin but motor runs | Drive interface | Blender drive coupling |
| No response from controls | User interface/control board | Electronic control |
| Loud hum, stalls under load | Motor/drive train | Motor |
Replacing the correct KitchenAid KSB4028BM0 blender part restores safe operation and consistent blending results, and it prevents secondary damage (for example, a slipping coupling can wear faster and strain the motor).
Last updated: February 2026
How to disassemble a KitchenAid blender blade?
To disassemble the blade area on your KitchenAid KSB4028BM0 blender, unplug the blender first, then remove the jar and work from the underside of the jar. Many KitchenAid-style jar bases use a reverse-thread retaining nut, so loosening can require turning clockwise.
- Unplug the blender base before you start.
- Wear cut-resistant gloves; the blade edges stay sharp even when dull.
- Work on a towel to keep the jar from slipping.
- Never grip the blade from the inside of the jar while loosening hardware underneath.
- If anything is cracked or stripped, stop and replace the damaged part.
- Remove the jar from the motor base and empty it.
- Turn the jar upside down and locate the retaining nut or “wing nut” style fastener on the bottom.
- Hold the blade assembly steady (from the bottom side) and loosen the retaining nut.
- If the nut is reverse-threaded, loosen by turning clockwise (opposite of normal).
- Lift off the base components and carefully remove the blade assembly and seals.
Many KitchenAid blender jar assemblies use reverse threads to help prevent the nut from loosening during operation.
| What you see under the jar | Most common thread style | “Loosen” direction |
|---|---|---|
| Wing nut / retaining nut on blade shaft | Reverse-thread | Clockwise |
| Standard hex nut (less common) | Standard thread | Counterclockwise |
If you have leaking, wobble, or grinding, replacement is often faster and more reliable than rebuilding the jar.
- Persistent leaks around the blade seal
- Blade wobble or a stripped retaining nut
- Cracked jar base or damaged threads
- Coupler slipping or loud rattling at the drive point
For KSB4028BM0, common replacements include the jar assembly W11433178 and the blender drive coupling W11627528.
Correct disassembly prevents stripped threads, broken seals, and injuries. Reverse-thread hardware is the most common reason customers overtighten or damage the retaining nut during blade removal.
Last updated: February 2026
How to remove blender drive coupling?
On the KitchenAid KSB4028BM0 blender, the drive coupling is typically a threaded part on the motor shaft; removal usually means holding the shaft steady and turning the coupling in the loosening direction until it unthreads. If it is stuck, use controlled force so you do not crack the base.
- Unplug the blender and remove the jar.
- Work on a stable counter with good lighting.
- Protect the housing with a towel to prevent scratches.
- Use gloves for grip; avoid grabbing the coupling with bare hands if it is sharp or damaged.
- If the coupling is melted or seized, stop and plan on replacing it.
- Access the coupling: With the jar off, locate the coupling on top of the base.
- Hold the motor shaft: If you can access the shaft from below (varies by design), hold it steady while turning the coupling.
- Unthread the coupling: Turn the coupling in the loosening direction until it comes off.
- If it is stuck: Apply a few sharp, controlled taps to the coupling (not the housing) to help break it free, then try again.
| Tool | What we use it for | Notes |
|---|---|---|
| Strap wrench | Gripping without chewing up plastic | Best for tight couplings |
| Small hammer | Light taps to free a seized coupling | Tap gently, avoid the base |
| Screwdriver set | Base access (if needed) | Keep screws organized |
Replace the coupling if you see any of the following:
- Rounded or stripped drive teeth
- Cracks, wobble, or melted plastic
- Burning smell or black dust around the coupling
- Jar slips even though the motor runs
For the correct replacement on this model, use the blender drive coupling W11627528.
A worn drive coupling is designed to fail first to protect the motor and jar drive system. Replacing it restores proper power transfer and helps prevent damage to the motor, electronic control, and jar assembly.
Last updated: February 2026
Can I put my KitchenAid blender in the dishwasher?
Yes, you can dishwasher-clean some removable parts on your KitchenAid KSB4028BM0 blender, but we recommend hand-washing the motor base and any parts with electrical or drive components. For best results, wash the jar and lid promptly after use to prevent residue from drying on.
In most KitchenAid blenders like the KSB4028BM0, the safe approach is to dishwasher-clean only the non-electrical, removable pieces.
- Dishwasher (typical): jar, lid, and non-electrical inserts
- Hand-wash only: motor base, power cord, control area
- Avoid dishwasher: parts that couple to the drive system if they show wear or trap water
This is the fastest way to clean the jar after smoothies, sauces, or shakes.
- Fill the jar halfway with warm water
- Add 1 to 2 drops of dish soap
- Run on a low speed for 10 to 20 seconds
- Rinse thoroughly
- Air-dry with the lid off
If you notice leaking, wobbling, loud grinding, or the jar not engaging smoothly after washing, inspect these common wear items.
| Symptom | What it often points to | Example part for this model |
|---|---|---|
| Jar won’t seat or slips | Worn drive interface | Blender drive coupling W11627528 |
| Persistent odor or cloudy jar | Jar wear or residue buildup | Jar assembly W11433178 |
| Lid no longer seals well | Warped or worn lid | Lid assembly W11752211 |
Dishwasher heat and strong detergents can shorten the life of seals and plastic over time. Using the quick-clean method and keeping the motor base dry helps prevent drive wear, corrosion, and premature part replacement.
Last updated: February 2026
What is the color of the year for the KitchenAid KSB4028BM0 blender?
KitchenAid does not assign a “color of the year” to the KitchenAid KSB4028BM0 blender model itself. This model is sold in multiple finishes; the correct way to identify your blender’s color is to match the finish name to the color-specific housing parts used on your unit.
Use the blender’s physical finish and any label information to match the correct color family.
- Check the model/serial label (commonly on the underside of the base) for any color or variant code
- Compare the visible top housing color to the color-specific “upper base” options
- If the blender has been repaired, confirm the upper base color matches the rest of the housing
- When ordering cosmetic parts, match the exact color name (matte black, white, etc.)
These parts change the visible exterior finish; choosing the right one prevents a mismatched look.
| Part (color) | What it is | Best used for |
|---|---|---|
| Upper base (matte black) W11287120 | Color top housing | Scratches, cracks, cosmetic refresh |
| Upper base (white) W11287121 | Color top housing | Yellowing, damage, cosmetic refresh |
| Upper base (passion red) W11245953 | Color top housing | Broken tabs, cosmetic replacement |
On KitchenAid blenders, cosmetic housing pieces are finish-specific. Ordering the correct upper base color keeps your KSB4028BM0 looking uniform after a repair, even when the blender runs perfectly.
Last updated: February 2026