




How do I identify my Briggs and Stratton model?
To identify your Briggs engine model, find the engine ID stamping or tag and read the three-part number set: model, type, and code. For your Briggs 135212-0140-01, the first group is the model, the second is the type, and the third is the code.
On most Briggs lawn and garden engines, the ID is on a metal tag or stamped into the blower housing (recoil starter shroud) or valve cover area.
- Look on the recoil starter housing near the pull rope
- Check the blower housing (sheet metal shroud) above the muffler area
- Look near the spark plug side of the engine on a flat machined surface
- Wipe off dirt and oil; use a flashlight to read faint stampings
- If the tag is missing, check for stamped numbers in the same areas
Briggs typically formats the ID like this:
| Field | What it tells you | Why we use it |
|---|---|---|
| Model | Engine family and basic specs | Matches the correct parts diagrams and core components |
| Type | Exact build configuration | Ensures the right carburetor, ignition, and governor parts |
| Code | Production date code | Helps match running changes and revisions |
Using the full model-type-code prevents wrong-part issues, especially on ignition and fuel parts where small changes matter.
Common parts that often require the exact ID include:
- Briggs & stratton lawn & garden equipment engine ignition coil 397358
- Lawn & garden equipment engine carburetor 498298
- Lawn & garden equipment engine air filter 491435S
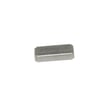
- Briggs & stratton lawn & garden equipment engine flywheel key 222698S
- Take a photo, then zoom in to confirm each digit
- Write it down with dashes exactly as shown
- If the engine won’t start after a sudden stop or blade strike, check the flywheel key first (a sheared key can throw off timing)
Last updated: February 2026
How do I find the specs on my Briggs & Stratton engine?
For your Briggs 135212-0140-01 lawn and garden engine, the most reliable way to get the correct specs is to use the engine’s model, type, and code numbers from the ID tag; those numbers map to the exact tune-up and internal settings (valve lash, bore, stroke, and more).
On most Briggs and Stratton small engines, the ID is stamped or printed on the engine shroud (blower housing), valve cover area, or near the muffler.
Check these common locations:
- Top of the recoil starter housing or blower shroud
- Valve cover area (often on OHV engines)
- Above the spark plug or near the muffler heat shield
- On a metal tag or a printed label on the shroud
Once you have the full ID (model, type, and code), you can match the engine to the correct spec set for:
- Valve clearance (intake and exhaust)
- Ignition armature air gap
- Spark plug type and gap
- Governor settings and governed RPM range
- Carburetor and gasket configuration
| ID item | What it tells you | Why it matters |
|---|---|---|
| Model | Engine family and basic design | Gets you into the right parts and spec group |
| Type | Exact build configuration | Prevents ordering the wrong carburetor or ignition parts |
| Code | Production date code | Helps match running changes by year |
Small-engine specs are configuration-specific; two engines that look similar can use different ignition parts, carburetor setups, and valve settings. Using the correct 135212-0140-01 identification prevents hard-starting, backfiring, and repeat repairs.
If you are chasing a no-start, weak spark, or timing issue while confirming specs, these model-matched parts are often involved:
- Briggs & stratton lawn & garden equipment engine ignition coil 397358 (spark and timing)
- Briggs & statton key 222698S (flywheel timing alignment)
- Briggs & statton starter 497830 (cranking speed for starting)
Last updated: February 2026
How many cc is a 12.5 hp Briggs and Stratton engine?
Most 12.5 HP Briggs and Stratton lawn and garden engines are about 344 cc, but the exact displacement depends on the specific engine family and type number. For your Briggs model 135212-0140-01, confirm the stamped engine numbers first, then match parts and specs to that exact build.
On Briggs engines, the most reliable way to confirm displacement is to use the engine model, type, and code stamped on the blower housing or valve cover area.
- Clean the shroud area and locate the stamped numbers (model, type, code)
- Verify the model is 135212-0140-01 (not a different type or spec)
- Use the model and type to match the correct spec listing and parts breakdown
- If the engine was swapped, use the stamped numbers on the engine, not the mower model
Horsepower is a performance rating that can vary by RPM, governor setting, and application. Displacement (cc) is a physical measurement of cylinder volume, so it is the better spec for comparing engines.
| Spec | What it tells you | Why it matters for parts |
|---|---|---|
| HP (horsepower) | Power output rating | Can vary by setup; not ideal for parts matching |
| CC (displacement) | Engine size (cylinder volume) | Helps confirm engine family and compatibility |
| Model/Type/Code | Exact build configuration | Best way to ensure correct carburetor, ignition, gaskets |
If you are troubleshooting starting, spark, or timing issues while confirming your engine build, these parts are commonly involved:
- Briggs & statton key 222698S (flywheel key; affects ignition timing if sheared)
- Briggs & stratton lawn & garden equipment engine ignition coil 397358 (spark generation)
- Briggs & statton switch 692310 (kill switch circuit issues can mimic “no spark”)
Using the correct cc and, more importantly, the correct model/type prevents ordering the wrong carburetor, ignition coil, or gasket set for the 135212-0140-01 engine; small spec differences can change fit and performance.
Last updated: February 2026
How much oil does a 12.5 Briggs & Stratton engine hold?
For Briggs & Stratton engine model 135212-0140-01, the crankcase oil capacity is about 20 oz (1-1/4 pints, 0.6 qt). Even if your equipment is advertised as “12.5,” always set the final level by the dipstick or fill-plug mark to avoid overfilling.
- Park on level ground and let the engine cool.
- Drain the oil fully, then reinstall the drain plug securely.
- Add 18 oz first, then wait 1 to 2 minutes.
- Check the dipstick or fill level; add small amounts until it reaches the full mark.
- Run the engine 30 to 60 seconds, shut it off, wait 2 minutes, then recheck and top off.
Many lawn and garden machines are marketed by series name or equipment rating; oil capacity is determined by the engine model and crankcase design, not the advertised horsepower.
| What to match | Where to look | Why it matters |
|---|---|---|
| Engine model number | Engine shroud or valve cover tag | Ties to the correct oil capacity |
| Oil level mark | Dipstick or fill plug | Prevents smoking and seal leaks |
| Oil type/viscosity | Owner guidance for your climate | Helps starting and reduces wear |
- Check for oil around the crankshaft area; a worn seal can leak (see Briggs & statton oil seal 299819S).
- Inspect the breather connection area for oil misting or a loose fit (see Briggs & statton grommet cover 692187).
- Replace a dirty or oil-soaked air filter to prevent rich running and smoking (see Briggs & statton element 491435S).
Correct oil level protects internal parts like the connecting rod and piston rings; overfilling can cause smoking and air filter saturation, and underfilling can quickly damage the engine.
Last updated: February 2026