Installation guide
 Owner’s manual


How to find GE wall oven model number?
On the GE JTP86SH6SS wall oven/microwave combo, we find the model and serial number on a label inside the upper oven, on the left side. This tag is the fastest way to confirm the exact model before ordering parts or scheduling service.
Where to look on model JTP86SH6SS
Check these spots in order:
- Open the upper oven door and look along the left interior side wall for a rating label
- Look for both Model # and Serial # on the same label
- Wipe the area with a dry cloth if the label is dusty or greasy
- Write the numbers down exactly as shown (letters and numbers matter)
What the model number is used for
Having the correct model number helps us match the right diagrams and parts for your cooking center.
| You need it for | Why it matters |
|---|---|
| Ordering parts | Ensures the part fits your exact configuration |
| Troubleshooting | Error codes and symptoms can vary by model |
| Installation/service | Confirms electrical and cabinet requirements for your unit |
Tips if the label is hard to read
- Use your phone camera and zoom in for a clearer view
- Look for a second sticker nearby if the main label is scratched
- Copy the model number first, then the serial number
Why it matters
GE wall oven/microwave combos often share similar styling across model families, so confirming the exact model number prevents wrong-part returns and speeds up repairs.
For additional model-specific details and labeling guidance, use the JTP86SH6SS owner’s manual.
Last updated: January 2026
What is the GE JTP86SH6SS?
The GE JTP86SH6SS is a GE wall oven/microwave combo: a built-in unit that combines a wall oven with an integrated microwave cooking center in one cabinet cutout. For operating features, controls, and care details, use the JTP86SH6SS owner's manual.
What you get with a wall oven/microwave combo
This appliance type is designed to save space while giving you two separate cooking systems.
- Built-in wall oven for baking and broiling
- Built-in microwave cooking center for quick heating and cooking
- Separate controls and safety systems for each section
- Hard-wired electrical installation (typical for electric wall ovens)
How to confirm you have the right model
We recommend verifying the model number on the rating label before ordering parts or scheduling service.
| What to check | What it should show | Why it matters |
|---|---|---|
| Model number | JTP86SH6SS | Ensures correct parts and documentation |
| Serial number | Unique to your unit | Helps with service history and support |
| Installation type | Built-in, hard-wired | Confirms correct electrical and mounting requirements |
For installation requirements and grounding guidance, follow the JTP86SH6SS installation guide.
Why it matters
GE built-in combos use model-specific components (controls, sensors, door switches, trim) and the correct model number is the fastest way to match the right replacement parts and troubleshooting steps.
Last updated: January 2026
How long does a GE Profile oven last?
A GE Profile oven typically lasts about 12 years with normal household use and basic maintenance. For your GE JTP86SH6SS wall oven/microwave combo, keeping airflow clear, using self-clean correctly, and fixing heat or door issues early helps you reach that lifespan.
What affects oven lifespan most
- Heat stress from frequent high-temp baking, broiling, or long self-clean cycles
- Power quality (surges/outages) that can stress the control and display
- Cooling airflow around the built-in cabinet cutout and venting
- Door seal and hinges staying aligned so heat stays in the cavity
- Sensor accuracy so the oven does not overheat or run longer than needed
Maintenance habits that help you get the full life
Use these practical steps for the JTP86SH6SS:
- Follow the self-clean prep steps in the JTP86SH6SS owner’s manual (remove cookware/foil, wipe heavy soil, avoid abrasives).
- Keep the oven from running unattended for long periods; the control has a 12-hour shutoff feature you can manage in the special features menu.
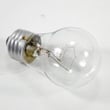
- Replace failed lights promptly so you can monitor food without holding the door open; use the correct bulb such as the oven lamp 40A15 when needed.
- If baking temps seem off, test with an oven thermometer and address calibration or sensor issues early.
Quick lifespan expectations (typical)
| Item | Typical range | What it means for you |
|---|---|---|
| Built-in electric wall oven | 10 to 15 years | 12 years is a solid average target |
| Electronic controls | 8 to 15 years | More sensitive to heat and power events |
| Wear items (lights, hinges, sensors) | 1 to 10 years | Replacing these can extend overall life |
Why it matters
Most “oven failures” are actually a smaller part issue (lamp, temperature sensor, cooling fan, door hardware). Replacing the right part early often restores safe, consistent heating and helps you avoid premature replacement of the entire unit.
Last updated: January 2026
How to reset a GE wall oven?
To reset your GE JTP86SH6SS wall oven/microwave combo, turn the home circuit breaker OFF (or remove the fuse) for about 1 minute, then restore power. This power reset clears many control glitches and is also the right step after a power outage.
Quick reset steps (recommended)
- Turn the oven OFF at the control panel.
- Switch the dedicated oven breaker to OFF (or remove the fuse).
- Wait 60 seconds.
- Switch the breaker back to ON (or reinstall the fuse).
- Set the clock again if the display is flashing after a power failure.
If the issue is only the microwave controls
Some “reset” needs are really a control lockout or a canceled cooking program.
- To cancel a wrong selection, press CLEAR/OFF (some functions require pressing it twice to fully cancel).
- If the control panel is locked, press and hold CLEAR/OFF for about 3 seconds to lock or unlock.
- If the beeper is bothering you, press and hold the 8 pad for about 3 seconds to toggle sound on/off.
For exact pad names and sequences, follow the JTP86SH6SS owner’s manual.
What to check after a reset
| Symptom after reset | What it usually means | What to do next |
|---|---|---|
| Display flashes | Power interruption | Reset the clock and re-enter cooking settings |
| Oven will not start heating | Controls not set correctly | Re-enter BAKE temperature and start the cycle |
| Microwave will not start | Door not fully closed or START not pressed | Close door firmly, press START |
Why it matters
A breaker reset restores stable power to the electronic control board. That often clears false error states, restores normal keypad response, and gets you back to baking, broiling, or microwave cooking without replacing parts.
Last updated: January 2026