 Owner’s manual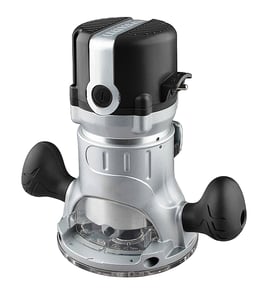

Does Craftsman make a corded router?
Yes. Craftsman makes corded routers, and the Craftsman router table model 171264620 is designed to mount compatible Craftsman corded routers (and some other brands) for steady, repeatable woodworking cuts. For model-specific mounting patterns and compatible base styles, use the owner's manual.
What “corded router” means for this router table
A corded router plugs into a standard outlet and delivers consistent power for longer routing sessions. With a router table like Craftsman 171264620, a corded router is the typical choice because it stays powered without battery swaps.
Common corded-router features you will see:
- Fixed-base or plunge-base design
- 1/4-inch and sometimes 1/2-inch collet capability (router-dependent)
- Variable speed on many models
- Standard round base plate patterns for table mounting
Compatibility basics for Craftsman 171264620
The manual describes mounting steps for Craftsman routers that use a three-hole, 6-inch diameter base plate, and it also notes that other routers can be used with an adapter plate (user-drilled). Use these checkpoints before buying or mounting a router:
- Unplug the router before mounting or adjusting
- Confirm the router base plate style (three-hole pattern is specifically covered)
- Verify the router fits typical size limits (overall height and base diameter)
- Use the correct screw type and length for the mounting holes
- Recheck mounting screws periodically; vibration can loosen hardware
Quick fit check (typical guidance)
| What to check | What to look for | Why it matters |
|---|---|---|
| Base plate pattern | Three-hole pattern (common on some Craftsman bases) | Aligns with countersunk holes in the table |
| Router size | Compact to mid-size corded router | Prevents interference under the table |
| Mounting hardware | Correct machine screws, tightened securely | Keeps the router stable and accurate |
Why it matters
A corded router that mounts correctly is what makes the router table accurate and safe. Proper mounting reduces vibration, improves cut quality (tenons, tongue and groove, edge profiling), and helps keep the fence and bit alignment consistent.
Last updated: February 2026
How to replace a Craftsman router bit?
To replace a router bit on your Craftsman router table model 171264620, unplug the router (or switch box), let the bit stop completely, then loosen the collet nut to remove the old bit and tighten the collet securely on the new bit. Router bits are extremely sharp, so handle them carefully.
Step-by-step: changing the bit safely
- Toggle the switch to OFF and unplug the router or switch box before touching the collet.
- Raise the router/collet to a comfortable height above the table opening (support the router from below if loosening any base clamp).
- Use the correct wrench(es) to turn the collet nut counterclockwise until the bit releases.
- Remove the old bit; clean dust from the collet and nut so the bit seats properly.
- Insert the new bit shank fully, then pull it back out about 1/16 to 1/8 inch so it is not bottomed out.
- Tighten the collet nut firmly (snug plus a solid final tighten); do not overtighten.
Quick checks before you route
- Confirm the overhead guard and fence move freely and are clear of chips.
- Verify the bit clears the tabletop insert opening; the manual notes 2-3/4 inch is the largest bit diameter allowed on this router table.
- Feed the workpiece against the bit rotation and keep hands away from the bit path.
Bit size and insert selection (router table)
| What you are doing | What to use | Why it matters |
|---|---|---|
| Using small to medium bits | A tabletop insert sized to the bit | Reduces the opening around the bit for better support and safety |
| Using large bits (over 2 inches up to 2-3/4 inches) | No tabletop insert (per manual guidance) | Prevents interference and binding |
| Changing inserts | Remove the bit first and unplug | Avoids accidental contact with a sharp, exposed cutter |
Why it matters
A properly seated bit and tight collet reduce vibration, slipping, and burning. Following the unplug-first routine in the owner's manual also prevents accidental starts while your hands are near the cutter.
Last updated: February 2026
Can you attach a router to a table saw?
Yes; you can attach a router setup to a table saw, but we only recommend it when the mounting is rigid, the work is fully supported, and guarding and dust control are maintained. For Craftsman model 171264620, the safest method is mounting the router table to a stable work surface as described in the owner's manual.
Recommended setup for model 171264620
Use the router table as its own station, then place it near the table saw when you want shared infeed and outfeed support.
- Mount the router table firmly to a workbench or to a thick, flat board
- Keep the router unplugged when attaching or removing the fence
- Use the router table fence and overhead guard for routing operations
- Connect a wet/dry vac to the fence dust port (fits most 2-1/2 inch hoses)
- Use the smallest tabletop insert opening that safely clears the bit
If you still integrate it with the table saw
Build an auxiliary top that is flat and cannot shift; provide clearance for the router motor, bit, and power cord. Avoid any setup that allows vibration or twisting.
| Check | Target | Why it matters |
|---|---|---|
| Mounting | Screwed or clamped so it cannot move | Prevents chatter and loss of control |
| Fence | Locks square and stays put | Controls depth of cut and accuracy |
| Dust control | Vac hose attached to fence port | Reduces chip buildup under the guard |
Router bit and insert limits
The 171264620 router table uses inserts to match bit diameter.
- 1-1/4 inch insert: bits up to 1-1/8 inch
- 1-7/8 inch insert: bits up to 1-3/4 inch
- 2-1/8 inch insert: bits up to 2 inches
- Maximum bit size: 2-3/4 inches (do not exceed)
Why it matters
A table saw top is convenient, but routing loads and chip flow are different than sawing. Secure mounting, proper guarding, and dust collection keep the fence and overhead guard working correctly.
Last updated: February 2026
What size shank bit will fit in a Craftsman router?
A router bit shank must match the collet size on the router you’re using (commonly 1/4 inch or 1/2 inch). The Craftsman 171264620 is a router table, so shank size is determined by your router, while the table insert opening limits the bit’s cutting diameter; see the 171264620 owner's manual.
How to choose the right shank size (collet fit)
- Unplug the router before checking or changing bits.
- Check your router’s collet or collet nut for a size marking (1/4 or 1/2).
- Use only bits with the same shank diameter as the installed collet.
- Insert the shank fully, then pull it back slightly before tightening (helps proper clamping).
- Tighten the collet nut securely; recheck tightness after a brief test run.
Router table insert sizing (bit diameter, not shank)
The 171264620 router table uses tabletop inserts to support the workpiece around the bit. The manual specifies three insert hole sizes and the maximum bit cutting diameters they accommodate.
| What you’re matching | Where it must fit | What it controls |
|---|---|---|
| Shank diameter | Router collet | Whether the bit can be clamped safely |
| Cutting diameter | Tabletop insert opening | Clearance and support around the bit |
Why it matters
Correct shank-to-collet fit prevents slippage and vibration. Using the right insert opening improves support around the bit, reduces chatter, and helps produce cleaner cuts on a router table.
Last updated: February 2026
What size router is best for a router table?
For the Craftsman router table model 171264620, the best choice is a variable-speed, mid to full-size router that accepts 1/2-inch shank bits for stability and bit selection. Most users get the best results with a 2-1/4 HP to 3-1/4 HP class router, matched to the bit sizes and cut depth you plan to run (see the 171264620 owner's manual).
Router size recommendations (what to buy for table use)
- 2-1/4 HP variable-speed: best all-around for edge profiles, dados, rabbets, and joinery
- 3 to 3-1/4 HP variable-speed: best for frequent heavy cuts and larger diameter bits
- Under 2 HP: works for light-duty routing, but slows down more easily in a table
- 1/2-inch collet: preferred for table work (stronger grip, less chatter)
- Soft start (if available): helps control startup torque in a table setup
Bit clearance and insert openings for model 171264620
This router table includes multiple tabletop inserts; choose the insert that matches the bit diameter you are using.
| Tabletop insert opening | Use it for bits up to | Typical examples |
|---|---|---|
| 1-1/4 inch | 1-1/8 inch diameter | small straight bits, small round-overs |
| 1-7/8 inch | 1-3/4 inch diameter | many common edge-forming bits |
| 2-1/8 inch | 2 inch diameter | larger bits that still clear the opening |
| No insert | 2 to 2-3/4 inch diameter | only when the bit will not fit an insert |
How to match router power to your projects
- If you mostly do trim profiles and joinery, a 2-1/4 HP variable-speed router is the sweet spot.
- If you often run larger diameter bits or do long sessions, choose 3+ HP variable-speed.
- If you plan to use 1/2-inch shank bits regularly, use a router with a true 1/2-inch collet (not just a sleeve).
Why it matters
In a router table, the bit is doing longer, heavier cuts; power helps maintain RPM under load, and variable speed lets you slow down for larger bits. Using the correct insert opening on model 171264620 improves clearance, dust control, and cut quality.
Last updated: February 2026