Owner’s manual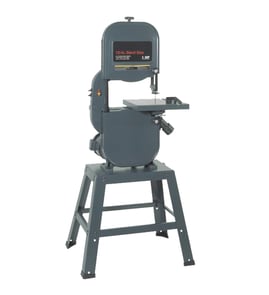

How do I know the size of my bandsaw blade?
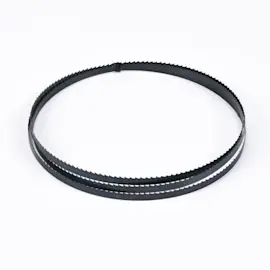
For the Craftsman 315214490 9-inch one-speed band saw, the correct blade length is 59-1/4 inches, and the supported blade width range is 1/8 inch to 3/8 inch. To confirm what you have installed, measure blade length, width, and teeth per inch (TPI) using the steps below and compare to the specs in the 315214490 owner's manual.
Blade size specs for this model
These are the blade size limits that matter most when buying a replacement blade:
| Spec | What to look for | Craftsman 315214490 spec |
|---|---|---|
| Blade length | Total loop length | 59-1/4 in. |
| Blade width | Tooth tip to back edge | 1/8 in. to 3/8 in. |
| TPI | Teeth per inch | Choose based on material and cut |
How to measure your blade (length, width, and TPI)
Wear gloves when handling a blade; the teeth and weld area can cut.
- Blade length (loop length): Lay the coiled blade flat, mark a starting point (often the weld), then roll the blade along the floor while following the edge with a tape measure until the mark returns; that distance is the length.
- Blade width: Measure from the tooth tip straight across to the back edge of the blade.
- TPI: Count how many teeth are in 1 inch; that number is the TPI.
Why it matters
Using the correct 59-1/4 inch blade length keeps tensioning and tracking working properly. Staying within the 1/8 inch to 3/8 inch width range helps the blade guides support the blade so it does not twist, wander, or break during cuts.
Quick safety and setup reminders
Before you measure, change, or adjust a blade:
- Turn the saw OFF and unplug it.
- Remove the switch key (if equipped).
- Let the blade come to a complete stop.
- Set the upper blade guide about 1/8 inch above the workpiece when cutting.
- Lock the blade guide assembly before turning the saw on.
Ordering the right blade
Once you confirm length (59-1/4 in.), width (1/8 in. to 3/8 in.), and your preferred TPI, you can shop by model number on the parts list for this saw or search more broadly on Sears PartsDirect.
Last updated: February 2026
What are the main parts of a band saw?
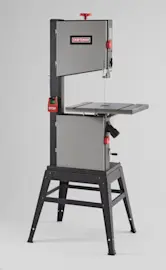
On the Craftsman 315214490 9" one-speed band saw, the main parts you use and adjust most often are the saw table and tilt controls, blade tension and tracking controls, blade guide assembly, wheel covers, and the dust exhaust port. These parts work together to keep the blade running true and the cut accurate.
Main parts you will see on the Craftsman 315214490
- Band saw table (aluminum table with throat plate and miter slot)
- Table tilt system (table lock knob, angle adjustment knob, and angle scale)
- Blade tension system (quick-release tension adjustment knob)
- Blade tracking system (tracking adjustment screw on the back of the frame)
- Blade guide assembly (guides and thrust bearing that support the blade)
- Covers and access features (easy-open cover tabs; hex key holder inside the front cover)
- Dust collection connection (2-1/4 inch sawdust exhaust port)
What each part does (quick reference)
| Part | What it controls | When you adjust it |
|---|---|---|
| Tension adjustment knob | Blade tension | Blade changes; different cutting needs |
| Tracking adjustment screw | Blade centered on wheels | If blade drifts forward/back on wheels |
| Blade guide assembly | Blade support near the cut | Before cutting; after blade changes |
| Table lock and angle knob | Bevel angle | Bevel and compound cuts |
| Dust exhaust port | Sawdust removal | Any time you connect a shop vacuum |
Why it matters
Correct tension, tracking, and blade guide setup keeps the blade running in the center of the wheels, reduces binding, and improves cut quality for straight cuts, curves, bevels, and resawing.
Safety and setup reminders we follow
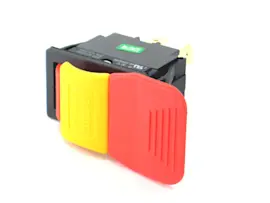
- Turn the switch OFF, wait for all moving parts to stop, remove the switch key, and unplug before adjustments.
- Keep the blade guide assembly set to just clear the workpiece to reduce blade contact risk.
- Tighten the table lock knob before turning the saw on.
For diagrams and the exact names/locations of these controls on your saw, use the 315214490 owner's manual. To look up replacement parts by model number, use the parts list for Craftsman 315214490 or search on Sears PartsDirect.
Last updated: February 2026
What is the 4 inch rule for bandsaw?
The 4-inch rule for a band saw means we keep our hands and fingers at least 4 inches away from the moving blade at all times. On the Craftsman 315214490 9-inch band saw, that usually means using a push stick, holding jig, or clamp whenever the cut would bring your hands close to the blade.
How to apply the 4-inch rule on this band saw
Use these habits every time you cut:
- Set the upper blade guide assembly to just clear the workpiece before cutting.
- Keep both hands to the side of the cut line, not in line with the blade.
- Use a push stick or push block for narrow rips and short pieces.
- Never reach across the blade to steady a workpiece.
- Never clear scraps by hand while the blade is moving; stop the saw first.
- Start the saw with the blade not touching the workpiece; let the motor reach full speed.
Quick safety checklist (matches the manual’s intent)
The Craftsman manual emphasizes avoiding blade contact and preventing sudden slips. These steps support the 4-inch rule:
| Step | What to do | Why it helps |
|---|---|---|
| Blade guide height | Lower guides to just above the stock | Reduces exposed blade and twisting risk |
| Work handling | Cut one piece at a time; do not stack | Prevents binding and loss of control |
| Start-up | Do not start with blade touching wood | Avoids kick, grab, and hand drift |
| Body position | Keep balance; avoid awkward hand positions | Prevents a slip into the blade |
Why it matters
A band saw blade cuts continuously and does not “kick back” like some saws, but it can pull material into the cut and tempt you to guide with your fingertips. The 4-inch rule forces safer control methods (guides, jigs, push tools) so your hands never become the “fence.”
Where to find model-specific safety notes
We recommend reviewing the safety section in the 315214490 owner's manual for the exact warnings for this saw, including guidance like not touching moving parts, not stacking workpieces, and adjusting the blade guide assembly to just clear the workpiece.
If you need replacement parts for the Craftsman 315214490, use the parts list for this model, or search by model number on Sears PartsDirect.
Last updated: February 2026
What should you not do with a band saw?
On the Craftsman 315214490 9-inch one-speed band saw, do not put your hands near the moving blade, reach across the cutting path, cut unstable stock without support, or leave the saw running unattended. Keep the blade guide assembly set just above the workpiece and stay in full control of the cut.
Safety “don’ts” that prevent the most injuries
- Do not operate the saw when you are tired, distracted, or rushing.
- Do not use awkward hand positions where a slip could pull your hand into the blade.
- Do not cut round stock (dowels, pipe, branches) without a cradle, V-block, or other secure support.
- Do not twist the workpiece in the cut; keep feeding while you turn to follow a curve.
- Do not back out of a cut while the blade is moving; stop the saw first.
- Do not leave the band saw unattended while it is connected to power.
Setup rules we follow before every cut
Use these habits to keep the blade stable and reduce binding, blade breakage, and kickback-like surprises.
| What to set | What we recommend | Why it matters |
|---|---|---|
| Blade guide assembly height | Adjust to just clear the workpiece | Reduces exposed blade and helps control the cut |
| Work area lighting | Bright, shadow-free | You can track the cut line and see hand position |
| Stance and balance | Stable footing, hips square to the table | Prevents a slip toward the blade |
| Material control | Keep the work flat on the table, supported | Prevents rolling, pinching, and blade twist |
Power and maintenance “don’ts”
- Do not adjust, align, clean, or service the saw while it is plugged in; turn it off, remove the switch key, and unplug first.
- Do not use solvents on plastic parts; they can damage and weaken them.
- Do not let pitch build up on the table, blade guides, or thrust bearings; buildup increases friction and makes the saw harder to control.
Why it matters
Most band saw accidents happen when the operator loses control: poor balance, poor visibility, unstable stock, or too much exposed blade. Keeping the guide low, the work supported, and the saw attended prevents the sudden slips that put hands into the blade.
For model-specific operating and safety details, follow the 315214490 owner's manual. For parts and diagrams, start with the model parts list, or search by model number on Sears PartsDirect.
Last updated: February 2026
What is the 3-tooth rule for bandsaws?
The 3-tooth rule means your band saw blade should keep at least three teeth engaged in the material during the cut. On the Craftsman 315214490 9-inch one-speed band saw, this helps prevent tooth stripping, reduces chatter, improves chip clearance, and supports straighter cuts.
How to apply it (choose the right TPI)
Match blade TPI (teeth per inch) to the thickness of the stock so you maintain tooth engagement.
- Measure the thickness where the blade enters the cut
- Pick a TPI that keeps 3 or more teeth in contact
- Use lower TPI for thicker wood (faster cutting, larger gullets)
- Use higher TPI for thin stock (cleaner cut, less grabbing)
- If the cut chatters or snags, increase TPI
- If the blade loads up with sawdust or burns, decrease TPI
Quick reference
| Stock thickness | Typical TPI range | Common result |
|---|---|---|
| Under 1/4 in. | 14 to 24 | Cleaner edge, less grabbing |
| 1/4 to 1 in. | 6 to 14 | Balanced speed and finish |
| Over 1 in. | 3 to 6 | Faster feed, better chip clearance |
Setup tips that matter on model 315214490
Good blade setup works with the 3-tooth rule to keep the blade from twisting and wandering.
- Set the blade guide assembly to just clear the workpiece while cutting
- Adjust upper and lower blade guides about 0.004 in. from the blade (about a dollar bill)
- Keep the blade teeth from contacting the guides; it ruins the tooth edge
Why it matters
Too few teeth in the cut overloads each tooth and can strip teeth; too many teeth packs the gullets with sawdust, creating heat, slowing the saw, and roughening the cut.
For model-specific safety steps and guide adjustments (including switch key lockout), use the 315214490 owner's manual.
To shop by model number and find compatible replacement parts, use Sears PartsDirect.
Last updated: February 2026