- Kenmore refrigerator water filters
- Whirlpool refrigerator water filters
- Samsung refrigerator water filters
- GE refrigerator water filters
- LG refrigerator water filters
- Frigidaire refrigerator water filters
- KitchenAid refrigerator water filters
- Maytag refrigerator water filters
- Kenmore Elite refrigerator water filters
- Estate refrigerator water filters
- GE Profile refrigerator water filters
- Amana refrigerator water filters
- Bosch refrigerator water filters
- Dacor refrigerator water filters
- Electrolux refrigerator water filters
How to replace the spin basket in a top-load washer
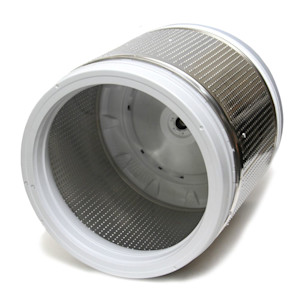
This washer repair guide explains how to replace the spin basket in a top-load washer. The spin basket holds garments during the wash cycle. Replace the basket is if it's damaged where it attaches to the hub, causing a loud banging or rubbing sound during the spin cycle. Consider replacing it if the basket has spots of rust where it's chipped, because rust can leave marks on your clothing. If the spin basket is damaged or rusted, replace it using a manufacturer-approved replacement part.
Use these steps to replace the spin basket in Kenmore, Maytag, Whirlpool and Amana vertical modular top-load washers.
Quick links
Video
Instructions
Tools required
Spanner wrench
Hammer
Socket set and ratchet
Slot screwdriver
Tape
Work gloves
Repair difficulty
Time required
45 minutes or less
Repair difficulty
Time required
45 minutes or less
Replacing the spin basket in a top-load washer
This video shows how to replace the spin basket in a top-load washing machine.
Instructions
- 01.
Shut off the electricity and water
Unplug the power cord from the wall outlet.
Turn off the water supply valves for the washer. Wear work gloves to protect your hands.
Have someone help you move the washer away from the wall.
- 02.
Lift the top panel
Tape the lid shut so it doesn’t flop open and damage the control console or hit your arms as you work.
Remove the top screws on the 2 hinge brackets on the back of the washer.
Remove the screw from the wire cover and pull it off of the washer.
Slide the top panel forward about half an inch and then raise the front of the top panel up about a quarter of an inch. With the panel still raised slightly, push the panel back about a quarter of an inch to release it from the brackets.
Lift the top panel and prop it against the wall behind the washer.
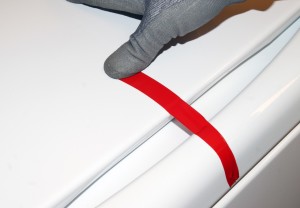
PHOTO: Tape the lid shut.
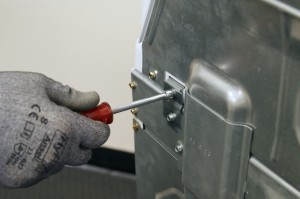
PHOTO: Remove the top screws from the hinges.

PHOTO: Remove the screw from the wire cover.
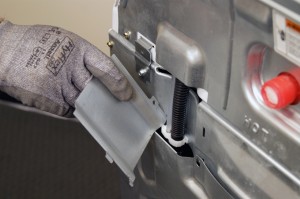
PHOTO: Remove the wire cover from the washer.
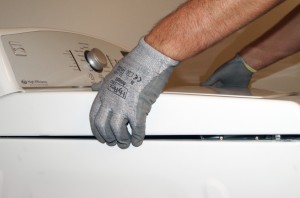
PHOTO: Move the top panel slightly forward and up.
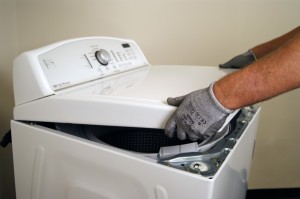
PHOTO: Push the top panel back to release it from the backets.
- 03.
Remove the tub ring
Pull the bottom of the tub ring to release it from the locking tabs on the side of the outer plastic wash tub—use a slot screwdriver if necessary.
Pull the tub ring out of the washer.
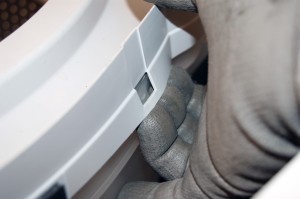
PHOTO: Release the tub ring locking tabs.
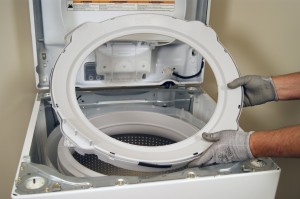
PHOTO: Remove the tub ring from the washer.
- 04.
Remove the impeller
Insert a slot screwdriver into the notch in the base of the plastic cap and pry the cap off the impeller.
Use a socket or wrench to remove the bolt that secures the impeller to the drive motor shaft.
Grasp the impeller firmly and pull it out of the washer.
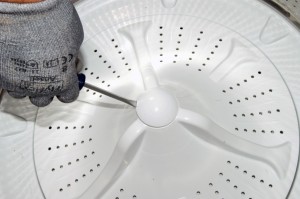
PHOTO: Pry the cap off the impeller.
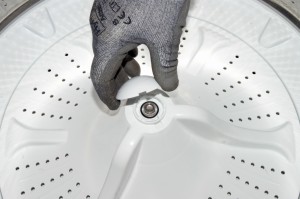
PHOTO: Remove the impeller cap.
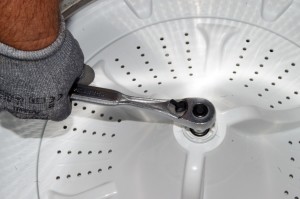
PHOTO: Loosen the bolt holding the impeller to the drive motor shaft.
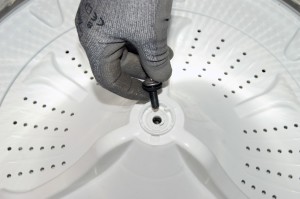
PHOTO: Remove the bolt holding the impeller to the drive motor shaft.
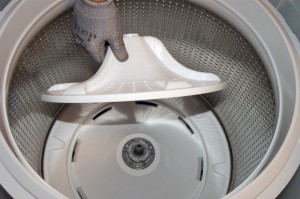
PHOTO: Remove the impeller from the washer.
- 05.
Pull the spin basket out of the washer tub
Position the spanner wrench on top of the spanner nut so that the wrench teeth engage the notches in the nut.
Strike the arm of the spanner wrench with a hammer to loosen the spanner nut. Then spin the spanner nut until it's free and remove it from the washer.
Pull straight up on the spin basket to remove it from the washer tub.
Tip: Some washer models use a retainer clip to secure the spin basket to the drive shaft inside the washer tub. Follow the steps in the video to remove the retainer clip and pull out the spin basket.
PHOTO: Loosen the spanner nut.
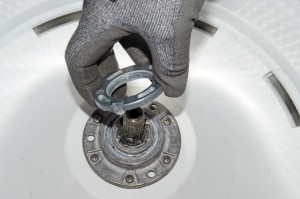
PHOTO: Remove the spanner nut.
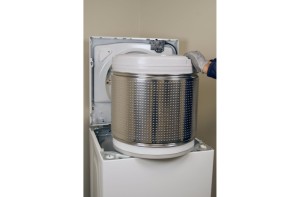
PHOTO: Pull the spin basket out of the tub.
- 06.
Install the new spin basket
Position the new spin basket on the top of the shaft in the bottom of the tub and then work the new spin basket down until it's completely seated on the shaft.
Position the spanner nut and thread it onto the base of the new spin basket.
Hand tighten the spanner nut and then use the spanner wrench to snug the spanner nut.
Using reasonable force, strike the arm of the spanner wrench with a hammer to tighten the spanner nut.
Tip: Follow the steps in the video to reinstall the retainer clip if your washer uses a clip to secure the spin basket to the drive shaft inside the washer tub. - 07.
Reinstall the impeller
Push the impeller down on top of the drive motor shaft until it's fully seated.
Insert the bolt and tighten it firmly.
Snap the cap back onto the top of the impeller.
- 08.
Reinstall the tub ring
Position the tub ring on the top of the outer tub and push it down.
Press down on the sections over the locking tabs so the tabs all snap into the locked position.
- 09.
Reinstall the top panel
Carefully lower the top panel.
Engage the brackets by pulling the panel forward about a quarter of an inch until the panel drops and the brackets engage.
Push the panel back about a quarter of an inch to lock it flush with the frame.
Remove the tape from the washer lid.
Insert the screws back into the top of the hinges on the back of the control console.
Tighten the screws firmly.
Place the tabs on the right side of the wire cover in the slots and then line up the holes on the left side and insert the mounting screw.
Tighten the mounting screw to secure the wire cover in place.
- 10.
Restore the water and power
Turn on the water supply valves.
Plug the washer into the electrical outlet.
Return the washer to its original location.
- 11.
Calibrate the washer
With the washer shut off, the basket empty (no water or clothes) and the lid closed, enter the diagnostic mode:
Turn the control dial 1 complete rotation (360 degrees) counterclockwise.
Quickly (within about 6 seconds) turn the control dial 3 clicks clockwise, one click counterclockwise and one more click clockwise.
All the green status lights blink when you successfully activate the diagnostic mode.
If the status lights don’t blink, turn the control dial one complete rotation counter-clockwise to reset the control and then try again, this time turning the knob faster.
In the diagnostic mode, select the Calibration Cycle by turning the control dial 4 clicks clockwise. When the Rinse light turns on, press Start to begin the Calibration Cycle, which runs for 2 to 3 minutes.
When the Calibration Cycle ends, the lid unlocks and the washer shuts off.
Warning: Undertaking repairs to appliances can be hazardous. Use the proper tools and safety equipment noted in the guide and follow all instructions. Do not proceed until you are confident that you understand all of the steps and are capable of completing the repair. Some repairs should only be performed by a qualified technician.
Most common symptoms to help you fix your washers
Choose a symptom to see related washer repairs.
Main causes: clogged drain hose, house drain clogged, bad drain pump, water-level pressure switch failure, bad control b…
Main causes: worn agitator dogs, bad clutch, broken motor coupler, shifter assembly failure, broken door lock, suspensio…
Main causes: bad lid switch or door lock, bad timer or electronic control board, wiring failure, bad water inlet valve a…
Main causes: broken lid switch or lid lock, bad pressure switch, broken shifter assembly, faulty control system…
Main causes: unbalanced load, loose spanner nut, worn drive block, broken shock absorber or suspension spring, debris in…
Main causes: no water supply, bad water valves, water-level pressure switch failure, control system failure, bad door lo…
Main causes: lack of electrical power, wiring failure, bad power cord, electronic control board failure, bad user interf…
Main causes: leaky water inlet valve, faulty water-level pressure switch, bad electronic control board…
Main causes: water heater failure, bad water temperature switch, faulty control board, bad water valve, faulty water tem…
Repair guides for top-load washers
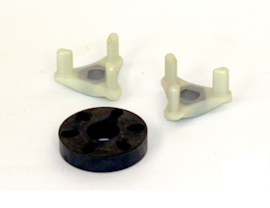
How to replace the motor coupler on a top-load washer
If the washer drains but won’t agitate or spin, the motor coupler might have broken to protect the drive motor from dama…
Repair difficulty
Time required
60 minutes or less
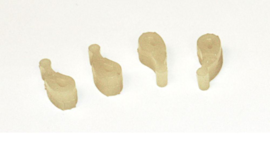
How to replace the agitator dogs in a top-load washer
If the top of the agitator moves both ways instead of just one, replace the agitator dogs, using the steps in this repai…
Repair difficulty
Time required
15 minutes or less
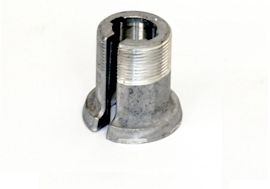
How to replace the drive block on a top-load washer
The drive block rotates the spin basket. If the basket wobbles or rattles in the spin mode because the drive block is wo…
Repair difficulty
Time required
60 minutes or less
Effective articles & videos to help repair your washers
Use the advice and tips in these articles and videos to get the most out of your washer.
Find tips for using your washing machine efficiently to save energy and help reduce utility bills.…

Learn about all the convenient features on our Sears PartsDirect website that make your parts purchases easier.…

Get answers to frequently asked questions about Sears and Sears PartsDirect.…
