Brother electronic sewing machine error codes

These error code explanations can help you diagnose a problem with your Brother electronic sewing machine. For repair how-to help, visit the PartsDirect repair help section, which includes repair help for sewing machines, major appliances, lawn and garden equipment, garage door openers, vacuum cleaners and more. Search for your model number to find a complete list of replacement parts for your sewing machine.
Main motor rotation failure
Unplug the sewing machine and check the wiring connections on the power supply PCB and the main PCB assembly. Reconnect any loose wires. If the problem persists, replace the power supply PCB. If the F1 code returns after replacing the power supply PCB, replace the main PCB assembly.
Button pressed continuously with power on
The F2 code appears when the reverse/reinforcement stitch button, needle position button or start/stop button is stuck. Attempt to release the stuck button. If you cannot release the stuck button, replace it. If no buttons are stuck, replace the SSVR PCB assembly. If the problem persists, replace the main PCB assembly.
Key pressed continuously with power on
The F3 code appears when a stitch selection key, stitch length adjustment key or stitch width adjustment key is stuck. Attempt to release the stuck button. Replace the key panel if you can't release the stuck key. If no keys are stuck, replace the operation PCB assembly. If the problem persists, replace the main PCB assembly.
Foot controller disconnected
Plug in the foot controller jack if it's disconnected. If the foot controller jack appears damaged, replace it. Replace the foot controller if it's defective. Replace the main PCB assembly if the foot controller is connected and working properly.
Dirty speed sensor
Unplug the sewing machine and check the timing shutter wiring connection on the main PCB assembly. If the wiring connection is okay, clean the timing shutter. Replace the timing shutter if it doesn't work after you clean it. If the problem persists, replace the main PCB assembly.
Speed VR disconnected
Unplug the sewing machine and reconnect any loose wires on the SSVR PCB assembly and the main PCB assembly. If the wiring connections are okay, replace the SSVR PCB assembly. If the problem persists, replace the main PCB assembly.
Power supply failure
Unplug the sewing machine and check the wiring connection between the power supply PCB assembly and the main PCB assembly. Reconnect any loose wires. If the wiring connections are okay, check the output voltage from the power supply PCB. Note: You should check this output voltage only if you're completely confident in your technical ability to safely perform this test. Follow electrical safety guidelines when checking this voltage. Wear electrical safety gloves when conducting the test. Unplug the sewing machine immediately after completing the test. Check for 5 VDC between pins 2 and 3 on PCB assembly connector CN201. Check for 30 VDC between pins 4 and 3 on the same connector. If voltage on those pins is incorrect, replace the power supply PCB assembly. If the voltage is correct, replace the main PCB assembly.
Main PCB assembly failure
Replace the main PCB assembly.
Foot controller error
With the presser foot raised, the operator pressed the foot controller and the reverse/reinforcement stitch button. Lower the presser foot lever before continuing the operation.
Buttonhole lever error
With the buttonhole lever lowered, the operator selected a stitch other than the buttonhole or bar tack stitch and pressed the foot controller. Raise the buttonhole lever or select a correct stitch.
Buttonhole stitch error
With the buttonhole lever raised, the operator selected a stitch other than the buttonhole or bar tack stitch and pressed the foot controller. Lower the buttonhole lever before continuing the operation.
Bobbin winder shaft engaged
With the bobbin winder shaft moved to the right, the operator pressed the reverse/reinforcement stitch button or needle position button. Disengage the bobbin winder shaft by moving it to the left before continuing the operation.
Start/stop button error
With the foot controller connected, the operator pressed the start/stop button. Disconnect the foot controller when using the start/stop button. Otherwise, operate the machine by using the foot controller.
Motor locked up
The motor locked up because the thread is tangled. Remove the tangled thread before continuing the operation.
Most common symptoms to help you fix your sewing machines
Choose a symptom to see related sewing machine repairs.
Main causes: dirty shuttle race, improper thread routing, incorrect thread tension…
Main causes: dirty shuttle race, wrong thread tension, bad needle timing, damaged needle, using the wrong type of needle…
Main causes: thread bunched up in the shuttle race, bad needle timing, internal drive gear failures…
Main causes: machine needs lubrication, internal gear failure…
Main causes: problems with the feed dogs, setting stitch length to 0…
Main causes: lack of lubrication, lint buildup, worn drive belt, faulty drive motor…
Main causes: disengaged clutch, broken drive belt, internal drive gear failure…
Main causes: faulty foot pedal, locked drive gears, wiring failure, bad drive motor…
Main causes: power supply failure, bad power cord, faulty On/Off switch…
Most common repair guides to help fix your sewing machines
These step-by-step repair guides will help you safely fix what’s broken on your sewing machine.
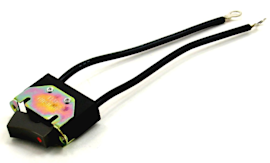
How to replace a sewing machine on/off switch
If the sewing machine is completely dead, replace the On/Off switch using these 6 steps.…
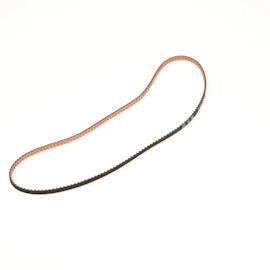
How to replace a sewing machine drive belt
You can replace a broken sewing machine drive belt in about 15 minutes. …
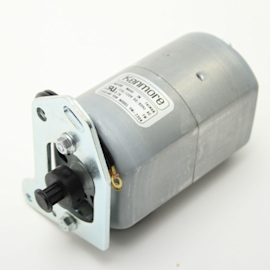
How to replace a sewing machine drive motor
If the drive motor on your sewing machine runs roughly or doesn't run at all, you can replace it in about 30 minutes usi…
Effective articles & videos to help repair your sewing machines
Use the advice and tips in these articles and videos to get the most out of your sewing machine.

Learn about all the convenient features on our Sears PartsDirect website that make your parts purchases easier.…

Get answers to frequently asked questions about Sears and Sears PartsDirect.…
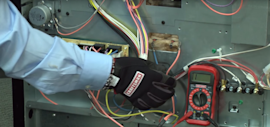
Learn how to use a multimeter to check for wiring problems in an appliance that's not working…