Installation guide
 Owner’s manual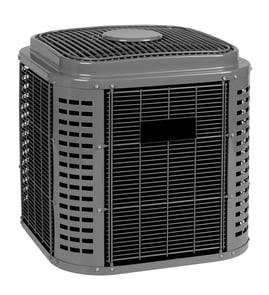




How many square feet will a 36000 BTU air conditioner cool?
A 36,000 BTU (about 3-ton) central air conditioner like the Payne PA10JA036000AA typically cools about 1,500 to 2,500 square feet in an average, well-insulated home. The right size depends most on insulation, ceiling height, sun exposure, windows, and local climate; confirm your exact match in the owner's manual.
Typical coverage range (what to expect)
Most 36,000 BTU systems land in this practical range:
- 1,500 to 1,800 sq ft: older homes, poor insulation, lots of sun or large windows
- 1,800 to 2,200 sq ft: average insulation and typical ceiling heights
- 2,200 to 2,500 sq ft: good insulation, shaded exposure, tighter construction
- Less than 1,500 sq ft: if ceilings are very high or the home has major air leaks
Quick sizing check: why “square feet” is only a starting point
Square footage alone can mislead. These factors often change the needed capacity the most:
- Insulation and air sealing (attic, walls, duct leakage)
- Ceiling height (taller ceilings increase volume to cool)
- Sun exposure (west-facing glass and minimal shade raise load)
- Occupancy and appliances (more people and cooking add heat)
- Ductwork condition (leaks and poor airflow reduce delivered cooling)
Rule-of-thumb table (BTU per square foot)
Use this as a fast estimate, then confirm with a proper load calculation.
| Home condition | Typical BTU per sq ft | 36,000 BTU estimate |
|---|---|---|
| Good insulation, shaded | 14 to 18 | ~2,000 to 2,570 sq ft |
| Average insulation | 18 to 22 | ~1,640 to 2,000 sq ft |
| Poor insulation, high sun | 22 to 28 | ~1,285 to 1,640 sq ft |
Why it matters (comfort and equipment life)
An oversized unit can cool fast but leave humidity high and cause more on-off cycling; an undersized unit can run constantly and still struggle on hot days. Your installation guide also lists operating limits (cooling mode is typically intended for outdoor temperatures roughly 55°F to 125°F), which affects expectations during mild or extreme weather. See the installation guide for model-specific setup details.
Last updated: February 2026
How much does an AC unit cost for a 1200 sq ft home?
A 1,200 sq ft home typically falls in the 2 to 2.5 ton central air conditioner range; installed replacement pricing commonly runs about $5,500 to $14,500, with many mid-efficiency installs landing around $8,000 to $9,000. Use the sizing and connection guidance in the PA10JA036000AA installation guide to confirm what your home and ductwork need.
What drives the total installed price
Most of the cost is the complete project (equipment plus labor), not just the outdoor condenser.
- Cooling capacity (tons) based on climate, insulation, windows, and sun exposure
- Efficiency level (SEER2); higher efficiency costs more up front
- Indoor coil compatibility (often replaced with the outdoor unit)
- Ductwork and airflow corrections (leaks, undersized returns, blocked registers)
- Electrical and controls (disconnect, breaker sizing, low-voltage wiring)
- Refrigerant line set work (reuse vs replace, length, evacuation and recharge)
Typical cost breakdown
| Project item | Typical share of total | What it includes |
|---|---|---|
| Outdoor condenser unit | 25% to 45% | Equipment cost varies by efficiency and brand tier |
| Indoor coil and indoor equipment pairing | 15% to 35% | Coil, metering device, and match-up for performance |
| Labor and refrigerant work | 25% to 40% | Brazing, evacuation, charging, startup testing |
| Electrical and misc. materials | 5% to 15% | Disconnect, whip, pad, fasteners, vibration isolation |
Model-specific details that can affect labor
Your Payne PA10JA036000AA is in the “036” size class (commonly associated with about 3 tons of cooling capacity in many product lines). The installation guide calls out connection and wiring practices that can change labor time and materials.
- “030, 036” refrigerant connections: 3/8 in. liquid and 3/4 in. vapor (for typical line lengths)
- Longer line sets can require additional design steps and materials
- Power wiring connects to the contactor in the control box
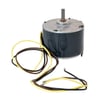
If you are budgeting because the outdoor fan is not running, a common repair is replacing the fan motor; see central air conditioner condenser fan motor HC39GE237.
Why it matters
Correct sizing and proper refrigerant tubing and wiring practices help prevent short cycling, poor airflow, and high operating cost; they also protect the compressor and extend system life.
Last updated: February 2026
How to look up AC model number?
To look up the model number for your Payne central air conditioner or heat pump, find the rating plate on the outdoor unit cabinet and read the field labeled Model (or M/N). For this page, the model number is PA10JA036000AA; matching that number ensures you get the correct parts and wiring information from the owner's manual.
Where to find the model number on a central AC or heat pump
Most outdoor condensers have a data label on the cabinet. Check these common spots:
- On the outside of the outdoor unit, usually on a side panel
- Behind the service access panel (where the electrical components are)
- Near the refrigerant service valves or line set entry point
- On the inside edge of a removable panel (you may need a flashlight)
What to write down (and why)
For accurate parts lookup and troubleshooting, record these items exactly as shown:
- Model number (example: PA10JA036000AA)
- Serial number (helps identify production details)
- Electrical data (voltage, phase, minimum circuit ampacity)
- Refrigerant type (used for service and charging)
Quick reference: model vs. serial
| Item | What it tells you | Used for |
|---|---|---|
| Model number | The exact unit design and parts family | Ordering parts, matching manuals, wiring diagrams |
| Serial number | The unit’s unique identifier | Service history, production identification |
Why it matters
Using the exact model number prevents ordering the wrong contactor, dual capacitor, or condenser fan motor; it also helps you follow the correct sequence of operation and thermostat wiring shown in the documentation.
Helpful tip for parts lookup
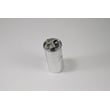
If you are ordering electrical parts for PA10JA036000AA, match the part by description and ID when available, such as the central air conditioner condenser fan motor HC39GE237 or the capactr dual CAP050350440RSP.
Last updated: February 2026
What is the most common part to fail on an AC unit?
On most central AC systems, the run capacitor is the most common part to fail because it handles frequent starts and electrical stress from heat and power fluctuations. For the Payne PA10JA036000AA, a failed dual capacitor is a top suspect when the outdoor fan or compressor will not start.
What usually fails first (and what you notice)
These are the most common failure points we see on outdoor condensing units and heat pumps:
- Dual run capacitor: outdoor unit hums, fan will not spin, compressor will not start, or it starts then shuts off
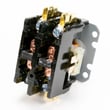
- Contactor: outdoor unit will not turn on even when the thermostat calls for cooling
- Condenser fan motor: fan runs slowly, squeals, overheats, or stops (unit may shut down on overload)
- Wiring and connections: intermittent operation, burnt terminals, or melted insulation
- Airflow and debris issues: reduced efficiency and more wear from restricted outdoor airflow
If you are troubleshooting parts on this model, the capactr dual CAP050350440RSP and central air conditioner condenser fan motor HC39GE237 are common components tied directly to “won’t start” and “no cooling” complaints.
Quick checks that narrow it down
Turn off power at the disconnect before opening panels.
- Confirm the thermostat is calling for cooling; avoid rapid on and off changes (wait at least 5 minutes between cycles)
- Check for obvious debris buildup and keep clearance around the outdoor unit (at least 12 inches)
- Listen for a click at the contactor when cooling is requested
- Look for bulging or leaking capacitor can (a strong indicator of failure)
- Inspect wiring for heat damage at the contactor and capacitor terminals
For wiring and electrical testing basics, use the installation guide for safe access and connection details.
Common symptoms vs likely part
| Symptom at outdoor unit | Most likely cause | What to check next |
|---|---|---|
| Hums but fan will not spin | Dual run capacitor | Bulging can, weak start, correct replacement match |
| No sound, no fan, no compressor | Contactor or power issue | Contactor pull-in, line voltage, burnt contacts |
| Fan runs, compressor does not | Capacitor or compressor circuit | Capacitor rating, wiring, overload behavior |
| Starts then stops quickly | Capacitor, fan motor, airflow | Overheating, debris, motor amp draw |
Why it matters
A weak capacitor or failing fan motor can cause hard starts and overheating, which shortens compressor life and reduces efficiency. Keeping airflow unrestricted and avoiding rapid cycling helps protect the system.
Last updated: February 2026