Owner’s manual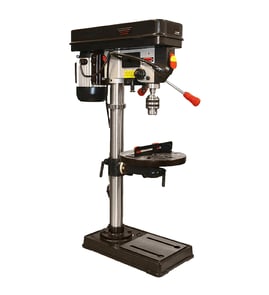

How much does a Craftsman 149213340 drill press weigh?
The Craftsman radial drill press model 149213340 weighs about 120 lb (net weight). Use this weight to plan safe lifting, choose a sturdy bench, and confirm your mounting hardware; the 149213340 owner's manual covers setup and safe operation details.
What that weight means for setup
- Plan for a two-person lift when moving the base and head/arm assembly.
- Use a solid, level bench that can support the drill press plus your workpiece and vise.
- Bolt the base down to reduce vibration and improve hole accuracy.
- Keep the table and base waxed to prevent rust and help workpieces slide smoothly.
- Clamp the workpiece to prevent twisting and binding during drilling.
Quick reference
| Item | Value | Why you care |
|---|---|---|
| Drill press net weight | 120 lb | Lifting plan, bench capacity, vibration control |
| Recommended handling | Two-person lift | Reduces tip-over and strain risk |
How to confirm weight for your exact configuration
Accessories can add a few pounds. For the most accurate number in your shop:
- Remove add-ons (vise, clamps, auxiliary table, bits).
- Weigh in sections (base/column, head/arm) using a scale method.
- Record the total so you can repeat safe moves later.
Why it matters
A 120 lb drill press is heavy enough to drill more smoothly, but only when it is supported correctly. Proper mounting and clamping reduce vibration, improve accuracy, and help prevent the workpiece from grabbing.
Last updated: February 2026
What is a good horsepower for a drill press?
For a home shop drill press, 1/2 HP is a good all-around choice for wood and light metal work; step up to 3/4 HP to 1 HP if you regularly drill larger holes, use bigger bits (Forstner/hole saws), or work in thicker steel. On your Craftsman 149213340 radial drill press, correct belt speed and safe feed matter as much as horsepower; see the owner's manual.
How to choose the right horsepower
Use horsepower to match the toughest job you do most often.
- 1/3 to 1/2 HP: wood, plastics, aluminum, small bits, occasional metal drilling
- 3/4 HP: frequent metal drilling, larger twist bits, more demanding accessories
- 1 HP: larger diameter holes, thicker/harder metals, higher duty-cycle use
- If you bog down often, more HP helps, but only when paired with the right speed and sharp bits
- For many projects, proper speed selection prevents stalling better than extra HP
What matters just as much as horsepower (especially on model 149213340)
Your Craftsman 149213340 uses a pulley and V-belt drive with five spindle speeds; choosing the correct speed is critical for performance and bit life.
| What you’re doing | What to prioritize | Why it helps |
|---|---|---|
| Small drill bits | Higher spindle speed | Cleaner cut, less grabbing |
| Large bits/hole saws | Lower spindle speed | More torque, less stalling |
| Soft materials (wood) | Faster speed | Efficient cutting |
| Hard materials (steel) | Slower speed + cutting fluid | Reduces heat and dulling |
Quick setup and safety checks we recommend
These steps improve results regardless of motor size.
- Clamp the workpiece; never hold it by hand
- Set the table or depth stop to avoid drilling into the table
- Use the recommended speed chart (inside the pulley cover) and change speeds with power disconnected
- Feed steadily; slow down as the bit breaks through to reduce splintering and grabbing
- Wear ANSI Z87.1 eye protection and never leave the drill press running unattended
Why it matters
Horsepower mainly affects how well the drill press maintains speed under load. Correct spindle speed, sharp bits, and clamping reduce stalling, improve hole quality, and help prevent the workpiece from spinning.
Last updated: February 2026
What is the 4 inch rule for drill press?
The 4-inch rule is a drill press safety guideline: keep your hands and fingers at least 4 inches away from the rotating drill bit, chuck, and spindle while drilling. On the Craftsman 149213340 radial drill press, we recommend clamping the workpiece so your hands never need to get close to the point of operation.
How to follow the 4-inch rule on a drill press
- Clamp the workpiece to the table or secure it in a drill press vise; never hold it by hand.
- Keep fingers out of any spot where the bit could contact them if the work shifts.
- Adjust the table height and set the depth stop so you do not drill into the table.
- Use the recommended spindle speed for the bit size and material.
- Shut off power and wait for a complete stop before clearing chips or making adjustments.
Quick safety checklist (Craftsman 149213340)
| Task | Safer method | What to avoid |
|---|---|---|
| Holding material | Clamp or vise | Hands near the bit/chuck |
| Setup and layout | Power off, bit stopped | Measuring/marking with tool rotating |
| Changing speed/belts | Disconnect from power first | Adjusting while plugged in |
| Leaving the tool | Turn power off, wait for stop | Walking away while running |
Why it matters
Most drill press injuries happen when the workpiece spins, shifts, or pulls your hand toward the rotating bit. The 4-inch rule creates a simple buffer zone, and clamping does the real work of keeping your hands away while improving hole accuracy.
Where to confirm model-specific safety rules
Our Craftsman safety rules for drill presses (including clamping the workpiece, avoiding loose clothing, and keeping fingers out of the bit’s path) are listed in the owner's manual.
Last updated: February 2026
Where is the model number on a Craftsman drill press?
On the Craftsman radial drill press model 149213340, the model number is typically printed on the drill press identification plate; you will usually find that plate on the base near the column. Use that model number any time you look up parts, manuals, or service information.
Where to look on the drill press
Check these common spots first (in order):
- Base near the column (most common location)
- The rear of the base (plate may face the back)
- The side of the column (near where the column mounts to the base)
- Near the power switch housing (less common)
- On the motor tag (this is motor info, not always the drill press model)
What the model number looks like
For this unit, the model number is 149213340. On some Craftsman tools, the plate may also show a longer formatted version (for example, with punctuation), but the digits are what matter for parts lookup.
| Item on the plate | Example for this drill press | Why you need it |
|---|---|---|
| Model number | 149213340 | Ensures parts diagrams match your exact tool |
| Part number | Varies by component | Used to order the correct replacement part |
| Description/name | Radial drill press | Confirms you are in the right parts category |
Why it matters
Craftsman drill presses often have multiple versions that look similar. Using the exact model number helps us match the correct repair parts list, troubleshooting info, and diagrams so you do not end up with a wrong-fit belt, switch, chuck, or quill-related part.
Tip for ordering parts
When you record the model number, also write down any part number and part description you see in the diagrams and lists in the owner's manual. That combination is the fastest way to match the right component.
Last updated: February 2026