



How to calibrate a Jenn Air wall oven?
For a Jenn-Air JMW2430DS02 wall oven/microwave combo, we calibrate (adjust) oven temperature by changing the control’s bake temperature offset so the oven runs slightly hotter or cooler to match your cooking results.
Before you calibrate
- Use an oven-safe thermometer and test at least 2 to 3 bakes before changing the offset.
- Preheat fully; most ovens need 15 to 20 minutes after the preheat beep to stabilize.
- Test with a simple item (biscuits or a sheet-pan of cookies) to confirm real-world results.
- Keep the oven empty except for one rack in the center position.
- Avoid opening the door during the first 15 minutes of baking.
How calibration usually works on Jenn-Air controls
Jenn-Air wall ovens typically let you adjust an offset in small increments (often 5°F steps) so you can correct consistent overbaking or underbaking.
- Open the oven settings menu (often labeled Settings, Tools, or Options).
- Find Oven calibration, Temperature calibration, or Temp offset.
- Choose Upper oven (if prompted) and adjust the offset warmer or cooler.
- Save the setting, then re-test with a normal bake.
Quick guide: which direction to adjust
| What you observe | What to change | Typical starting change |
|---|---|---|
| Food browns too fast, center underdone | Decrease offset | -10°F |
| Food takes too long, pale tops | Increase offset | +10°F |
| Only certain recipes are off | Re-test first | 0°F |
If the oven still seems off after calibration
A calibration offset corrects small, consistent differences. If temperatures swing widely, preheat never finishes, or baking is uneven, we check common causes:
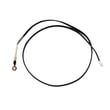
- Temperature sensor out of range or drifting (consider temperature sensor W11233913)
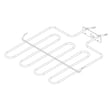
- Heating element not heating evenly (consider range bake element W11545804)
- Control issue causing poor temperature regulation (consider electronic control board WPW10260060)
- Door not sealing or latch problems letting heat escape
Why it matters
Calibration helps match the displayed temperature to how your Jenn-Air oven actually bakes, which improves doneness, browning, and bake times without changing how you cook.
Last updated: February 2026
What are common problems with Jenn Air stoves?
Jenn-Air cooking appliances most often have heating problems, control or display issues, and door or latch faults. For your Jenn-Air JMW2430DS02 wall oven/microwave combo, the most common service calls we see are the oven not heating evenly or at all, and the microwave not heating or not starting due to an interlock or power issue.
Most common symptoms and what usually causes them
- Oven not heating or underheating: failed bake element, temperature sensor drift, or a control issue
- Uneven baking: weak bake element, sensor problems, or airflow/venting restrictions
- Microwave runs but does not heat: magnetron or inverter problem
- Microwave will not start: door switch (interlock) not closing, door alignment, or control problem
- Dead display or random resets: control board or power supply issue
Quick checks we recommend before replacing parts
- Power reset: Turn the breaker off for 1 minute, then back on.
- Confirm settings: Make sure Control Lock is off and the correct mode is selected (Bake vs. Convect).
- Door and latch check: Close the microwave door firmly; check for looseness or sagging.
- Look for obvious damage: Burn marks, melted connectors, or pinched wiring near the door area.
Parts that commonly fix these problems on JMW2430DS02
| Symptom | Likely part to check | What it does |
|---|---|---|
| Microwave will not start | Microwave door switch W10211972 | Confirms the door is closed so the microwave can run safely |
| Microwave runs, no heat | Microwave magnetron W11346197 | Generates microwave energy for heating |
| Microwave runs, weak/no heat | Inverter W10217711 | Supplies controlled high voltage to the magnetron |
| Oven not heating | Range bake element W11545804 | Provides primary heat for baking |
| Oven temperature inaccurate | Temperature sensor W11233913 | Tells the control the actual oven temperature |
Why it matters
Heating and door-interlock problems can look similar from the outside, but the fix is very different. Matching the symptom to the right circuit (oven heat, microwave heat, or door safety interlock) helps you avoid replacing the wrong part and gets your Jenn-Air cooking correctly again.
Last updated: February 2026
How long do Jenn Air wall ovens last?
Most Jenn-Air wall ovens typically last 15 to 20 years with normal household use and basic care. For a Jenn-Air JMW2430DS02 wall oven/microwave combo, lifespan depends most on heat exposure, door use, and keeping key electrical and heating parts in good condition.
Typical lifespan and what affects it
A wall oven’s service life is usually limited by high-heat wear on heating components and long-term stress on controls, wiring, and door hardware.
Common factors that shorten lifespan:
- Heavy daily baking or long high-temperature cooks
- Frequent self-clean cycles (high heat stresses wiring and controls)
- Slamming or forcing the door (wears hinges and latches)
- Power surges or repeated breaker trips
- Poor airflow around the built-in cabinet cutout
Parts that most often drive “repair vs. replace” decisions
When performance drops, these are the types of parts we see involved most often on combo units like the JMW2430DS02:
- Oven heating issues: range bake element W11545804
- Temperature accuracy problems: temperature sensor W11233913
- Control or power symptoms (dead display, erratic operation): control (with power supply) W11179310 or electronic control board WPW10260060
- Door won’t latch or won’t stay closed: door latch W10883049
Quick guide: what the symptoms usually mean
| Symptom | Most common cause | What to check first |
|---|---|---|
| Oven not heating or heats unevenly | Failed bake element | Look for visible damage on the bake element; then test continuity |
| Oven temperature off by 25°F or more | Sensor drift or control calibration | Verify with an oven thermometer; inspect sensor connection |
| Display dead or random resets | Control/power supply issue | Check breaker, then inspect wiring connections |
| Door won’t lock/unlock properly | Latch mechanism problem | Inspect latch alignment and mounting |
Why it matters
Knowing the 15 to 20 year typical lifespan helps you plan: if your unit is mid-life, replacing a heating part or sensor often restores performance; if it is near end-of-life, repeated control or wiring repairs can add up quickly.
Last updated: February 2026
What are the disadvantages of a microwave oven combo?
A microwave/wall oven combo like the Jenn-Air JMW2430DS02 saves space and looks built-in, but the tradeoffs are higher purchase and repair cost, more complex electronics, and the risk that one failure can take out both cooking functions until it’s fixed.
Common disadvantages to plan for
- Higher repair complexity: More boards, sensors, and interlocks than a standalone microwave or wall oven.
- Downtime risk: If the control system fails, you can lose both the microwave and oven at once.
- Higher part costs: Key components like a control board or inverter typically cost more than basic mechanical parts.
- Tighter service access: Built-in installs can make removal and troubleshooting harder.
- Learning curve: More modes (convection, sensor cooking, combo modes) means more settings to master.
- Heat and ventilation considerations: Cabinet cutout airflow matters; poor airflow can shorten component life.
What this means for repairs on JMW2430DS02
These are the types of parts that commonly drive cost and complexity on a combo unit:
| Symptom | Often involved system | Example part on this model |
|---|---|---|
| Microwave runs but does not heat | High-voltage system | Inverter W10217711 or microwave magnetron W11346197 |
| Microwave will not start, door error | Door interlock circuit | Microwave door switch W10211972 |
| Oven temperature swings, bakes unevenly | Oven sensing/heating | Temperature sensor W11233913 or range bake element W11545804 |
Why it matters
A combo unit concentrates more functions into one chassis. That can be great for a clean kitchen layout, but it also means a single electronic or safety-interlock issue can stop cooking entirely until the correct Jenn-Air replacement part is installed.
How we recommend minimizing the downsides
- Keep the microwave cavity clean to prevent arcing and damage to internal covers.
- Avoid slamming the microwave door; it stresses the interlock switches.
- If heating performance changes, stop using the affected function and troubleshoot promptly.
- Use a multimeter for safe, accurate checks when diagnosing electrical parts; see how to use a multimeter to test electrical parts video.
Last updated: February 2026

