Get free shipping on your order, with any water filter subscription. Find my filter

Open Hamburger Menu
Sears Parts Direct
Tips to find your model number

KitchenAid KBHC109JSS05 microwave Parts

Here are the diagrams and repair parts for KitchenAid KBHC109JSS05 microwave, as well as links to manuals and error code tables, if available.

KitchenAid KBHC109JSS05 microwave
By Schematic
By Part
SELECT DIAGRAM
?

This is the number corresponding to the part on the diagram / schematic

Browse Parts for KBHC109JSS05 Microwave

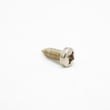
  • Range Screw for KitchenAid KBHC109JSS05 - Part WPW10132940

    Microwave door parts, optional parts diagram

    Range Screw

    Part #WPW10132940
    This item is not returnable
    In Stock
    $6.14
    14% OFF Phone Price : $7.14Info Icon
    Minus Item
    Qty
    Plus Item
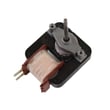
  • Thrmst-fix for KitchenAid KBHC109JSS05 - Part W11607085

    Cabinet and stirrer parts diagram

    Wall Oven Microwave Thermostat

    Part #4375430

    Replaced by #W11607085

    Info Icon
    Manufacturer substitution
    This part replaces 4375430. Substitute parts can look different from the original.
    In Stock
    $27.19
    18% OFF Phone Price : $33.19Info Icon
    Minus Item
    Qty
    Plus Item
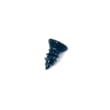
  • Range Screw for KitchenAid KBHC109JSS05 - Part WP4450038

    Microwave door parts, optional parts diagram

    Range Screw

    Part #4450038

    Replaced by #WP4450038

    Info Icon
    Manufacturer substitution
    This part replaces 4450038. Substitute parts can look different from the original.
    This item is not returnable
    In Stock
    $4.88
    17% OFF Phone Price : $5.88Info Icon
    Minus Item
    Qty
    Plus Item
  • Crisp Plate for KitchenAid KBHC109JSS05 - Part W11512490

    Cabinet and stirrer parts diagram

    Crisper Pan

    Part #4393536

    Replaced by #W11512490

    Info Icon
    Manufacturer substitution
    This part replaces 4393536. Substitute parts can look different from the original.
    In Stock
    $103.24
    Minus Item
    Qty
    Plus Item
  • Wall Oven Microwave Door Hinge, Left for KitchenAid KBHC109JSS05 - Part WP4375323

    Microwave door parts, optional parts diagram

    Oven Door Hinge

    Part #4375323

    Replaced by #WP4375323

    Info Icon
    Manufacturer substitution
    This part replaces 4375323. Substitute parts can look different from the original.
    In Stock
    $50.83
    34% OFF Was : $76.74Info Icon
    Minus Item
    Qty
    Plus Item
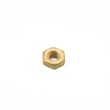
  • Dryer Terminal Block Hex Nut for KitchenAid KBHC109JSS05 - Part WP112432

    Top venting parts diagram

    Nut

    Part #112432

    Replaced by #WP112432

    Info Icon
    Manufacturer substitution
    This part replaces 112432. Substitute parts can look different from the original.
    This item is not returnable
    In Stock
    $4.88
    17% OFF Phone Price : $5.88Info Icon
    Minus Item
    Qty
    Plus Item
  • Thermoactuat for KitchenAid KBHC109JSS05 - Part 461967842541

    Cabinet and stirrer parts diagram

    Actuator

    Part #4375427

    Replaced by #461967842541

    Info Icon
    Manufacturer substitution
    This part replaces 4375427. Substitute parts can look different from the original.
    In Stock
    $93.51
    Minus Item
    Qty
    Plus Item
  • Control for KitchenAid KBHC109JSS05 - Part W10755214

    Top venting parts diagram

    Side

    Part #4451597

    Replaced by #W10755214

    Info Icon
    Manufacturer substitution
    This part replaces 4451597. Substitute parts can look different from the original.
    In Stock
    $103.16
    Minus Item
    Qty
    Plus Item
  • Lens-lamp for KitchenAid KBHC109JSS05 - Part W11193483

    Cabinet and stirrer parts diagram

    Lamp Lens

    Part #4375318

    Replaced by #W11193483

    Info Icon
    Manufacturer substitution
    This part replaces 4375318. Substitute parts can look different from the original.
    In Stock
    $37.56
    31% OFF Was : $54.70Info Icon
    Minus Item
    Qty
    Plus Item
  • Nut for KitchenAid KBHC109JSS05 - Part WP4450118

    Top venting parts diagram

    Nut

    Part #4450118

    Replaced by #WP4450118

    Info Icon
    Manufacturer substitution
    This part replaces 4450118. Substitute parts can look different from the original.
    In Stock
    $28.13
    Minus Item
    Qty
    Plus Item

KitchenAid Microwave KBHC109JSS05 FAQs

To set the clock on your KitchenAid KBHC109JSS05 wall oven/microwave combo, touch CLOCK SET/START, enter the time using the number pads, then touch CLOCK SET/START (or START) again to save. This model uses a 12-hour clock and does not display a.m. or p.m.; see the KBHC109JSS05 owner's manual.

Steps to set the time
  • Make sure the upper oven, lower oven, Timer, and any Timed Cooking are off.
  • Touch CLOCK SET/START.
  • Use the number pads to enter the time of day.
  • Touch CLOCK SET/START or START to confirm.
  • If you see a power-failure message (such as PF), clear it with CANCEL and then reset the clock.
If the clock is missing from the display

You can hide or show the time-of-day display from the control panel.

What you want What to do What to expect
Remove time of day Touch and hold CLOCK SET/START for 5 seconds Time disappears from the display
Return time of day Touch CLOCK SET/START Time returns (usually without needing to reset)
Why it matters

The clock setting affects how the control behaves after a power interruption and helps you use timed features accurately (Timer and Timed Cooking). If the time is wrong, cooking schedules and reminders can be off.

Last updated: January 2026

To reset your KitchenAid KBHC109JSS05 wall oven/microwave combo, turn power off at the breaker for about 1 minute, then restore power. When power returns, the display may show a power-failure message; press the appropriate CANCEL key to clear it and reset the clock if needed (see the KBHC109JSS05 owner’s manual).

Quick reset steps (power cycle)
  • Turn OFF the circuit breaker (or remove the fuse) that supplies the wall oven.
  • Wait 60 seconds.
  • Turn the breaker ON.
  • If the display shows “PF id = 27” or “PF id = 30”, press LOWER OVEN CANCEL, UPPER OVEN CANCEL, or CANCEL OFF (varies by model) to clear it.
  • Reset the clock if needed.
If the control panel seems “stuck” (not a full reset)

Sometimes the oven is not failed; it is locked or waiting for a cancel.

  • Control Lock on: Touch and hold 3 CONTROL LOCK for about 3 seconds to unlock.
  • “Err” on display: Press the appropriate CANCEL key, then re-enter the setting.
  • “RETRY” flashes: Re-enter the selection; an invalid pad was touched.
What you should see after a successful reset
Situation What it means What to do
Display lights up for ~5 seconds at power-up Normal startup Wait for prompts to finish
“PF id = 27” or “PF id = 30” Power failure detected Press CANCEL, reset clock
Display returns to time of day Normal idle mode Start cooking as usual
Why it matters

A reset clears many temporary control glitches after a power interruption and helps restore normal keypad response, clock operation, and cooking functions without replacing parts.

Last updated: January 2026

If the display on your KitchenAid KBHC109JSS05 wall oven/microwave combo looks blank, the most common causes are a recent power interruption (the control may be waiting for a cancel/clock reset), a tripped breaker or loose power connection, or a failed control or fuse in the unit.

What to check first (fast, no tools)
  • Confirm the unit has power: check the home breaker(s) for the wall oven and reset fully OFF then ON.
  • Look for a power-failure message: when power is restored, the display can show a “PF” code that clears by pressing CANCEL and then resetting the clock (see the KBHC109JSS05 owner’s manual).
  • Try a control reset: turn the breaker OFF for 5 minutes, then restore power.
  • Press the correct cancel key: use LOWER OVEN CANCEL, UPPER OVEN CANCEL, or CANCEL OFF (varies by model).
  • If the lower oven is not in use, its display can be blank by design; the upper display typically shows time of day when idle.
If the display is still blank (likely electrical or control issue)

A blank display after confirming power usually points to an internal power-supply problem (fuse, fuse holder, wiring) or a failed electronic control.

Symptom Most likely area What we recommend
Completely dead, no lights, no response Power supply to unit, internal fuse Check breaker and wiring; test/replace fuse (black) WP4375321 if applicable
Display flickers or resets Loose connection, failing component Inspect connections; check terminal block and harness seating
Works sometimes, door-related behavior Door switch circuit Inspect/replace microwave door interlock switch W10211972 if symptoms match
Why it matters

A blank display is often a power-interruption or power-delivery problem, but it can also be an internal fuse opening to protect the control. Restoring stable power and clearing a PF condition prevents unnecessary parts replacement and helps you pinpoint whether the issue is in the home supply or inside the appliance.

Last updated: January 2026

Symptoms for electric ranges

Main causes: faulty surface element, burner control switch failure, temperature limiter not working properly, loose wiri…

Main causes: impact from dropping an item on the glass surface, ceramic glass surface flaw, surface element temperature …

Repair guides for electric ranges

How to replace an oven temperature sensor on an electric range

How to replace an oven temperature sensor on an electric range

These step-by-step instructions guide you through replacing an oven temperature sensing probe.…

Repair time and Difficulty

 15 minutes or less
How to replace an electric range oven control board

How to replace an electric range oven control board

If the electronic oven control board isn't powering the bake and broil functions, you can replace it in less than half a…

Repair time and Difficulty

 15 minutes or less
How to replace a range surface element control switch

How to replace a range surface element control switch

The surface element control switch lets you turn the stovetop elements on and off, and to set the heat level. These step…

Repair time and Difficulty

 15 minutes or less

Articles and videos for electric ranges

How to disassemble an Electrolux EW30 freestanding electric range

How to disassemble an Electrolux EW30 freestanding electric range

See how to access control boards and oven components in an Electrolux electric range.…

Radiant surface element on range not working video

Radiant surface element on range not working video

Troubleshoot the likely causes why a stovetop burner won’t heat.…

Hidden bake element has long preheat

Hidden bake element has long preheat

Here's why ovens with hidden bake elements take longer to preheat.…

Parts & More

Circular Saw
Cooktop
Dishwasher
Dryer
Dvd Player
Electric Range
Front-Engine Lawn Tractor
Furnace
Parts
Speaker
Top-Mount Refrigerator
Wet/Dry Vacuum