Installation guide
 Owner’s manual






What is WMH31017HS09 used for?
The Whirlpool WMH31017HS09 microwave/hood combo is used to heat, cook, and defrost food in the microwave cavity while also venting smoke and odors from the cooktop below through its built-in hood fan and filters. For safe operation details, follow the WMH31017HS09 user guide.
What you can do with this microwave/hood combo
- Reheat leftovers, beverages, and plated meals
- Defrost common foods using microwave power levels
- Cook simple microwave foods (covered dishes, microwave-safe containers)
- Vent the range area using the hood fan (helps reduce steam and odors)
- Light the cooktop area using the built-in cooktop light
Key safety and use reminders
Use this appliance only for normal household microwave cooking and hood ventilation.
- Use only microwave-safe cookware and containers
- Do not heat sealed containers (they can burst)
- Do not operate with a damaged door, hinges, latches, or door seals
- Plug into a properly grounded 120V outlet on a 15- or 20-amp circuit
- Install and vent it according to the WMH31017HS09 installation guide
Common “used for” questions (quick guide)
| Task | Use the microwave? | Use the hood fan? |
|---|---|---|
| Heating food | Yes | Optional |
| Removing cooking odors/steam | No | Yes |
| Lighting the stovetop | No | Yes |
| Drying clothes or industrial use | No | No |
Why it matters
Using the WMH31017HS09 for its intended purpose protects the door seal system, keeps ventilation working effectively, and reduces the chance of electrical or overheating problems that can lead to blown fuses, failed interlocks, or no-heat symptoms.
Last updated: February 2026
What is the life expectancy of a whirlpool microwave?
Most Whirlpool microwaves, including over-the-range models like WMH31017HS09, last 7 to 10 years with normal household use. Consistent ventilation, keeping the grease filter clean, and avoiding overheating are the biggest factors that help you reach the high end of that range; see the WMH31017HS09 owner's manual for care and operating guidance.
What typically shortens microwave life
The most common “life-shorteners” are heat, grease buildup, and door-switch wear. Focus on these areas first:
- Running the microwave empty or repeatedly overheating food
- Blocked airflow around the microwave/hood combo
- Grease filter not cleaned regularly (fan works harder, heat rises)
- Slamming the door or forcing it closed (stresses interlock switches)
- Power issues such as frequent breaker trips or surges
Signs it is nearing end of life
These symptoms usually point to a failing high-voltage or control component:
- Food takes much longer to heat than it used to
- Loud buzzing/humming during heating cycles
- Unit goes dead, resets, or blows the house breaker
- Fan and light work, but it will not heat
- Door must be “just right” to start (interlock problem)
Common parts involved (examples)
| Symptom | Common area to check | Example part for WMH31017HS09 |
|---|---|---|
| Dead/no power | Line fuse | Microwave fuse W11707984 |
| Runs but no heat | High-voltage circuit | Gaoxin-hvd c W11256462 |
| Door-related starting issues | Door interlock system | Interlock WPW10156813 |
Why it matters
A microwave that is weak-heating or intermittently powering off often gets worse quickly. Catching early symptoms helps you decide whether a simple repair (like a fuse or interlock) makes sense before a larger high-voltage repair.
Last updated: February 2026
What are common problems with whirlpool microwaves?
Common problems we see with Whirlpool microwaves like model WMH31017HS09 include no power or no start, not heating, sparking/arcing, loud buzzing or grinding noises, weak venting, and light or keypad/display issues. Many start with simple causes (power supply, door latches, filters, bulbs) before pointing to internal components.
Most common symptoms and what they usually mean
- Microwave will not operate at all: tripped breaker or blown house fuse; less commonly an internal fuse or door interlock issue.
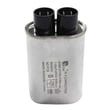
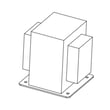
- Runs but does not heat: often a high-voltage circuit problem (magnetron, diode, capacitor, transformer) and should be handled by a technician.
- Starts then stops or acts “dead” after closing the door: door switch or interlock alignment problems.
- Sparking or burn marks: food splatter, metal in the cavity, damaged waveguide cover, or arcing from residue.
- Turntable not rotating: turntable motor/driver issue or the tray not seated correctly.
- Vent fan weak or noisy: grease filter clogged, damper stuck, or venting restriction.
Quick checks we recommend first (safe, no disassembly)
- Confirm the outlet has power; reset the breaker if needed.
- Open and close the door firmly; make sure it latches smoothly.
- Clean the cavity and door area; remove any metal racks/foil.
- Wash or replace the grease filter if airflow is poor.
- Test-heating: warm 1 cup of water for 2 minutes on High; if it does not heat, stop troubleshooting and plan for service.
Parts that commonly come up for this model
| Symptom | Common part involved | Example part for WMH31017HS09 |
|---|---|---|
| No start, intermittent start | Door switch/interlock | Interlock WPW10156813 |
| No heat (unit runs) | High-voltage components | Gaoxin-hvd c W11256462 (high-voltage diode) |
| No lights | Cooktop light bulb assembly | Lamp assembly 8206232A |
| Weak venting | Grease filter | Filter W10208631A |
Why it matters
Microwaves combine line voltage and high-voltage components; “runs but won’t heat” and electrical-noise symptoms can indicate a high-voltage failure. Addressing simple airflow, cleaning, and door-latch issues early helps avoid repeat shutdowns and nuisance tripping.
For model-specific operating tips, parts lists, and troubleshooting guidance, use the WMH31017HS09 owner’s manual. For mounting and venting setup that affects fan performance, use the WMH31017HS09 installation guide.
Last updated: February 2026