 Owner’s manual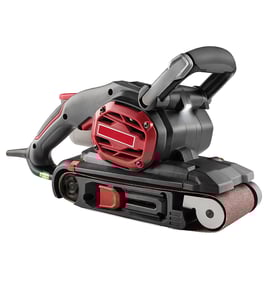

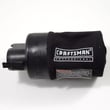
How to use a power sander?
To use your Craftsman power sander model 17227675, secure the workpiece, install the correct hook-and-loop sanding disc, then guide the sander in smooth overlapping passes without pushing down. Let the tool’s weight and the sandpaper grit do the cutting for a flatter, more even finish (see the owner's manual).
Before you start (safety and setup)
- Unplug the sander before installing or removing sandpaper, making adjustments, or cleaning.
- Clamp the workpiece so it cannot shift while sanding.
- Inspect the surface and remove nails, screws, staples, or any embedded metal.
- Hold the tool by insulated gripping surfaces when sanding where hidden wiring could be present.
- Never use this sander for wet sanding or liquid polishing.
Basic sanding technique (what to do while sanding)
- Start the sander, then set it flat on the surface.
- Move in a steady back-and-forth or side-to-side pattern with light, even guidance.
- Keep the pad moving; do not sand in one spot too long (it can create low spots).
- Use the speed dial to match the material and grit (lower for finer finishing, higher for faster stock removal).
Choosing sandpaper grit (quick guide)
Use hook-and-loop discs with pre-punched holes and align the disc holes to the pad holes for dust collection.
| Goal | Typical grit range | What to expect |
|---|---|---|
| Remove paint, level rough wood | 60 to 80 | Fast removal, visible scratches |
| General smoothing | 100 to 150 | Good balance of cut and finish |
| Final finish before stain/paint | 180 to 220 | Smoother surface, slower removal |
Dust collection and cleanup
Your sander uses a dust bag assembly and dual dust ports; reinstall the dust bag after changing paper.
- Empty the dust bag frequently to maintain airflow.
- Keep motor air openings clear of dust and chips.
- After use, unplug and clean with compressed air; wipe with a clean damp cloth.
Why it matters
Using light pressure, the right grit sequence, and continuous motion prevents swirl marks, gouges, and uneven surfaces. It also reduces wear on the backing pad and helps the sander run cooler and last longer.
Last updated: February 2026
What are the parts of a sander?
A sander is made up of a motor-driven sanding pad plus controls and dust collection parts. On the Craftsman model 17227675 random orbit sander, key parts include the comfort grip handle, on/off rocker switch, variable speed dial, hook-and-loop backing pad, and the dust bag assembly with a vac adapter. See the 17227675 owner's manual for the full parts list and diagrams.
Main parts you will typically find on a sander
These are the most common assemblies across electric sanders (including random orbit models):
- Electric motor (drives the pad)
- Sanding pad or backing pad (often hook-and-loop)
- Switch and speed control (on/off switch, variable speed dial)
- Housing and handle (comfort grip areas, covers)
- Dust collection (dust bag, dust port, vac adapter)
- Power cord and strain relief
Craftsman 17227675 parts called out in the manual
The manual identifies both included items and the main operating features.
Included in the box (parts list):
| Item | What it is | What it does |
|---|---|---|
| Sander | Main tool | Provides sanding motion and power |
| Dust bag assembly | Dust bag | Collects sanding dust |
| Vac adapter (dual dust ports) | Adapter | Connects to vacuum-style dust pickup |
| 5-in. hook-and-loop sanding discs | Sandpaper discs | Attaches to the backing pad |
| Operator’s manual | Manual | Safety, setup, and operation info |
Operating features (know your sander):
- Comfort grip handle
- On/off rocker switch (sealed to help keep out dust)
- Variable speed dial (dial 1 to 6)
- Hook-and-loop backing pad (5-inch disc size)
- Dust bag assembly and vac adapter with dual dust ports
Why it matters
Knowing the main parts helps you troubleshoot faster. For example, poor dust pickup usually points to the dust bag assembly, vac adapter, or misaligned holes in the sanding disc and backing pad; speed issues often relate to the speed dial or switch.
Last updated: February 2026
How many watts is a random orbital sander?
For the Craftsman random orbital sander model 17227675, the motor is rated at 3.0 amps on 120V AC. That equals about 360 watts (watts = volts × amps). For the exact electrical rating details and safe power requirements, use the owner's manual.
How to convert amps to watts (and what you will actually see)
Most corded random orbital sanders list amps, not watts. Use this quick conversion:
- Watts (W) = Volts (V) × Amps (A)
- U.S. household outlets are typically 120V
- For model 17227675: 120V × 3.0A = 360W
Typical wattage range (for comparison)
| Sander type | Typical input power | What it means |
|---|---|---|
| Light-duty corded random orbital | 200 to 350 W | Good for small projects and lighter sanding |
| Mid-range corded random orbital | 350 to 500 W | Faster removal, better under continuous use |
| Heavy-duty/pro corded random orbital | 500 W+ | More torque and durability for demanding work |
Why wattage is not the whole performance story
Input watts tell you how much electrical power the tool uses, but sanding results depend on more than that:
- Orbits per minute (OPM): model 17227675 is variable speed 5,000 to 12,000 OPM
- Orbit diameter: 1/16-inch orbit helps reduce swirl marks
- Sandpaper grit and quality: coarse grits remove faster; fine grits finish smoother
- Dust collection: a cleaner pad and disc cut better and last longer
- Pressure and technique: pressing too hard slows the pad and can leave marks
Quick tips to match power to the job
- Use lower speed for finishing and between-coat sanding
- Use higher speed for faster material removal (with the right grit)
- Let the sander do the work; keep it flat and moving
- Empty the dust bag or connect a vacuum adapter when possible
Last updated: February 2026
How to load a CRAFTSMAN sander?
To load sandpaper on your Craftsman 17227675 power sander, unplug the tool first, then attach the correct sanding disc to the backing pad so it sits flat and centered. A properly seated disc sands evenly, reduces vibration, and helps protect the pad and brake.
Safe loading steps (recommended)
- Turn the switch OFF and unplug the sander before installing or removing sandpaper.
- Remove the old sanding disc (if installed).
- Inspect the backing pad; brush off dust and debris so the new disc sits flat.
- Center the new disc on the pad and press it down evenly across the surface.
- Tug lightly at the edge to confirm it is fully attached and not lifting.
- Clamp your workpiece before sanding so it cannot shift under the tool.
Quick checks after you load the disc
Run these checks before you start sanding a project:
| Check | What you want | Why it matters |
|---|---|---|
| Disc alignment | Disc is centered and flat | Reduces swirl marks and vibration |
| Pad condition | No heavy buildup or damage | Helps the disc grip and wear evenly |
| Brake operation | Pad stops within about 6 seconds when run off the workpiece | Helps control and safety |
Sanding tips that prevent “loaded” paper
A disc can “load up” (clog) quickly, especially on resinous wood or existing finishes. These habits keep performance consistent:
- Let the weight of the sander do the work; do not force it.
- Keep the sander moving; do not sand in one spot too long.
- Inspect the disc often and replace it when the grit is worn or clogged.
- Never use this sander for wet sanding or liquid polishing.
Why it matters
Correctly loading the sanding disc helps the Craftsman 17227675 maintain orbital speed, avoid overheating the motor, and produce a smoother finish with less rework.
For diagrams, disc type, and operating cautions specific to this model, use the 17227675 owner's manual.
Last updated: February 2026
What is a power sander?
A power sander is a motor-driven tool that quickly abrades a surface to smooth it, remove old finish, or prep for paint or stain. The Craftsman model 17227675 is a corded random orbit sander that uses hook-and-loop sanding discs and variable speed for controlled sanding.
What this means for Craftsman 17227675
Our owner's manual describes this sander as a 5-inch random orbit sander designed to reduce swirl marks while sanding.
Key model-specific points from the manual:
- Uses two 5-inch hook-and-loop sanding discs (pre-punched holes)
- Includes a dust bag assembly and a vac adapter with dual dust ports
- Runs on 120-volt, 60-Hz AC household power with a 10-ft, 2-wire power cord
- Has variable speed rated 5,000 to 12,000 OPM (orbits per minute, no-load)
- Uses random orbital action with a 1/16-inch orbit diameter
Common jobs a power sander handles
Power sanders speed up surface prep and help keep results consistent.
Typical uses:
- Smoothing rough wood and leveling raised grain
- Removing light finish or paint (with the right grit)
- Blending wood filler and patch repairs
- Scuff-sanding between coats of paint or clear finish
- Final finish sanding before staining
Quick sandpaper grit guide
| Task | Typical grit | Result |
|---|---|---|
| Fast removal | 60 to 80 | Strips material quickly |
| General smoothing | 100 to 150 | Levels and preps surfaces |
| Finish sanding | 180 to 220 | Reduces visible scratches |
Safety basics (why it matters)
A power sander removes material fast; safe setup prevents kickback, shock, and damaged work.
Follow these essentials:
- Unplug before installing or removing sandpaper, cleaning, or adjusting
- Clamp the workpiece so it cannot move
- Remove nails, screws, and staples before sanding
- Hold insulated gripping surfaces when sanding near hidden wiring
- Never use for wet sanding or liquid polishing
Last updated: February 2026