 Installation guide
 Owner’s manual
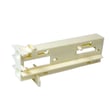



Do all Whirlpool microwaves use the same mounting bracket?
No. Whirlpool microwaves do not all use the same mounting bracket; brackets and mounting hardware are designed around the specific model, cabinet cutout, and venting/trim configuration. For the Whirlpool WOC54EC0HS02 combo unit, follow the exact mounting and vent/trim steps in the installation guide.
Why mounting brackets are not universal
Different Whirlpool microwave and combo models vary in:
- Overall chassis size and weight
- Cabinet cutout dimensions and support points
- Venting and trim pieces (upper/lower vent parts)
- Door swing clearances and required spacing
- Screw locations and frame attachment points
Using a bracket from a different model can cause poor fit, misalignment, vibration, or unsafe support.
What to do if you are replacing or reinstalling your unit
For WOC54EC0HS02, we recommend these practical checks before ordering or reusing any bracket or hardware:
- Confirm the full model number from the label (typically under the control panel area)
- Compare your cabinet cutout to the installation requirements
- Inspect the existing bracket/frame for bending, stripped holes, or missing screws
- Verify vent and trim pieces are installed as shown in the instructions
- If the unit was installed above a warming drawer, confirm whether a deflector kit is required per the instructions
Quick compatibility guide
| Situation | What usually works | What usually does not work |
|---|---|---|
| Same model (WOC54EC0HS02) reinstall | Reuse original bracket and hardware if undamaged | Mixing hardware from other models |
| Different Whirlpool model | Use the bracket specified for that model | “One-size-fits-all” brackets |
| Cabinet remodel or cutout change | Reinstall using the documented cutout and support method | Forcing the old bracket to fit a new opening |
Why it matters
The mounting bracket and frame support the appliance’s weight and keep the microwave and lower oven aligned with the cabinet. Correct mounting also helps prevent door alignment issues and reduces stress on the trim and vent components.
Last updated: February 2026
What are common issues with Whirlpool ovens?
Common issues we see with Whirlpool ovens (including the oven section of the Whirlpool WOC54EC0HS02 electric oven/microwave combo) are no-heat or weak-heat baking, uneven cooking, temperature inaccuracy, self-clean not starting, and oven light failures. Many of these trace back to a failed heating circuit, a temperature sensor problem, or a control-related issue; the owner's manual also points to setup items like preheating and rack position that can affect results.
Most common symptoms and what they usually mean
- Oven not heating or takes too long to preheat: often a failed bake element, wiring issue, or control problem.
- Food cooks unevenly: commonly rack position, bakeware airflow, or preheat habits; sometimes temperature calibration.
- Temperature seems off: the oven may need calibration, or the temperature sensor may be drifting.
- Self-clean will not run: the door is not fully closed, the cycle was not entered correctly, or another mode is active.
- Oven light not working: typically a burned-out 25-watt appliance bulb or a loose bulb cover.
Quick checks we recommend before replacing parts
- Confirm the basics: correct mode (Bake vs. Broil), correct set temperature, and allow full preheat.
- Check rack and bakeware placement: leave space around pans for airflow.
- Try a power reset: turn the breaker off for 1 minute, then back on (clears some control glitches).
- Inspect the bake element: look for blisters, cracks, or separated spots.
- If the light is out: replace the bulb (the manual lists standard 25-watt appliance bulbs and the cover removal steps).
Parts that commonly solve oven-side problems on this model
| Symptom | Common part to check | Example part on this model |
|---|---|---|
| No bake heat | Bake element | Range bake element W11545804 |
| Temperature swings or inaccurate temp | Temperature sensor | Temperature sensor W11233913 |
| Dead display or erratic operation | Control board | Range oven control board WPW10327373 |
Why it matters
An oven that is not heating correctly or is running at the wrong temperature wastes energy and ruins cooking results. Catching a weak bake element or a drifting temperature sensor early also helps prevent repeated overheating cycles that can stress wiring and electronic controls.
Last updated: February 2026
What are the symptoms of a bad oven control board Whirlpool?
On the Whirlpool WOC54EC0HS02 wall oven/microwave combo, a failing oven control board commonly shows up as a dimming or blank display, unresponsive touch controls, random beeping, error messages, or heating that will not start or runs erratically. Some “control” symptoms can also be normal sleep mode behavior described in the owner's manual.
Common symptoms you can see
- Touch panel buttons do not respond, respond intermittently, or select the wrong function
- Display flickers, dims unexpectedly, goes blank, or reboots
- Oven will not start Bake/Broil, or cancels shortly after starting
- Temperature swings (too hot, too cool) or preheat never completes
- Error messages on the display (sometimes after a power interruption)
- Cooling fan runs when it should not, or runs longer than normal after cooking
Quick checks before blaming the control board
These model-specific checks often explain “dead” or “glitchy” controls without replacing parts.
- Wake the control: the display can dim after about 2 minutes of inactivity; press Oven Power/Cancel to wake it
- Check Control Lock: if it is on, “Control Lock” shows on the screen and the oven will not operate
- Check the home power supply: a tripped breaker or blown fuse can cause a blank display or “nothing will operate”
- After a power failure, reset the clock if needed (power interruptions can trigger display messages)
- If the oven heats but is consistently off-temp, use temperature calibration (a sensor issue can mimic a control issue)
Control board vs. other parts: what the symptoms suggest
| Symptom | More likely cause | Parts to consider on this model |
|---|---|---|
| Oven heats inconsistently or overshoots | Temperature sensing problem | Temperature sensor W11233913 |
| Oven will not heat at all, no visible glow (if applicable) | Heating circuit issue | Range bake element W11545804 |
| Display/touch is erratic, functions start/stop randomly | Control board or console issue | Control/console assembly (match by model and diagram) |
Why it matters
Replacing an electronic control is one of the higher-cost repairs on a wall oven/microwave combo. Ruling out Control Lock, sleep mode, power supply issues, and a failed temperature sensor helps you fix the real cause the first time and avoid unnecessary parts.
Last updated: February 2026
Can you replace the microwave on a wall oven microwave combo?
On the Whirlpool WOC54EC0HS02 wall oven/microwave combo, the microwave is built into the combination unit, so it is not designed to be swapped out as a separate, standalone appliance. In practice, you either repair the microwave section (using serviceable parts) or replace the entire combo unit.
What you can do instead (repair the microwave section)
Many “microwave won’t run” or “microwave won’t heat” problems in a combo unit come from safety interlock and door-related components, or from high-voltage heating components.
Common repair paths include:
- Check door alignment and latch operation; a misaligned door can prevent operation.
- Test the door interlock circuit; a failed switch can stop the microwave from starting.
- Inspect the waveguide cover for burning or damage that can cause arcing.
- If the unit runs but does not heat, the magnetron circuit is a common area to diagnose.
- Verify power is properly restored after service; the display may show “PF” after reconnecting power.
Helpful parts that are available for this model include:
Quick decision guide: repair vs. replace
| Situation | Most likely best next step |
|---|---|
| Microwave will not start, door must be slammed, or it stops when the door moves | Diagnose door latch and interlock switches |
| Microwave runs (light/fan/turntable) but does not heat | Diagnose high-voltage heating circuit (often magnetron-related) |
| Repeated arcing or burning smell inside microwave cavity | Inspect/replace waveguide cover and check for cavity damage |
| Multiple major symptoms or repeated failures | Compare repair cost vs. replacing the combo unit |
Why it matters
In a built-in combo design, the microwave and oven share a cabinet, trim, and installation footprint. That integrated construction is why the microwave is typically serviced with internal replacement parts rather than replaced as a separate appliance.
Reference for model-specific handling
For safety notes, power reconnection behavior, and installation-related details that affect service access, use the installation guide.
Last updated: February 2026

