Installation guide
 Owner’s manual







How do I do a hard reset on my GE microwave?
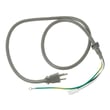
To hard reset your GE PVM9195SF1SS microwave/hood combo, disconnect power for about 1 to 2 minutes (unplug it or switch the breaker off), then restore power and reset the clock. This full power cycle clears many display glitches and “won’t start” issues caused by a power surge.
- Unplug the microwave from the wall outlet; if it’s hardwired, turn the circuit breaker off.
- Wait 1 to 2 minutes.
- Restore power.
- Set the clock and test a simple cook cycle (for example, 30 seconds with a cup of water).
- If the display is still blank, check whether the Power Saver (Zero Standby) feature is enabled.
The troubleshooting section for this model points to a few common causes you can check right away in the PVM9195SF1SS owner's manual.
- Confirm the door is fully closed and latched.
- Press Start/Pause after entering a cook selection.
- Check your home fuse or reset the circuit breaker.
- Unplug and plug back in again if you suspect a power surge.
- Make sure the 3-prong plug is fully seated in the outlet.
| What you see | Most likely cause | What to do next |
|---|---|---|
| Display is off | Power Saver (Zero Standby) is on | Toggle Power Saver, then retest |
| Panel lights but won’t run | Door not closed or Start not pressed | Close door firmly; press Start/Pause |
| Completely dead | Tripped breaker or blown fuse | Reset breaker; check outlet power |
A hard reset restores normal control operation after brief power interruptions and surges. If the microwave still will not run, the issue is usually power supply, door interlock alignment, or a control problem, and the manual’s “Before you call for service” checks help you narrow it down quickly.
Last updated: February 2026
Do all over-the-range microwaves have the same dimensions?
No. Over-the-range microwaves are built around common cabinet standards, but dimensions are not identical. For the GE PVM9195SF1SS microwave/hood combo, the installation requirements focus on fitting under a 30 to 36 inch wide cabinet space and over a range up to 36 inches wide; height and depth can still vary by model. See the installation guide for the exact fit and mounting clearances.
Most OTR microwaves are designed to align with standard upper cabinets, but manufacturers offer different profiles and capacities.
- Width is usually the most standardized (commonly around 30 inches)
- Height varies (standard-height vs low-profile designs)
- Depth varies based on door style, venting design, and capacity
- Mounting hole patterns and wall plate positions vary by model
- Clearance needs vary depending on cabinet type and cooktop setup
The installation instructions for this model family call out key constraints that help you confirm whether your space is compatible.
| Fit item | What to plan for | Why it matters |
|---|---|---|
| Cabinet width | 30 to 36 inches | Ensures the unit aligns with standard cabinet openings |
| Range width below | Up to 36 inches | The microwave is designed for ranges no wider than 36 inches |
| Mounting method | Top cabinet and wall (into at least one stud) | Prevents unsafe mounting and shifting |
Use these measurements before ordering any replacement microwave/hood combo or planning a swap.
- Measure cabinet opening width (inside-to-inside)
- Measure available height from cabinet bottom to cooktop surface
- Measure depth from the wall to the cabinet front edge (and note any trim/overhang)
- Confirm venting direction (recirculating vs outside vent) and duct location
- Check for a grounded outlet in the cabinet above the unit
Even when two OTR microwaves are both “30-inch class,” small differences in height, depth, and mounting plate layout can force cabinet modifications or leave gaps. Using the model-specific clearances from the installation guide helps you avoid fit issues and rework.
Last updated: February 2026
What is the average lifespan of a GE microwave?
A GE microwave typically lasts about 7 to 10 years with normal household use. For an over-the-range microwave/hood combo like GE PVM9195SF1SS, heavy daily cooking, poor airflow (grease buildup), and door-slam wear can shorten life, while regular cleaning and proper venting can extend it. See the PVM9195SF1SS owner's manual for care and cleaning guidance.
- Light use (reheat only, a few times a day): often 9 to 12 years
- Average use (daily cooking plus reheating): often 7 to 10 years
- Heavy use (multiple full cook cycles daily): often 5 to 8 years
- Poor maintenance (grease, blocked filters, frequent door slams): often 3 to 6 years
| Usage pattern | What wears out first | Common symptom |
|---|---|---|
| Heavy cooking | Magnetron cooling and high-voltage system | Not heating, shuts off mid-cycle |
| Frequent door use | Door interlock switches and levers | Won’t start, stops when door moves |
| Greasy venting | Ventilation system and filters | Loud vent, weak airflow, odors |
If your PVM9195SF1SS is otherwise in good shape, these are common repair paths that can restore normal operation:
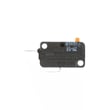
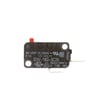
- Door won’t start or is intermittent: micro-switch WB24X830, microwave door interlock switch lever WB06X10128
- Turntable not rotating: microwave turntable motor WB26X10233
- Runs but does not heat: microwave magnetron WB27X11079 (also check related high-voltage components)
- Poor recirculating vent performance: microwave charcoal filter WB02X11544
- Keep the cavity and door area clean; grease and food debris accelerate wear
- Avoid running the microwave empty (it stresses internal components)
- Use the vent fan when cooking on the range to reduce heat and grease exposure
- Replace filters on schedule (especially in recirculating setups)
- Close the door gently to protect the interlock system
Microwaves often fail in predictable ways; knowing the typical lifespan helps you decide whether a repair (like a door switch or turntable motor) makes sense versus replacing the unit, especially once you are past the 7 to 10 year window.
Last updated: February 2026
What are common problems with GE profile microwaves?
Common problems we see on GE Profile microwave/hood combos like model PVM9195SF1SS include: the oven will not start (often power, door-closure, or interlock issues), the unit runs but does not heat (high-voltage component failures), and fan, light, or turntable problems. Use the troubleshooting section in the owner's manual to narrow the cause safely.
- Oven will not start: tripped breaker, blown house fuse, plug not fully seated, door not fully closed, or Start/Pause not pressed
- Display is off: Power Saver/Zero Standby feature may be enabled
- Runs but not heating: magnetron circuit issues (magnetron, capacitor, thermostat, wiring)
- Turntable not turning: turntable motor or coupler problems
- Intermittent starting or stopping: door interlock switch or switch lever wear
- Weak venting or loud hood fan: ventilation motor or damper issues
- Confirm the outlet has power; then fully reseat the 3-prong plug.
- Reset the home breaker or replace the home fuse if it tripped.
- Open and close the door firmly; then press Start/Pause after selecting a cook setting.
- If the display is dark, toggle the Power Saver feature per the owner's manual.
- Remove any metal twist ties or metal-handled containers; they can cause arcing and damage.
If basic checks do not resolve the problem, these model-matched parts are frequent repair items:
| Symptom | Common part to check/replace | Example part for this model |
|---|---|---|
| Won’t start, door issues | Door interlock switch | Micro-switch WB24X830 |
| Won’t start, inconsistent door sensing | Interlock switch lever | Microwave door interlock switch lever WB06X10128 |
| Runs but no heat | Magnetron thermostat | Microwave magnetron thermostat WB27X11095 |
| Runs but no heat (major component) | Magnetron | Microwave magnetron WB27X11079 |
| Turntable not turning | Turntable motor | Microwave turntable motor WB26X10233 |
Microwaves rely on door interlocks and thermal protection to prevent unsafe operation. A worn switch, misaligned latch, or overheating condition can stop the oven from starting or heating, even when the control panel looks normal.
Last updated: February 2026