
What does code 800 mean?
On a Devilbiss GBVE8000 generator, “code 800” is not a standard, universal generator fault code; it is usually a display or meter-related message (or a code specific to an add-on controller). We treat it as a symptom and confirm what the generator is doing (running, producing power, tripping a breaker) before replacing parts.
- Look at where the code appears: control panel display, hour meter, or a plug-in monitor.
- Note the exact behavior: no-start, starts then stalls, runs but no AC output, or breaker trips.
- Reset the generator: shut down, turn fuel valve off, wait 2 minutes, then restart.
- Check the AC breaker(s) and GFCI receptacles (if equipped); reset them.
- Unplug all loads and restart; then add loads back one at a time.
Even without model-specific documentation, these are the most common generator issues that show up as a “code” or abnormal display:
| Symptom | Most likely area | What we do next |
|---|---|---|
| Runs, no outlets work | Breaker/GFCI tripped, wiring issue | Reset, then inspect wiring and receptacles |
| Starts then dies | Fuel delivery or ignition | Check fuel, spark plug condition, air filter |
| Breaker trips under load | Overload or short | Reduce load, inspect cords and connected devices |
| Display acts odd | Meter/controller issue | Verify output voltage with a multimeter |
- Verify output at the receptacle with a multimeter (typical portable generators should read about 120 VAC at a 120V outlet when running normally).
- Inspect for loose, burned, or broken wires at the control panel and receptacles.
- Check the engine basics: fresh fuel, clean air filter, and a good spark plug.
For electrical testing and wiring checks, use our guide: how to use a multimeter to test electrical parts video.
“800” by itself does not tell you which part failed. Confirming whether the GBVE8000 is producing correct voltage and whether protection devices (breaker/GFCI) are tripping prevents unnecessary part replacement and helps you pinpoint whether the issue is engine-side or electrical-side.
Last updated: February 2026
Will a 8000 watt generator run a whole house?
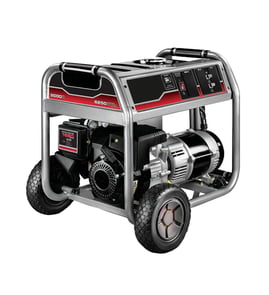
An 8,000-watt portable generator like the Devilbiss GBVE8000 can power many essential home circuits, but it typically will not run an entire all-electric house at once. It works best when you prioritize loads (refrigerator, lights, furnace blower) and avoid stacking high-wattage appliances.
Most homes can run a “critical loads” setup on 8,000 watts if you manage starting surges (especially motors).
- Refrigerator or freezer (plus startup surge)
- Sump pump or well pump (often one at a time)
- Gas furnace blower or boiler circulator pump
- Lighting circuits and outlets for phone chargers, TV, router
- Microwave or small kitchen appliances (not all at once)
These loads can exceed capacity quickly, especially if more than one runs at the same time.
- Central air conditioning (startup surge can be very high)
- Electric water heater
- Electric range/oven
- Electric dryer
- Multiple space heaters
Use running watts for steady use and plan extra headroom for motor startup.
| Item type | Typical running watts | Typical startup surge | Notes |
|---|---|---|---|
| Refrigerator/freezer | 150 to 800 | 1,200 to 2,500 | Surge varies by compressor size |
| Sump/well pump | 800 to 2,000 | 2,000 to 4,000+ | Often the biggest surge load |
| Window AC | 500 to 1,500 | 1,500 to 3,000 | Central AC is usually much higher |
| Lights + electronics | 50 to 800 | Low | Easy to support |
For home backup power, we recommend a properly installed transfer switch or interlock kit so you can select which circuits to run and prevent backfeeding.
- Choose a set of “essential circuits” to power
- Add up running watts, then account for the largest surge load
- Keep a buffer (about 15 to 25%) to avoid tripping breakers
- Start big motor loads one at a time
Overloading a generator can trip breakers, cause low voltage that damages motors and electronics, and shorten generator life. A planned essential-circuits approach gives the best results from an 8,000-watt unit.
For help identifying the right replacement parts for your Devilbiss GBVE8000 generator, use the model number to search on Sears PartsDirect.
Last updated: February 2026
What size breaker do I need for a 8000 watt generator?
For a Devilbiss GBVE8000 generator, breaker size is based on the generator’s rated output voltage and the amp rating of the connection you’re using (receptacle, inlet, cord, and transfer equipment). For an 8,000-watt class generator at 240 volts, the typical range is a 30A to 40A 2-pole breaker, matched to the lowest-rated component.
Use the first limit you hit; that becomes your maximum breaker size.
- Generator receptacle or hardwire output amp rating (nameplate or labeling)
- Inlet box and generator cord rating (commonly 30A or 50A)
- Transfer switch or interlock kit rating
- Wire gauge and run length (voltage drop and heat)
- Local electrical code requirements for generator connections
This helps you understand why 30A and 40A are common; it does not override equipment ratings.
| Assumed output | Calculation | Current |
|---|---|---|
| 240V | 8000W ÷ 240V | 33.3A |
| 120V | 8000W ÷ 120V | 66.7A |
These are common pairings used for generator inlets; always match your specific inlet, cord, and transfer equipment.
- 30A 2-pole: typically 10 AWG copper
- 40A 2-pole: typically 8 AWG copper
- 50A 2-pole: typically 6 AWG copper
An oversized breaker can fail to protect the inlet, cord, or wiring during an overload or fault. Matching the breaker to the lowest-rated component protects your generator connection and your electrical system.
To verify voltage, continuity, and safe testing steps before you select components, use how to use a multimeter to test electrical parts video.
Last updated: February 2026