- Kenmore refrigerator water filters
- Whirlpool refrigerator water filters
- Samsung refrigerator water filters
- GE refrigerator water filters
- LG refrigerator water filters
- Frigidaire refrigerator water filters
- KitchenAid refrigerator water filters
- Maytag refrigerator water filters
- Kenmore Elite refrigerator water filters
- Estate refrigerator water filters
- GE Profile refrigerator water filters
- Amana refrigerator water filters
- Bosch refrigerator water filters
- Dacor refrigerator water filters
- Electrolux refrigerator water filters
Top DIY repair help
View All Repair Categories
Appliances
Lawn & Garden
Power Tools
Home Improvement
Sports & Leisure
Heating & Cooling
Quick Links
How to replace a garage door opener safety sensor
less than a minute readMar 19Lyle Weischwill
Repair time and Difficulty
15 minutes or less
Tools Required
- Pliers
- Wire cutters
- Blue wire nuts (if crimp wire nuts aren't included)
- Safety glasses
- Work gloves
- Step ladder
This DIY repair guide explains how to replace a safety sensor on a garage door opener. The garage door opener has two sensors that prevent the garage door from closing on a person or object: one that sends an infrared beam and one that receives the beam. If an object or person is in the way of the beam, the closing door reverses direction. If a safety sensor stops working, the remote control won't work and the motor unit lights blink when you press the remote.
Our garage door opener safety sensor troubleshooting video can help you confirm a problem with the safety sensor. If you determine the safety sensors have failed, replace the sensors using the manufacturer-approved garage door opener part.
Follow the steps in this repair guide and video to replace garage door safety sensors in Craftsman, Chamberlain, LiftMaster and Genie garage door openers.
Instructions
- 1. Disconnect the power
Use a step ladder to access the garage door opener’s power cord and motor unit. Unplug the garage door opener.

PHOTO: Unplug the garage door opener.
- 2. Remove the sensors
Remove the wing nut from the safety sensor.
Pull the sensor from the bracket.
Cut the wires about an inch from the safety sensor, leaving enough slack in the control wire to connect the new sensor.
Repeat the process for the other safety sensor.
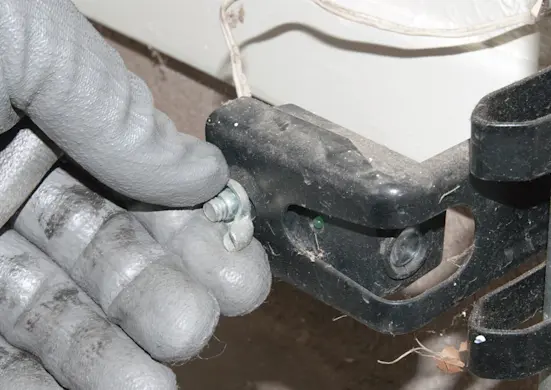
PHOTO: Remove the wing nut from the safety sensor.
- 3. Connect the new safety sensor wires
Separate the control wires on the new sensor.
Connect the black-striped control wire to the black-striped safety sensor wire using the crimp wire nut.
Connect the solid white wires the same way.
Repeat the process for the other safety sensor.
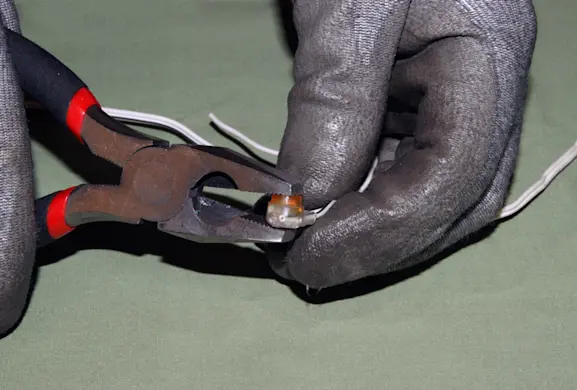
PHOTO: Connect the safety sensor wires. Tip: If you're not using the crimp wire nuts that come with the new safety sensors, strip 1/2-inch of insulation from each wire and connect the wires using wire nuts.
- 4. Install the new safety sensors
Slide the safety sensor into its bracket and secure it with the wire nut.
Repeat the process for the other safety sensor.
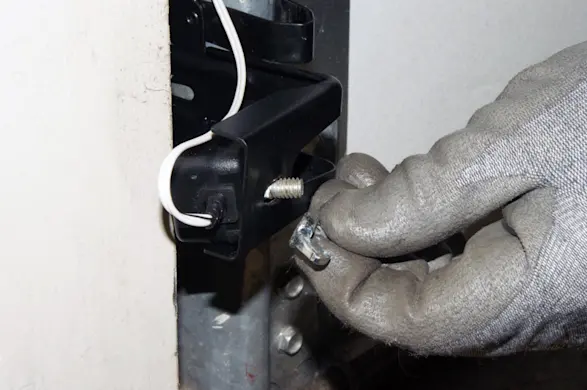
PHOTO: Install the new safety sensors.
- 5. Reconnect electrical power
Plug in the garage door opener.
- 6. Line up the safety sensors
Align the safety sensors so the green indicator light on the receiving sensor glows steadily.
- 7. Test the safety sensor
Open the garage door.
Place a box or similar object between the safety sensors to block the sensing beam.
Attempt to close the garage door using a remote.
The door should stay open and the motor unit lights should blink.
If the garage door opener closes the door with the safety sensors blocked, replace the logic board.
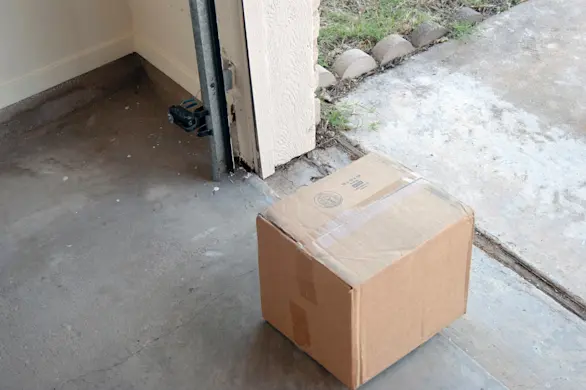
PHOTO: Test the safety sensor.