- Kenmore refrigerator water filters
- Whirlpool refrigerator water filters
- Samsung refrigerator water filters
- GE refrigerator water filters
- LG refrigerator water filters
- Frigidaire refrigerator water filters
- KitchenAid refrigerator water filters
- Maytag refrigerator water filters
- Kenmore Elite refrigerator water filters
- Estate refrigerator water filters
- GE Profile refrigerator water filters
- Amana refrigerator water filters
- Bosch refrigerator water filters
- Dacor refrigerator water filters
- Electrolux refrigerator water filters
How to replace a dishwasher drain pump
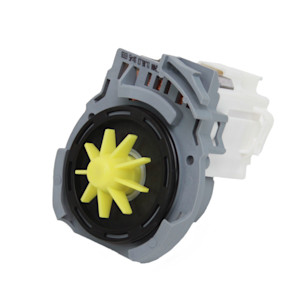
This dishwasher repair guide gives step-by-step instructions on how to replace the dishwasher drain pump. If the moving parts of the pump are damaged, the dishwasher might not drain, even if the pump runs and the drain path is clear. Or the pump motor could be the problem if the pump doesn’t run at all during the drain cycle. In these situations, replace the drain pump with the manufacturer-approved dishwasher part.
These instructions are for Kenmore, Whirlpool, KitchenAid Maytag, JennAir and Amana dishwashers. The same basic procedure can be used to replace the drain pump in some GE, Frigidaire, Electrolux, Samsung and LG dishwashers.
Quick links
Video
Instructions
Tools required
Nut driver set
Slot screwdriver
Rinse aid (to lubricate seals)
Channel-lock pliers
Towel
Work gloves
Repair difficulty
Time required
30 minutes or less
Repair difficulty
Time required
30 minutes or less
How to replace a dishwasher drain pump video.
Replacing a dishwasher drain pump video.
Instructions
- 01.
Shut off electrical power
Unplug the dishwasher or shut off the house circuit breaker for the dishwasher.
To verify that power is disconnected, make sure the control panel doesn’t light up when you press a control button or the power button.
- 02.
Remove the outer door panel and control panel
Remove the Torx screws from the inner door panel, supporting the outer door panel with one hand as you remove the final 2 screws so the outer door panel doesn't fall.
Separate the outer door panel and control panel from the inner door panel, and let the outer panel rest on the floor while you disconnect the user interface control wire harness from the control panel.
Pull off the outer door panel and control panel.
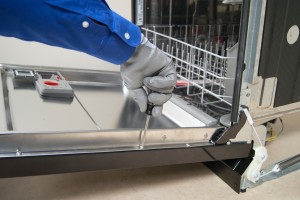
PHOTO: Remove the outer door panel.
- 03.
Remove the bottom front access panel and toe panel
Using a nut driver, remove the screws that hold the bottom front access panel and toe panel in place.
Pull the access panel and the toe panel forward and remove them.
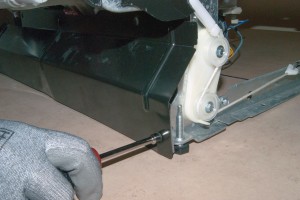
PHOTO: Remove the toe panel.
- 04.
Remove the drain pump
Lay a towel under the drain pump to catch water.
Reach under the dishwasher and squeeze the wire hose clamp that holds the drain hose on the drain pump—use channel-lock pliers if necessary.
Pull the drain hose off the drain pump.
Remove the wire harness from the drain pump.
Press down on the locking tab and then rotate the pump 1/4 turn counterclockwise to pull it out of the sump.
Remove the towel.
Tip: If you can't access the drain hose and pump with the access panel and toe panel removed, pull the dishwasher out from under the counter. Refer to the installation manual for your dishwasher as a guide.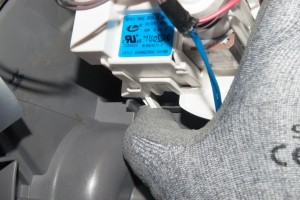
PHOTO: Remove the drain pump.
- 05.
Install the new drain pump
Lubricate the O-ring water seal on the new drain pump with a light coat of rinse aid to prevent leaks.
Insert the new drain pump in the sump opening and then rotate it 1/4 turn clockwise so the locking tab snaps into place.
Plug the wire harness into the receptacle on the drain pump.
Reinstall the drain hose on the outlet of the drain pump. Use the wire clamp to secure the drain hose on the drain pump outlet.
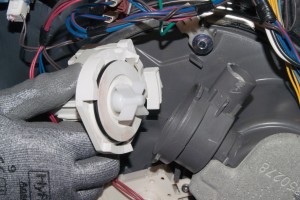
PHOTO: Install the new drain pump.
- 06.
Reinstall the bottom front access panel and toe panel
Position the toe panel on the dishwasher and then position the access panel in front of the toe panel. Insert the mounting screws and tighten the screws firmly.
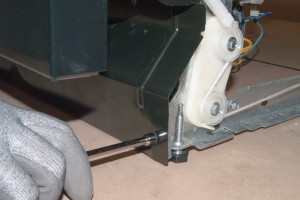
PHOTO: Reinstall the toe panel.
- 07.
Reinstall the outer door panel and control panel
Position the outer door panel and control panel close enough to the inner door so you can reconnect the user interface control wire harness.
Reconnect the user interface control wire harness and attach the outer door panel and control panel to the inner door panel.
Reinstall the mounting screws.
Tip: Use the longer screws to secure the control panel.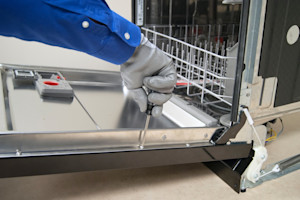
PHOTO: Reinstall the outer door panel.
- 08.
Restore electrical power
Reset the house circuit breaker or plug in the dishwasher to restore electrical power.
Warning: Undertaking repairs to appliances can be hazardous. Use the proper tools and safety equipment noted in the guide and follow all instructions. Do not proceed until you are confident that you understand all of the steps and are capable of completing the repair. Some repairs should only be performed by a qualified technician.
Most common symptoms to help you fix your dishwashers
Choose a symptom to see related dishwasher repairs.
Main causes: broken door spring, damaged or broken door hinge…
Main causes: damaged or stuck spray arm, leaking door seal, damaged door hinge, leaky heating element water seal, cracke…
Main causes: broken door latch, tripped circuit breaker, broken heating element, faulty vent fan, sensor failure, contro…
Main causes: improper loading, low water temperature, improper detergent dosage, detergent dispenser failure, spray arm …
Main causes: clogged kitchen sink drain, clogged drain hose, drain check valve damaged, drain pump failure, control syst…
Main cause: damaged rack height adjuster…
Main causes: glass or popcorn kernel stuck in the chopper blade, drain line vibrating against the cabinet, debris in was…
Main causes: not using rinse aid, rinse aid dispenser failure, broken heating element, malfunctioning vent, drying fan f…
Main causes: light switch beside the sink turned off, lack of power, bad dishwasher door switch, control system failure,…
Most common repair guides to help fix your dishwashers
These step-by-step repair guides will help you safely fix what’s broken on your dishwasher.
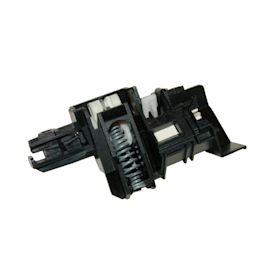
How to replace a dishwasher door latch assembly
If the dishwasher door doesn't click shut, a broken door latch is a likely cause. Follow these instructions to replace i…
Repair difficulty
Time required
30 minutes or less
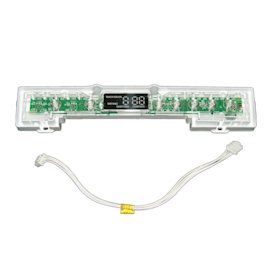
How to replace a dishwasher user interface control
The user interface control houses the selection buttons and display. If it fails, you can't select the cycle and setting…
Repair difficulty
Time required
30 minutes or less
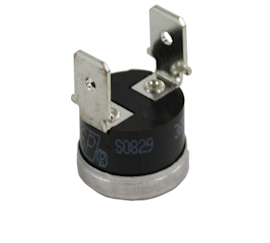
How to replace a dishwasher thermal fuse
A completely dead control panel often indicates that the thermal fuse on the electronic control board is blown; follow t…
Repair difficulty
Time required
15 minutes or less
Effective articles & videos to help repair your dishwashers
Use the advice and tips in these articles and videos to get the most out of your dishwasher.

Get tips on completing essential holiday cleaning tasks to brighten your home.…

Learn about all the convenient features on our Sears PartsDirect website that make your parts purchases easier.…

Get answers to frequently asked questions about Sears and Sears PartsDirect.…
