- Kenmore refrigerator water filters
- Whirlpool refrigerator water filters
- Samsung refrigerator water filters
- GE refrigerator water filters
- LG refrigerator water filters
- Frigidaire refrigerator water filters
- KitchenAid refrigerator water filters
- Maytag refrigerator water filters
- Kenmore Elite refrigerator water filters
- Estate refrigerator water filters
- GE Profile refrigerator water filters
- Amana refrigerator water filters
- Bosch refrigerator water filters
- Dacor refrigerator water filters
- Electrolux refrigerator water filters
Top DIY repair help
View All Repair Categories
Appliances
Lawn & Garden
Power Tools
Home Improvement
Sports & Leisure
Heating & Cooling

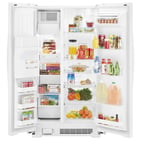
Hoover Side-by-side refrigerator Parts — Browse All Models
Hoover has been manufacturing top-quality side-by-side refrigerators for many years. Hoover side-by-side refrigerators offer convenient storage features and dependable cooling systems. When your Hoover side-by-side refrigerator breaks down, trust Sears PartsDirect to have the repair parts you need to get your refrigerator going again quickly.

 Error Codes
Frequently bought Hoover parts

Washer Pulley And Thrust Bearing Kit
In Stock
$48.93
11% OFF Phone Price : $54.93

Qty


Dryer Drum Front Glide Kit
Part #LA-1006
This item is not returnable
In Stock
$19.50
9% OFF Phone Price : $21.50
Qty

Refrigerator Door Closer
Part #61003647
This item is not returnable
In Stock
$5.90
52% OFF Was : $12.41
Qty

Dryer Lint Screen Housing
In Stock
$121.34
9% OFF Phone Price : $133.34
Qty

Refrigerator Light Switch
Part #61003254
Replaced by #W11396033
Manufacturer substitution
This part replaces 61003254. Substitute parts can look different from the original.
In Stock
$25.91
19% OFF Phone Price : $31.91
Qty

Refrigerator Seal
Part #61003832
Replaced by #WP854334
Manufacturer substitution
This part replaces 61003832. Substitute parts can look different from the original.
In Stock
$11.17
15% OFF Phone Price : $13.17
Qty
Popular maintenance items for Side-By-Side Refrigerators

Refrigerator Uv Filter Dryer
In Stock
$22.16
21% OFF Phone Price : $28.16
Qty


Ge Profile Refrigerator Temperature Sensor
In Stock
$22.74
21% OFF Phone Price : $28.74
Qty

Ice Maker Assembly - Refrigerator Ice Maker By Whirlpool
In Stock
$115.43
9% OFF Phone Price : $127.43
Qty

G.e. Refrigerator Water Filter
In Stock
$61.75
9% OFF Phone Price : $67.75
Qty

G.e. Refrigerator Ice Maker Kit
In Stock
$247.78
5% OFF Phone Price : $259.78
Qty
Replacing the water inlet valve in your Hoover side-by-side refrigerator
- Safely store any food that could deteriorate while the refrigerator is shut off. Then unplug the refrigerator or shut off the circuit breaker for the refrigerator. Close the water supply cut-off valve for the ice maker. The valve is often on the wall behind the refrigerator, but could be attached to a water pipe under the kitchen sink or in the basement below the fridge.
- Pull the refrigerator away from the wall far enough so you can access the water line connection and work on the back of the refrigerator. Place a towel under the water valve assembly to catch water. Loosen the nut on the supply water line until the water line is free.
- Use a Phillips screwdriver to remove the screws that secure the lower service panel on the back of the refrigerator. Remove the panel. Remove the screw that secures the mounting bracket to the frame of the refrigerator. Press the back of the locking tab on the wire harness to release the tab. Pull the wire harness plug off the valve. Remove the black plastic C-clip from the collar of the water line connection. Push the collar in and simultaneously pull the water line from the inlet water valve assembly.
- Push the water line into the fitting on the new water valve assembly. Reinstall the C-clip on the collar of the fitting. Push the wire harness plug back onto the spades of the water valve assembly. Push the plug in until the locking tabs snap into place. Position the bracket of the new valve assembly so that the mounting holes line up. Reinstall the mounting screw and tighten firmly. Position the lower service panel on the back of the refrigerator so that the screw holes line up. Insert the screws and tighten firmly.
- Wrap a small amount of pipe thread tape around the water supply line fitting on the back of the water valve. Fit the water line into the water valve assembly and tighten the compression nut firmly. Open the water supply cut-off valve. If the fitting leaks, tighten the compression nut and check again. Plug in the refrigerator or turn on the house circuit breaker to restore power.
Replacing a compressor start relay in a Hoover refrigerator
- Unplug the power cord from the wall outlet.
- Pull the refrigerator away from the wall. Remove the screws from the rear compartment cover and then remove the cover.
- Pry off the wire retainer holding the start relay on the compressor. Disconnect the wire harness from the start relay. Pull the start relay and run capacitor off the compressor.
- Transfer the run capacitor from the old start relay to the new start relay. Plug the new start relay with capacitor into the compressor terminals. Plug the wire harness into the new start relay. Reinstall the wire retainer to hold the start relay on the compressor.
- Position the rear compartment cover on the back of the refrigerator and reinstall the mounting screws.
- Plug in the refrigerator and push the refrigerator back into place.
Parts & More
Bottom-Mount Refrigerator
Chest Freezer
Electric Cooktop
Front-Engine Lawn Tractor
Garbage Disposal
Gas Chainsaw
Gas Leaf Blower
Gas Line Trimmer
Lawn & Garden Engine
Range/Microwave Combo
Reciprocating Saw
Refrigerator
Top-Mount Refrigerator
Treadmill
Wet/Dry Vacuum