 Installation guide
 Owner’s manual
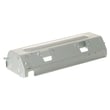
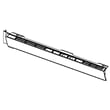
What is F3 shorted key panel?
On the GE PVM9195SF3SS microwave/hood combo, an F3 shorted key panel message means the touchpad is sensing a stuck or shorted key, so the control thinks a button is being pressed continuously. A power reset can clear it temporarily, but recurring F3 usually points to a failing touchpad or control panel.
What to do first (safe reset and quick checks)
- Unplug the microwave (or switch off the breaker) for at least 60 seconds, then restore power.
- Wipe the control panel with a slightly damp cloth, then dry thoroughly; avoid sprays and excess water.
- If the panel is locked, press and hold CANCEL/OFF for about 3 seconds to unlock controls.
- Press each key once to confirm none feel physically stuck.
- If F3 returns quickly, plan on a control panel or keypad-related repair.
Likely causes and the most common fix
F3 is almost always caused by a keypad circuit problem (moisture intrusion, worn membrane, or an internal short). On this model, the most common repair is replacing the control panel assembly.
If the display and keys act erratically along with F3, a control board issue can also be involved.
Parts that commonly relate to control issues
| Symptom with F3 | Most likely area | Example part on this model page |
|---|---|---|
| Keys beep or act “pressed” by themselves | Touchpad/control panel | Microwave control panel assembly (stainless) WB56X20716 |
| Random behavior, dead display, or repeated faults | Main control electronics | Microwave power control board WB56X20629 |
Why it matters
A shorted key can make the microwave start, stop, or change settings unexpectedly. Clearing the error restores normal operation only if the short was temporary (for example, moisture on the keypad). If it keeps coming back, replacing the failing control interface prevents repeat shutdowns and nuisance beeping.
Where to confirm feature and control details
For control lock, button functions, and cleaning guidance that helps prevent keypad damage, use the PVM9195SF3SS owner's manual.
Last updated: February 2026
Is GE Profile considered high end?
Yes. GE Profile is generally considered GE’s higher-end line; it typically adds more premium finishes, more features, and upgraded design compared with standard GE models. For your GE PVM9195SF3SS microwave/hood combo, “Profile” positioning mainly shows up in styling and feature set rather than changing basic installation requirements.
What “high end” usually means for GE Profile
GE Profile products commonly emphasize a step-up experience in a few areas:
- More feature options (sensor cooking, convenience presets, stronger venting options)
- More premium exterior finishes and trim details (often stainless)
- More electronic controls and display features
- More model-to-model variation in parts like control panels and door assemblies
What to check on your PVM9195SF3SS specifically
For the most accurate picture of what your unit includes, we recommend confirming the feature list and operating details in the PVM9195SF3SS owner’s manual.
Here are quick, practical indicators that you are in a “premium feature” tier:
- Sensor cooking modes and automatic time/temperature adjustments
- Multi-speed vent fan and cooktop lighting options
- More complex control interface (keypad, display, control board)
- Higher-cost assemblies when replacing cosmetic or electronic parts
Example: parts that often reflect a “premium” build
| Area | Example part on this model | What it suggests |
|---|---|---|
| Controls | Microwave power control board WB56X20629 | More advanced electronics and functions |
| Appearance | Door assembly (stainless) WB56X26003 | Premium finish and higher-cost assembly |
| User interface | Microwave control panel assembly (stainless) WB56X20716 | Model-specific styling and controls |
Why it matters
Knowing GE Profile is a higher-end line helps set expectations for repair costs and part selection. For example, electronic components (like a control board) and stainless door or control panel assemblies can cost more, and matching the exact model number (PVM9195SF3SS) is important for fit and appearance.
Last updated: February 2026
What is the average lifespan of a GE microwave?
A GE microwave typically lasts about 9 to 10 years with normal household use. For your GE PVM9195SF3SS microwave/hood combo, regular cleaning, good ventilation, and fixing small issues early (like door switch problems) helps you reach that expected lifespan.
Typical lifespan and what affects it
Most over-the-range microwaves wear out from heat, grease, and heavy daily use. The biggest factors are:
- Daily run time (reheating all day shortens life)
- Vent fan use while cooking on the range (reduces heat buildup)
- Grease and steam exposure (can affect the control panel and internal cooling)
- Door slamming or misalignment (stresses interlock switches)
- Power quality (surges can damage the control board)
Quick care tips that extend life
These habits reduce stress on the magnetron, control board, and door system:
- Run the hood fan when cooking on the stovetop to limit heat soak.
- Keep the cavity and door seals clean; wipe splatters before they carbonize.
- Do not run the microwave empty; it can overheat internal components.
- Use microwave-safe containers and avoid metal to prevent arcing.
- If the door feels loose or the unit stops when you open or close the door, address it promptly.
Common “wear” parts vs. “end of life” parts
| Symptom | Often related to | What it usually means |
|---|---|---|
| Unit runs but does not heat | Magnetron, high-voltage components | Major heating-system wear |
| Dead display or random resets | Control board | Electrical failure or surge damage |
| Starts then stops, or will not start with door closed | Door interlock switches/lever | Common, repairable door-safety issue |
| Loud hum or vibration | Turntable motor/coupler, fan | Mechanical wear, often repairable |
If you are seeing door-related start/stop issues on PVM9195SF3SS, the door interlock system is a common place to check, including the micro-switch WB24X830 and the microwave door interlock switch lever WB06X10128.
Why it matters
Knowing the typical lifespan helps you decide whether to repair or replace. If your microwave is near the 9 to 10 year mark and needs a high-cost repair (like a control board), comparing repair cost to replacement value is usually the smartest next step.
For model-specific use and care guidance (including cleaning and troubleshooting), use the owner's manual.
Last updated: February 2026
What are common problems with GE Profile microwaves?
Common problems we see with GE Profile over-the-range microwaves like model PVM9195SF3SS include not starting, running but not heating, arcing or burn marks inside the cavity, and vent or turntable issues. Many “no start” complaints trace back to power supply, door interlock, or control problems.
Most common symptoms (and what they usually point to)
- Microwave will not start: house breaker/fuse, power surge, plug not fully seated, door not fully closed, or a control setting such as Power Saver/Zero Standby.
- Control panel lights up but won’t run: door not closing securely, Start/Pause not pressed, or a door interlock issue.
- Runs but does not heat: high-voltage system problem (magnetron circuit, transformer, controls) or an overheat condition.
- Burn marks or arcing inside: metal/foil contact, wire ties, or damaged interior surfaces; arcing can also lead to overheating.
- Turntable not rotating: failed motor or coupler, or the tray not seated correctly.
- Vent fan loud or weak: ventilation motor or damper issue; grease buildup can also restrict airflow.
Quick checks we recommend first
- Reset power: unplug for 60 seconds, then plug back in.
- Confirm the door closes firmly and latches cleanly.
- Check your home breaker or fuse and reset/replace if needed.
- Remove any metal (foil, twist ties, metal-handled containers) before testing.
- If the display is off, check whether Power Saver/Zero Standby is enabled.
Parts that commonly solve these issues on PVM9195SF3SS
| Symptom | Common part to check | Example part on this model |
|---|---|---|
| Won’t start or intermittent start | Door interlock switches and lever | Micro-switch WB24X830, microwave door interlock switch lever WB06X10128 |
| Runs but no heat | High-voltage components and controls | Microwave magnetron WB27X11079, microwave high-voltage transformer WB27X10910, microwave power control board WB56X20629 |
| Turntable not turning | Turntable drive components | Microwave turntable motor WB26X10233, microwave turntable motor coupler WB06X10815 |
Why it matters
Microwaves rely on door interlocks and thermostats to prevent unsafe operation. If you see arcing, burn marks, or repeated breaker trips, stop using the unit until the cause is corrected to prevent further damage.
For model-specific operating and troubleshooting steps, use the owner's manual and the installation guide.
Last updated: February 2026


