




How long do Jenn-Air wall ovens last?
Most Jenn-Air wall ovens last 15 years. For the Jenn-Air JMW3430IL03 wall oven/microwave combo, that same 15-year lifespan is the right expectation when the oven is installed correctly, kept clean, and cooling airflow is not blocked.
Typical lifespan and what affects it
A wall oven’s life is usually determined by heat stress on electronics, door wear, and how hard the unit is worked (high-temp roasting, self-clean frequency, and long bake times).
- Typical lifespan: 15 years
- Heavy use (daily high heat, frequent self-clean): closer to 12 to 15 years
- Light to moderate use: often 15 years or longer
- Biggest life-shorteners: restricted ventilation, repeated overheating, power surges
What to do to reach (or beat) 15 years
These are the highest-impact habits for a built-in wall oven/microwave combo like model JMW3430IL03.
- Keep vents and intake areas clear so heat can escape
- Wipe spills promptly to prevent baked-on residue and smoke
- Avoid slamming the door; it stresses hinges and latches
- Use self-clean only when needed; high heat accelerates wear
- If the unit overheats, address cooling issues early (fan, airflow, installation clearances)
Parts that commonly influence longevity
If you are troubleshooting heat, shutdowns, or inconsistent performance, these parts are often involved.
| Symptom | Common area | Example part for JMW3430IL03 |
|---|---|---|
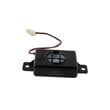
| Oven shuts off or overheats | Cooling and safety limit | Assembly, cooling fan W11344874 |
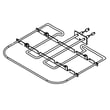
| Oven not heating properly | Heating circuit | Range bake element W11545804 |
| Microwave runs but does not heat | High-voltage system | Magnetron W11346197 |
Why it matters
A 15-year wall oven lifespan is realistic, but only if heat is managed. Overheating is the fastest way to shorten the life of control boards, wiring, and safety thermostats, and it can turn a small repair into a major one.
Last updated: January 2026
How to reset Jenn-Air wall oven?
To reset the Jenn-Air wall oven/microwave combo model JMW3430IL03, we recommend doing a full power reset at the breaker for 1 minute, then restoring power and starting a bake cycle. This clears many temporary control glitches and helps confirm normal operation.
Quick reset steps (breaker reset)
- Turn OFF the circuit breaker(s) that supply the wall oven.
- Wait 1 full minute.
- Turn the breaker(s) ON.
- Start a Bake cycle.
- Watch the display for about 1 minute to confirm the error does not return.
If the reset does not fix the problem
A reset helps when the electronic control is “stuck”, but it will not correct a failed part or a wiring issue. These checks narrow it down:
- If the display is blank or the unit seems dead, check the house breaker and power supply first.
- If the oven heats inconsistently or trips an error after warming up, inspect overheating protection and cooling airflow.
- If the control panel is unresponsive or keeps showing the same error, the control or keypad assembly may be the cause.
- If the microwave side will not run, door interlock problems are common.
| Symptom after reset | Most likely area to check | Example part for this model |
|---|---|---|
| No response, random behavior, repeated control errors | Control electronics | Electronic control board WPW10260060 |
| Microwave will not start, acts like door is open | Door interlock circuit | Microwave door switch W10211972 |
| Shuts down when hot, fan noise changes, overheating | Cooling and high-limit protection | Assembly, cooling fan W11344874 or range high-limit thermostat WP4449751 |
Why it matters
Resetting power is the fastest way to clear a temporary software or communication fault in the electronic control board. Running a short bake cycle right after the reset confirms the oven can energize safely and that the error is not immediately repeating.
Last updated: January 2026
How to calibrate a Jenn-Air wall oven?
To calibrate the oven temperature on your Jenn-Air JMW3430IL03 wall oven/microwave combo, use the control panel’s oven temperature offset (calibration) setting to raise or lower the displayed temperature so baking matches a reliable oven thermometer.
Before you calibrate
- Use an oven-safe thermometer placed in the center of the upper oven rack.
- Preheat at least 20 to 30 minutes before checking temperature.
- Check temperature in 3 cycles (preheat, then two additional cycles) and average the readings.
- Calibrate only after confirming the oven is fully preheating and cycling normally.
- If the oven is not heating at all, troubleshoot heating parts first instead of calibrating.
Typical calibration steps (most Jenn-Air wall ovens)
On many Jenn-Air electronic controls, calibration is done through an “offset” setting in Settings/Options.
- Open Settings (or Options) on the control panel.
- Find Oven calibration, Temperature offset, or Temp adjust.
- Adjust the offset up or down in small increments.
- Save/confirm the setting, then retest with the thermometer.
Common offset ranges
| What you see | What to do | Typical adjustment |
|---|---|---|
| Oven runs cool | Increase the offset | +10°F to +20°F |
| Oven runs hot | Decrease the offset | -10°F to -20°F |
| Temps vary widely | Do not calibrate yet | Diagnose heating/circulation |
If calibration does not fix the problem
Calibration only corrects a consistent “always hot” or “always cool” condition. If temperatures swing a lot, food browns unevenly, or preheat is slow, a component issue is more likely.
Check these common causes:
- Weak or damaged bake element (upper oven): consider the range bake element W11545804.
- Poor air movement in convection modes: inspect the convection fan blade and motor area.
- Overheating or shutdown behavior: cooling airflow and safety devices can be involved.
- Control problems (wrong cycling): the electronic control may be a factor.
Why it matters
Correct calibration helps prevent underbaked centers, overbrowned tops, and long cook times. It also reduces the temptation to “guess” temperatures, which is especially important for baking and roasting.
Last updated: January 2026
Where is the model number on a Jenn-Air wall oven?
On a Jenn-Air wall oven (including the JMW3430IL03 wall oven/microwave combo), the model number is typically printed on a rating label around the oven door opening. We most often see it on the frame behind the door, along the left or right side, or along the top edge of the opening.
Most common places to check
Look for a paper or metal rating label in these spots:
- Oven door frame (front frame behind the door), left or right side
- Top edge of the oven opening (visible when the door is open)
- Bottom edge of the oven opening (near the hinge area)
- Inside the storage or trim area just below the oven door (on some wall ovens)
- For combo units, also check the microwave door frame area (upper cavity)
What the label looks like (and what to write down)
The rating label usually includes several identifiers. We recommend copying all of these exactly:
- Model number (example format: JMW3430IL03)
- Serial number
- Electrical ratings (volts and amps)
- Sometimes a manufacturing code or date code
| Label item | Why it matters when ordering parts |
|---|---|
| Model number | Ensures diagrams and parts match your exact build |
| Serial number | Helps confirm production variation within the same model |
| Electrical rating | Helps match components like fuses, thermostats, and control boards |
Why it matters
Jenn-Air wall oven/microwave combos can have small production changes that affect fit and wiring. Using the exact model number from the rating label helps us match the correct parts the first time, especially for electrical items like a fuse, control board, or door switch.
If you are troubleshooting while you are there
If you are checking the label because the unit is not heating or not powering on, these model-matched parts are commonly involved:
Last updated: January 2026

