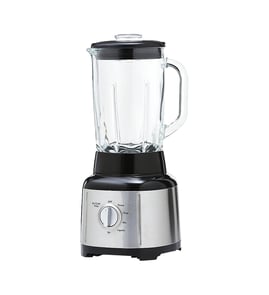

Why is my KitchenAid blender leaking?
A KitchenAid KSB5-3 blender usually leaks because the jar-to-blade seal is worn, the blade assembly is loose, or the sealing surfaces have residue that prevents a tight seal. In most cases, cleaning and reseating the seal fixes it; otherwise, replace the seal or blade assembly.
Quick checks that fix most leaks
- Unplug the blender and remove the jar from the base.
- Check that the jar is not cracked and the bottom threads are not stripped.
- Disassemble the bottom (collar and blade area), then wash and dry all mating surfaces.
- Reassemble snugly; do not overtighten (overtightening can distort the seal).
- If the leak only happens with hot liquids, let contents cool slightly before blending.
Parts that commonly cause leaks on the KSB5-3
If cleaning and proper assembly do not stop the leak, these parts are the most likely culprits:
- Seal WP9704204 (flattened, nicked, or hardened)
- Blender dome and blade assembly WP9704291 (worn sealing surface or damage)
- Collar WP9704253 (cross-threaded or not tightening evenly)
Symptom-to-cause guide
| What you see | Most likely cause | What to do |
|---|---|---|
| Drips from under the jar bottom | Seal not seated or worn | Clean and reseat; replace seal WP9704204 |
| Leak starts only when blending | Blade assembly loosening from vibration | Reassemble snugly; inspect collar WP9704253 |
| Slow seep even when sitting | Hairline jar crack or damaged sealing surface | Inspect jar; consider blender dome and blade assembly WP9704291 |
Why it matters
A small leak can let liquid reach the drive area and base, which can lead to slipping, odors, and electrical damage over time. Fixing the seal early helps protect the motor and keeps blending performance consistent.
Last updated: February 2026
Can I put my KitchenAid blender in the dishwasher?
For the KitchenAid KSB5-3 blender, most removable, non-electrical pieces (like the jar, lid, and some blade assemblies) are typically dishwasher-safe, but the motor base and any electrical parts must never go in the dishwasher. For the safest approach, hand-wash the blade area and keep water away from the base.
What you can dishwasher (and what you should not)
- Never dishwasher: motor base, controls, power cord, and anything with wiring
- Usually dishwasher-safe (top rack preferred): jar/pitcher and lid
- Often better hand-washed: blade assembly and sealing surfaces (to protect sharp edges and prevent leaks)
If your blender is leaking after cleaning, the sealing surfaces are the first place to check; the jar seal can get nicked or mis-seated.
Quick cleaning method (no dishwasher needed)
- Fill the jar halfway with warm water.
- Add 1 to 2 drops of dish soap.
- Run on low for 10 to 20 seconds.
- Rinse and air-dry completely.
Helpful do’s and don’ts
- Do unplug before cleaning.
- Do keep the underside of the jar and the drive area dry.
- Do remove and rinse food residue right away.
- Don’t submerge the base.
- Don’t use abrasive pads on plastic parts.
Parts that commonly affect cleaning and leaks
If you notice seepage at the bottom of the jar after washing, these parts are the usual suspects:
| Symptom | Most likely area | What to inspect/replace |
|---|---|---|
| Drips under jar | Jar seal | Look for cracks or flattening on the seal WP9704204 |
| Grinding or slipping | Drive connection | Check wear on the blender drive coupling WP9704230 |
| Leaks around blade base | Blade assembly seating | Inspect the blender dome and blade assembly WP9704291 for damage |
Why it matters
Dishwashers use high heat and strong detergents; that can shorten the life of seals and dull blades over time. Keeping the motor base dry also prevents electrical damage and intermittent power issues.
Last updated: February 2026
How to disassemble a KitchenAid blender blade?
To disassemble the blade on a KitchenAid KSB5-3 blender, remove the jar from the base, protect your hands, then loosen the retaining nut on the underside of the blade assembly. Many KitchenAid blade retaining nuts are reverse-threaded, so you typically turn it clockwise to loosen.
Safety first (sharp blades and glass)
- Unplug the blender base before you start.
- Wear cut-resistant gloves or wrap the blade with a thick towel.
- Work over a towel to prevent the jar from slipping.
- Keep track of small parts so the seal goes back in the same order.
Step-by-step: blade assembly disassembly
- Remove the jar from the motor base and empty it.
- Turn the jar upside down.
- Hold the blade assembly firmly (use a towel for grip).
- Loosen the retaining nut or wing nut on the bottom of the blade assembly.
- If it is reverse-threaded, turn clockwise to loosen.
- Lift out the blade assembly and separate the gasket/seal.
Parts you may need if it leaks or won’t tighten
If you’re taking the blade apart because of leaking, wobble, or poor blending, these are the most common wear items for the KSB5-3:
| Symptom | Most likely wear item | What it affects |
|---|---|---|
| Leaks under the jar | Seal WP9704204 | Keeps liquid from escaping around the blade base |
| Blade assembly feels loose or noisy | Blender drive coupling WP9704230 | Transfers motor power to the blade assembly |
| Blade is damaged or won’t spin smoothly | Blender dome and blade assembly WP9704291 | Complete cutting and bearing assembly |
Why it matters
The seal and coupling are designed to wear before the motor does. Replacing a worn seal or drive coupling often fixes leaks and slipping without needing a full blender replacement.
Last updated: February 2026