


Are KitchenAid blenders lifetime warranty?
KitchenAid blenders, including model KSB4028CU0, are not covered by a lifetime warranty. For this blender type, the warranty is typically a limited multi-year warranty (commonly 5 years from the purchase date), and coverage depends on your exact model and proof of purchase.
Most KitchenAid blender warranties are limited and focus on defects in materials or workmanship under normal household use.
Common warranty requirements:
- Keep your dated receipt or order confirmation
- Use the blender for normal household blending (not commercial use)
- Follow basic care (don’t run the motor with an empty jar, don’t force frozen loads)
- Use the correct jar and lid so the drive system engages properly
Many “warranty-like” complaints are actually wear, impact damage, or a jar-to-base engagement issue. For KSB4028CU0, these parts are often involved:
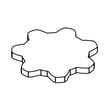
- Blender drive coupling W11627528 (stripped, cracked, or slipping)
- Jar assembly W11433178 (leaks, won’t seat, blade/jar issues)
- Lid assembly W11752211 (poor seal, lid fit problems)
| Symptom | Most likely area | What to look for |
|---|---|---|
| Motor runs but blades don’t spin | Drive connection | Coupling rounded off or slipping |
| Leaking from jar | Jar assembly | Worn seal, jar damage, blade base issue |
| Excess vibration or rattling | Jar seating or coupling | Jar not fully seated, damaged coupling |
| No power or dead controls | Electrical/control | Outlet, cord, control board, motor |
A “lifetime warranty” would cover the product indefinitely, but most blender coverage is time-limited. Knowing that helps you decide whether to pursue warranty service, replace a wear item like the coupling, or replace a major component like the motor.
Last updated: February 2026
Does KitchenAid sell replacement parts?
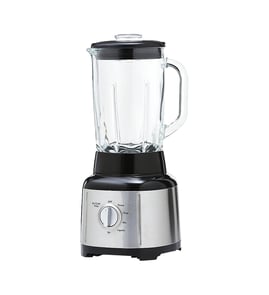
Yes. For your KitchenAid blender model KSB4028CU0, KitchenAid sells replacement parts and accessories, and we also carry model-matched parts so you can repair common wear items (like couplers, lids, and jar components) and keep the blender running smoothly.
Here are examples of parts we list for this model that customers replace most often:
- Blender drive coupling W11627528 (connects the motor drive to the jar assembly)
- Jar assembly W11433178 (complete jar and blade assembly, depending on configuration)
- Lid assembly W11752211 (helps prevent leaks and supports safe blending)
- Electronic control W11580224 (controls speeds and functions)
- Motor W11433014 (drives the blade through the coupling)
We recommend matching by model number KSB4028CU0 first, then confirming the part name and ID.
| What you’re replacing | What to check first | Typical symptom |
|---|---|---|
| Drive coupling | Coupler wear, cracking, stripped teeth | Motor runs but blades do not spin well |
| Jar assembly | Jar fit, leaks, blade performance | Leaks, poor blending, wobble |
| Lid assembly | Seal condition, lid fit | Drips or splatter during blending |
| Electronic control | Button response, power behavior | Dead panel, erratic operation |
Using model-matched KitchenAid parts helps restore proper fit and performance. On blenders, small issues like a worn drive coupling can look like a motor problem, so replacing the correct wear part first can save time and cost.
Last updated: February 2026
How do I tell which KitchenAid model I have?
To identify your KitchenAid blender model, we look for the model number on the rating label, then match it to the parts list. For this page, the model is KSB4028CU0; confirming the label ensures you order the correct jar, lid, or drive parts.
Most KitchenAid blenders place the rating label in one of these spots:
- On the underside of the blender base (flip the base carefully)
- On the back of the base near the power cord
- On the bottom edge of the base, close to the rubber feet
- Occasionally inside a recessed area on the base
Before you move the blender, unplug it and remove the jar assembly.
Once you find the label, match the full model number exactly (letters and numbers) to the model you are shopping.
| What you see on the label | What it means | What to do next |
|---|---|---|
| Model number (example: KSB4028CU0) | Identifies the exact blender version | Use it to select compatible parts |
| Serial number | Production identifier | Keep it for service records |
| Electrical ratings (V/Hz/A) | Power requirements | Use for outlet and troubleshooting checks |
These are the most common reasons customers land on the wrong KitchenAid parts list:
- Confusing the series name with the model number
- Missing the last digit or suffix (for example, leaving off the final character)
- Reading a character wrong (O vs 0, I vs 1)
- Using the jar marking instead of the base label
KitchenAid blenders can look similar across versions, but parts like the jar, lid, and drive coupling can differ by model. Matching the model number first helps ensure fit, performance, and safe operation.
If your label matches KSB4028CU0, these are examples of model-specific parts you can shop with confidence:
Last updated: February 2026
How to disassemble a KitchenAid blender blade?
On the KitchenAid KSB4028CU0 blender, we disassemble the blade only as part of a jar or drive repair; the blade area is extremely sharp and can be reverse-threaded on some designs. Unplug the blender, remove the jar, and work from the bottom of the jar with cut-resistant gloves.
- Unplug the blender base from the outlet.
- Remove the jar from the base and empty it.
- Wear cut-resistant gloves; the blade edges can slice even when stationary.
- Use a towel or rubber pad to grip parts without slipping.
- Keep small hardware together so nothing falls into the motor base.
- Turn the jar upside down on a towel.
- Look for a retaining nut or ring at the bottom of the jar (under the blade shaft).
- If you see a “wing nut” style retainer, try loosening it in the opposite direction of normal (many are reverse-threaded): turn clockwise to loosen.
- Lift off the retainer, then remove the blade assembly and seals/gaskets in order.
- Reassemble in the same order; tighten snugly but do not over-tighten.
If the blade area is seized, leaking, or wobbling, forcing it can crack the jar or strip threads. For KSB4028CU0, these common replacements usually solve the problem:
| Symptom | Most likely fix | Part to consider |
|---|---|---|
| Jar leaks from bottom | Worn seal or damaged jar base | Jar assembly W11433178 |
| Loud grinding, jar not driving | Worn drive interface | Blender drive coupling W11627528 |
| Coupler area won’t stay seated | Missing/damaged plug | Plug, coupler W11486757 |
Correct blade disassembly prevents leaks, stripped threads, and motor strain. A worn jar assembly or drive coupling can mimic “blade problems” even when the blade itself is fine.
Last updated: February 2026
How to put pan guard on KitchenAid hand blender?
A pan guard is an accessory for certain KitchenAid hand blenders, not for the KitchenAid KSB4028CU0 countertop blender. If you are working with a hand blender, the pan guard typically snaps onto the blending arm using mounting clips; for KSB4028CU0, focus on jar, lid, and drive-coupling fit instead.
- Confirm the appliance type: hand blender vs. KSB4028CU0 blender base
- Unplug the appliance before attaching or removing any accessory
- Let hot cookware cool slightly so the guard does not soften or warp
- Inspect clips for cracks or food buildup that can prevent a full snap-on
- Set the pan guard on a stable, flat surface.
- Angle the blending arm into one side of the mounting clip.
- Pull the opposite mounting clip outward slightly.
- Press the blending arm down until both clips snap and hold firmly.
- Tug gently to confirm it is locked and does not rotate freely.
On the KSB4028CU0, “guard” issues are usually about the jar and lid seating correctly or the drive coupling engaging the jar assembly.
- If the jar wobbles or does not drive the blades, check the blender drive coupling W11627528 for wear or rounding
- If the lid will not seal or sits unevenly, inspect the lid assembly W11752211 for distortion or torn sealing surfaces
- If the jar will not lock or leaks from damage, the jar assembly W11433178 is the correct replacement
| What you notice | Most likely cause | What to do |
|---|---|---|
| Accessory will not snap on | Clips misaligned or dirty | Re-align, clean clips, snap on evenly |
| Guard feels loose | Worn clips | Replace the guard (hand blender accessory) |
| Jar spins but blades do not | Worn drive coupling | Replace drive coupling |
| Lid pops up or leaks | Lid not seated or damaged | Reseat or replace lid |
A properly attached guard (hand blender) helps protect cookware and reduces splatter. On the KSB4028CU0 blender, correct jar, lid, and coupling engagement prevents leaks, poor blending, and premature wear on the motor drive.
Last updated: February 2026
Is the KitchenAid KSB4028CU0 blender dishwasher-safe?
Some parts of the KitchenAid KSB4028CU0 blender are typically dishwasher-safe, but the motor base is not. For the safest results, we recommend hand-washing the lid and jar components unless your specific jar and lid are marked dishwasher-safe.
- Never put the motor base in the dishwasher or submerge it in water.
- The jar and lid are often dishwasher-safe on many blenders, but confirm by checking for dishwasher-safe markings.
- If you are replacing worn components, matching the correct part helps ensure proper fit and sealing.
| Component | Dishwasher-safe? | Best practice |
|---|---|---|
| Motor base | No | Wipe with a damp cloth; dry immediately |
| Jar | Usually (varies by version) | Top rack if labeled safe; otherwise hand-wash |
| Lid | Usually (varies) | Hand-wash to protect seals and fit |
| Drive coupling area | No (base area) | Keep water out of the coupling and motor area |
- Unplug the blender before cleaning.
- Rinse the jar right after use to prevent residue from hardening.
- For stuck-on food, fill the jar halfway with warm water and a drop of dish soap, then run a short blend cycle and rinse.
- Hand-wash the lid to help prevent warping and leaks.
- Wipe the base with a lightly damp cloth; avoid letting liquid run into the controls.
Dishwashers use heat and strong detergents that can shorten the life of seals and plastic parts. Keeping water out of the drive area also helps prevent slipping, noise, and premature wear of the coupling.
If you are seeing leaks, poor blending, or slipping at the bottom drive area, these parts are commonly involved:
Last updated: February 2026
What is the color of the year for the KitchenAid KSB4028CU0 blender?
KitchenAid’s 2023 Color of the Year is Hibiscus, a bold fuchsia shade. For the KitchenAid KSB4028CU0 blender specifically, “Color of the Year” is a brand-wide color theme, not a built-in feature of the model; your blender’s actual color depends on the base and trim version.
We recommend matching your blender’s base color to the correct cosmetic base part option for KSB4028CU0.
- Check the color name on your purchase receipt or product listing (if available)
- Compare your base color to the listed base color options
- If your blender was repaired before, the base color may have been changed
- Use the model number KSB4028CU0 when ordering to avoid mismatches
| What you see on the blender | Matching part name (example) | Part ID |
|---|---|---|
| Matte black base | Upper Base (matte Black) | W11287120 |
| White base | Upper Base (white) | W11287121 |
| Red base | Upper Base (passion Red) | W11245953 |
| Blue-toned base | Upper Base (matte Vintage Blue) | W11287123 |
Color-themed releases like Hibiscus are usually tied to specific retail bundles and finishes. When you order replacement cosmetic parts (like an upper base), choosing the correct color part keeps your KitchenAid blender looking consistent after a repair.
If you are refreshing the look or replacing worn components, these model-matched parts are commonly replaced together:
- Upper base (matte black) W11287120 (cosmetic outer base cover)
- Upper base (white) W11287121 (cosmetic outer base cover)
- Upper base (passion red) W11245953 (cosmetic outer base cover)
- Jar assembly W11433178 (jar and blade assembly as a complete unit)
Last updated: February 2026
What is the most common problem with the KitchenAid mixer?
On the KitchenAid KSB4028CU0 blender, the most common problems we see are drive and jar-related: the motor runs but the blade does not spin, the jar leaks, or the lid will not seal. These issues usually trace to a worn coupling, a damaged jar assembly, or a loose fastener.
- Motor sounds normal but contents do not blend
- Burning smell or the blender stops under load
- Jar leaks from the bottom or around the seal
- Excess vibration, rattling, or a jar that will not seat firmly
- Lid fit problems or splashing during blending
In a blender, power transfers from the motor to the jar through the drive coupling. If that coupling strips or cracks, the motor can run while the blade stalls. Leaks and poor performance often come from wear or damage in the jar assembly.
| Symptom | Most likely cause | What we recommend |
|---|---|---|
| Motor runs, blade does not spin | Worn drive coupling | Inspect and replace the blender drive coupling W11627528 |
| Leaking jar or poor blending | Worn or damaged jar components | Replace the jar assembly W11433178 |
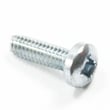
| Rattling or loose base feel | Loose screw or mounting hardware | Check and tighten; replace a stripped screw WP3395530 |
| Stops under heavy load | Overload from thick mixtures | Reduce batch size; add liquid; pulse instead of continuous |
- Unplug the blender; remove the jar and look for rounded, cracked, or missing drive tabs on the coupling.
- Confirm the jar is fully seated and locked (if your jar design uses a lock-in position).
- Try blending with more liquid and smaller batches to prevent overload.
- If you hear grinding at the jar-to-base connection, stop and inspect the coupling and jar bottom.
Running the KSB4028CU0 with a slipping coupling or damaged jar can quickly worsen wear, reduce blending performance, and increase the chance of leaks or overheating.
Last updated: February 2026
Why is my KitchenAid blender leaking at the bottom?
A KitchenAid KSB4028CU0 blender usually leaks at the bottom when the jar is not sealing correctly to the base, the jar assembly is worn or cracked, or the drive area is damaged. Start by reseating and tightening the jar, then inspect the jar bottom and coupling area for wear.
- Unplug the blender and remove the jar.
- Wash and dry the jar base and the top of the motor base; residue can prevent a tight seal.
- Reinstall the jar and fully lock it in place (a partially seated jar can drip).
- Check for hairline cracks around the jar bottom and lower collar.
- If the leak only happens while blending, reduce fill level and avoid hot liquids that can force seepage.
If the jar is leaking from the underside (not from the lid), these parts are the most likely suspects.
| Leak location | Most likely cause | What to do |
|---|---|---|
| Under jar bottom | Jar assembly seal area worn or cracked | Replace the jar assembly W11433178 |
| Center drive area | Coupling worn, stripped, or not engaging smoothly | Inspect and replace the blender drive coupling W11627528 |
| Base area after a drop | Jar or collar damage | Replace jar; stop using if cracked |
- Fill the jar halfway with cool water.
- Set the jar on a dry paper towel for 2 to 3 minutes without running the blender.
- If it drips while sitting, the jar assembly is leaking.
- If it only leaks while running, check for overfilling, foamy mixtures, or a worn coupling that causes vibration.
A bottom leak can let liquid reach the motor base and electronic control, which can cause corrosion, slipping, or intermittent operation. Fixing the seal or replacing the leaking component protects the motor and keeps blending performance consistent.
Last updated: February 2026