

How much oil goes in a hydro gear transmission?
Most Hydro-Gear hydrostatic transmissions take about 2 to 3 quarts (64 to 96 oz) of hydrostatic oil, but the correct fill for your Hydro-Gear 336-0510 depends on whether you are doing a full dry fill, a drain and refill, or a purge after service. Use the fill level method (not “just a quantity”) to avoid overfilling.
How to fill it correctly (what we recommend)
- Park on a level surface and let the unit cool.
- Clean around the fill port so dirt cannot enter the transaxle.
- Add oil slowly, pausing to let it settle.
- Purge air from the system (air pockets can make the level drop after cycling).
- Recheck the level and top off only as needed.
Typical oil capacity ranges (quick reference)
These ranges are common for Hydro-Gear style transaxles used on riding mowers and tractors.
| Service situation | Typical amount added | Why it varies |
|---|---|---|
| Drain and refill | ~1.5 to 2.5 quarts | Some oil stays trapped in the case |
| Dry fill (rebuilt/empty) | ~2 to 3 quarts | All cavities start empty |
| After purge/top-off | A few ounces | Air removal changes the level |
What to check if the level seems “wrong”
- Foamy oil: usually overfilled or aerated; let it sit, then recheck.
- Whining or weak drive: often low oil or air in the system; purge and recheck.
- Oil pushing out the vent: commonly overfill or overheating.
- Slow response forward/reverse: linkage issue or internal wear; inspect the control linkage.
Why it matters
Correct oil level protects the pump and motor, keeps the transaxle from overheating, and prevents drive problems like slipping, surging, or loss of power under load.
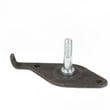
If you are servicing linkage or hardware while you are in this area, common drivetrain-related items on this model include the bypass arm 583234201 and control arm 583090101.
Last updated: February 2026
What fluid goes in a hydro gear transaxle?
For the Hydro-Gear transaxle model 336-0510, we use 20W-50 full synthetic hydrostatic transmission fluid. Using the correct viscosity helps maintain proper pump lubrication, smooth drive response, and consistent performance as the transaxle heats up.
What to use (and what to avoid)
Use a high-quality 20W-50 full synthetic hydrostatic transmission fluid that is intended for hydrostatic drives.
Avoid these common mistakes:
- Mixing different fluid types or viscosities
- Using automatic transmission fluid (ATF) unless your specific transaxle documentation explicitly calls for it
- Using straight hydraulic oil that is not rated for hydrostatic transaxle use
- Overfilling (it can cause foaming and weak drive)
Quick checklist before you add or change fluid
- Park on a level surface and let the unit cool.
- Clean around the fill area so dirt cannot enter the case.
- Use a clean funnel and a sealed container of fluid.
- After service, purge air from the system per your mower or tractor procedure.
- Recheck for leaks around seals, fittings, and the case.
Parts that often get inspected during hydro drive service
Fluid issues often show up as weak drive, inconsistent speed, or poor braking. While you are servicing the drivetrain, these related components are commonly checked for looseness or damage:
| Symptom | Common area to inspect | Example part on this model page |
|---|---|---|
| Jerky engagement or inconsistent control | Linkage and control hardware | Control arm 583090101 |
| Unit will not freewheel correctly | Bypass mechanism | Bypass arm 583234201 |
| Poor stopping or dragging | Brake linkage | Brake arm 583090201 |
Why it matters
Hydrostatic transaxles rely on fluid not just for lubrication, but also for power transfer. The wrong fluid can thin out when hot, aerate, or reduce internal sealing, which leads to sluggish drive and accelerated wear.
Last updated: February 2026
How long do hydrostatic transmissions last?
Most hydrostatic transmissions in riding mowers and tractors last about 1,000 to 2,000 operating hours with normal use and regular maintenance. For the Hydro-Gear 336-0510 transaxle, lifespan depends most on fluid condition, cooling, and avoiding overloads on hills.
Typical lifespan ranges (what to expect)
Hydrostatic drive life is usually measured in hours, not years.
- Light residential use: ~800 to 1,200 hours
- Average residential use: ~1,000 to 2,000 hours
- Heavy use or poor maintenance: ~500 to 1,000 hours
- Best-case (clean fluid, good cooling, gentle operation): 2,000+ hours
What shortens hydrostatic transmission life
These are the most common causes of early wear in a Hydro-Gear transaxle like the 336-0510:
- Overheating from clogged cooling fins or debris buildup
- Old, contaminated, or low hydrostatic fluid
- Towing or pushing loads beyond the mower’s rating
- Long hill climbs at low ground speed (high heat load)
- Driving with the bypass partially engaged
- Linkage/brake issues that keep the unit dragging
Quick checks when performance starts dropping
If you notice weak drive, slow speed, or loss of power after warm-up, check these items first:
- Verify the bypass linkage moves fully; inspect the bypass arm 583234201
- Inspect control linkage for binding or looseness; check the control arm 583090101
- Confirm the brake releases fully; inspect the brake arm 583090201
- Look for broken or stretched return hardware; check the lawn mower extension spring 583090601
Symptoms and likely causes
| Symptom | Most common cause | What to do first |
|---|---|---|
| Drives fine cold, weak when hot | Overheating or worn pump/motor | Clean cooling areas; reduce load; inspect linkage |
| Won’t roll in neutral | Bypass not fully engaged | Inspect/adjust bypass arm and linkage |
| Creeps or surges | Control linkage wear or binding | Inspect control arm, pivots, and return spring |
| Poor stopping or drag | Brake arm misadjusted or sticking | Inspect brake arm movement and adjustment |
Why it matters
A hydrostatic transmission that runs hot or drags against the brake wears internal surfaces faster, which reduces torque and speed. Keeping the linkage, bypass, and brake mechanisms working smoothly helps the 336-0510 deliver consistent drive and reach its normal hour range.
Last updated: February 2026
What is the equivalent oil to a hydro gear transaxle?
For the Hydro-Gear 336-0510 Hydro-Gear transaxle, the equivalent oil is the exact fluid type specified for the transaxle family and service design (sealed vs serviceable). Use the correct Hydro-Gear-approved hydrostatic fluid or oil spec for your unit; do not guess by viscosity alone.
How we recommend choosing the correct fluid
Use these checks before you buy or fill:
- Confirm whether the transaxle is sealed (non-serviceable) or has a fill port and vent
- Identify the transaxle series or build code on the tag; fluid specs are tied to that identifier
- Match the required fluid type (hydrostatic fluid vs motor-oil type fill) exactly
- If you are changing fluid, drain completely; do not mix different fluid types
- After service, purge air from the drive per the normal hydrostatic purge procedure (air causes whining and weak drive)
Typical “equivalent fluid” categories (what they mean)
These are the common categories customers compare; the right choice is the one that matches your transaxle’s required spec.
| Fluid category | What it is | When it’s used | What to avoid |
|---|---|---|---|
| Hydrostatic transmission fluid | Purpose-made hydrostatic/hydraulic fluid | Many hydrostatic transaxles that call for dedicated hydrostatic fluid | “Universal” hydraulic oil that does not meet the required spec |
| Motor-oil type fill | Engine-oil viscosity range specified by the transaxle maker | Some serviceable Hydro-Gear units designed around motor-oil type fill | Picking a viscosity because it is popular rather than specified |
| ATF | Automatic transmission fluid | Only on units that explicitly call for ATF | Treating ATF as a universal substitute |
Why it matters
Hydrostatic drives depend on the correct viscosity and additive package for pump and motor sealing. The wrong fluid causes weak drive, overheating, noise, and accelerated wear.
Drivetrain parts to check if drive feels weak or drags
Mechanical drag can mimic a fluid problem:
- Bypass arm 583234201 (disengages drive for pushing and service)
- Control arm 583090101 (affects speed and direction response)
- Brake arm 583090201 (dragging brakes reduce power and build heat)
Last updated: February 2026