Owner’s manual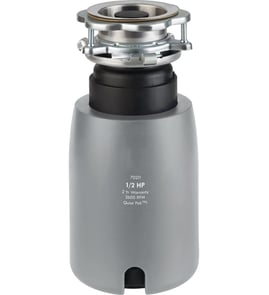


Is there a reset button on a GE garbage disposal?
Yes. GE garbage disposals such as model GFC530V typically have a built-in reset button (usually a small red button) on the bottom of the disposer; if it trips, you press it back in after clearing the cause. See the GFC530V owner's manual for the exact location and reset steps.
The reset button is a safety overload protector. It trips when the motor overheats or jams, cutting power to prevent damage.
Common places to look:
- On the underside of the disposer housing
- Near the center of the bottom plate
- Close to the wiring cover area
Before you press reset, make sure the jam or overload is handled.
- Turn the wall switch OFF.
- Unplug the disposer (or turn OFF the breaker).
- Look into the sink opening with a flashlight; remove any visible obstruction.
- Press the reset button firmly until it clicks or feels seated.
- Restore power and test with cold water running.
Repeated trips usually mean a jam, a failing internal component, or a drain issue that is loading the motor.
- Something hard is stuck (bone, fruit pit, utensil)
- The disposer was run without enough water
- The unit is overheating from frequent use
- The discharge connection is restricted or leaking
| Symptom | Likely issue | Part to inspect |
|---|---|---|
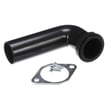
| Water backs up or drains slowly | Outlet connection problem | Outlet flang WC14X20160 |
| Sink flange area leaks | Worn gasket or loose mount | Garbage disposal sink flange gasket WC03X10008 |
| Stopper missing or not sealing | Worn or lost stopper | Garbage disposal drain stopper WC11X20163 |
Resetting without clearing the jam can cause repeated overheating and nuisance trips. Clearing the obstruction first helps protect the motor and keeps your GE GFC530V garbage disposal running smoothly.
Last updated: January 2026
How to unjam a GE garbage disposal?
To unjam your GE GFC530V garbage disposal, we shut off power first, free the jam by manually turning the disposer from underneath (or by rocking the impellers from above with a tool), then press the reset button and test with cold water.
- Turn off power at the wall switch and the breaker (or unplug the disposer if it’s corded).
- Look down the sink opening with a flashlight; remove visible debris using tongs or pliers (not your hand).
- Free the jam:
- If your unit has a hex socket on the bottom: insert a 1/4-inch Allen wrench and work it back and forth until it turns freely.
- If there’s no hex socket: insert a wooden spoon handle from the top and gently rock the impellers to loosen the obstruction.
- Press the red reset button on the bottom of the disposer (if it popped).
- Run cold water, then turn the disposer on for 10 to 20 seconds to flush out loosened debris.
- Confirm the breaker is on and the switch is working.
- Make sure the reset button stays engaged after pressing.
- Check for a hard obstruction wedged between the impellers and grind ring.
- If the disposer leaks at the sink opening after the jam is cleared, inspect the mounting and sealing parts.
If you notice leaking, wobble, or poor sealing after clearing a jam, these model-related parts are common suspects:
| Symptom | Common area | Example part for this model |
|---|---|---|
| Water around sink flange | Sink opening seal | Garbage disposal sink flange gasket WC03X10008 |
| Drips at sink opening or loose mount | Mounting/flange | Garbage disposal sink flange WC15X20161 |
| Water backs up in sink | Drain opening | Garbage disposal drain stopper WC11X20163 |
A jammed disposer can overheat and trip the internal overload. Clearing the obstruction and restoring free rotation before restarting helps prevent repeat trips, motor strain, and leaks at the sink flange.
For model-specific diagrams and safety notes, use the GFC530V manual.
Last updated: January 2026
How to shop for garbage disposals?
When shopping for a garbage disposal, we match the unit to your kitchen setup and how you cook: motor power (HP), noise level, mounting style, and dishwasher compatibility. For GE model GFC530V, use the GFC530V owner's manual to confirm fit and connection details before you buy.
- Motor size (HP): Light use typically fits 1/3 to 1/2 HP; frequent cooking and tougher scraps fit 3/4 to 1 HP.
- Noise reduction: Look for insulated housings and anti-vibration mounts if your sink area echoes.
- Grind components: Stainless steel grind parts resist corrosion and hold up longer.
- Mounting style: Many disposals use a 3-bolt mount; confirm your sink flange and mounting ring style.
- Dishwasher inlet: If you connect a dishwasher, confirm the disposal has an inlet and that the knockout plug can be removed.
- Drain connection: Verify discharge tube alignment to your trap and drain line.
| What you are checking | What to look for | Why it matters |
|---|---|---|
| Sink opening and mount | Existing sink flange and support ring style | Prevents leaks and mounting issues |
| Electrical | Corded vs hardwired, switch location | Avoids unsafe wiring changes |
| Plumbing | Outlet position and pipe size | Reduces strain and leaks |
| Dishwasher | Inlet present and knockout removable | Prevents dishwasher backup |
If you are seeing leaks, wobble, or a poor seal, these common mounting and drain parts are worth checking while you shop:
- Garbage disposal sink flange WC15X20161 (mounting surface at the sink)
- Garbage disposal sink flange gasket WC03X10008 (seal between flange and sink)
- Garbage disposal support ring WC05X10002 (helps secure the mount)
- Outlet flang WC14X20160 (discharge connection component)
Choosing the right horsepower and confirming mount and drain compatibility prevents the most common problems after installation: leaks at the sink flange, vibration noise, slow draining, and dishwasher water backing up into the sink.
Last updated: January 2026