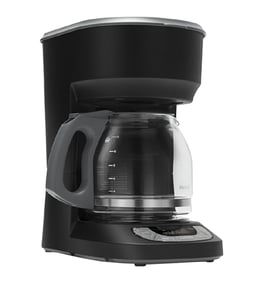



How do I find the model number on my JJB6424HL0?
The model number for your Jenn-Air coffee maker is printed on the appliance’s rating label. On built-in and countertop coffee makers, that label is most often found around the door opening, behind the front panel, or on the side or rear of the cabinet.
Where to look first
Check these common spots in this order:
- Inside the door opening, along the frame edge
- Behind the drip tray area or lower access panel
- On the side wall of the cabinet (left or right)
- On the back panel (if accessible)
- On the underside of a removable cover panel
What the label looks like
Most rating labels include several identifiers. Use the model number for parts lookup.
| Label item | What it’s used for | Example format |
|---|---|---|
| Model number | Correct parts and diagrams | JJB6424HL0 |
| Serial number | Production run tracking | Letters and numbers |
| Electrical ratings | Power requirements | Volts/amps |
Tips to avoid ordering the wrong part
- Match the model number exactly, including all letters and digits
- If the label is worn, take a clear photo and zoom in
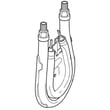
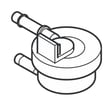
- Use the model number when selecting parts like a carafe W11363131 or coffee maker infusion assembly W11686740
Why it matters
Jenn-Air coffee maker parts can vary by revision even when units look identical. Using JJB6424HL0 ensures the right fit for components such as the pump, heater, switches, and seals.
Last updated: March 2026
How do I troubleshoot my JJB6424HL0?
To troubleshoot your Jenn-Air coffee maker model JJB6424HL0, start with the basics: confirm power, check for water flow restrictions, and look for leaks. Most issues trace to scale buildup, a blocked brew path, a failing heater, or a weak pump.
Quick checks (fastest wins)
- Verify the outlet has power and the unit is fully seated/connected
- Empty and reseat the carafe and drip area so sensors can detect them
- Run a water-only cycle to confirm flow and listen for the pump
- Inspect for drips under the unit (leaks often point to a seal issue)
- Descale the machine if brewing is slow or temperature is low
Symptom-based troubleshooting
| Problem | Most likely causes | What to do next |
|---|---|---|
| Won’t power on | Outlet, switch, control | Check power, then test the switch W11363128 |
| Brews slowly or stops | Scale, restricted tubing, weak pump | Descale, inspect tubing W11363614 for kinks or blockage |
| Leaks water | Worn seals, loose fittings | Inspect and replace the o-ring W11363551 if damaged |
| Coffee not hot | Heater issue, scale | Descale; if still cool, check heater circuit |
When a part test makes sense
If you have a multimeter and basic repair skills:
- Unplug the coffee maker before accessing internal components
- Check switches for continuity when pressed
- Inspect wiring connectors for heat damage or looseness
For safe electrical testing technique, use our how to use a multimeter to test electrical parts video.
Why it matters
Troubleshooting in a simple order prevents unnecessary part replacement and helps you pinpoint whether the issue is maintenance (descaling, cleaning) or a failed component (switch, tubing, seal).
Last updated: March 2026
What is the average lifespan of JJB6424HL0?
The average lifespan of a Jenn-Air coffee maker like model JJB6424HL0 is 5 years with normal home use. Regular descaling, keeping water lines clear, and replacing worn seals helps you reach that typical service life.
What affects lifespan the most
These factors have the biggest impact on how long a coffee maker lasts:
- Hard water scale buildup in the heater and tubing
- Daily brew volume (more cycles equals more wear)
- Heat stress on electrical controls and switches
- Leaks that damage wiring or electronics
- Lack of routine cleaning of the brew path
Parts that commonly wear first
If performance drops before 5 years, these are frequent culprits:
- Water seals and leak points such as the o-ring W11363551 and seal W10661107
- Water movement components like the pump and valves
- Heating components (slow heat, lukewarm coffee)
| Symptom | Common wear area | What to check |
|---|---|---|
| Slow brewing | Scale or weak pump | Tubing, pump, valves |
| Leaking | Seals and fittings | O-rings, seals, connections |
| Not heating | Heater circuit | Heater, wiring, controls |
Why it matters
Knowing the typical 5-year lifespan helps you decide whether to maintain, repair, or replace. Small fixes like replacing a leaking seal can prevent bigger failures such as control damage.
Last updated: March 2026