Installation guide
 Owner’s manual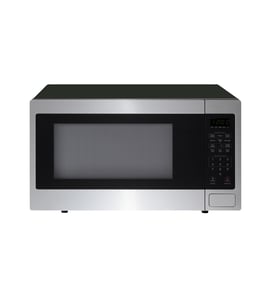

Are all Whirlpool microwaves the same size?
No. Whirlpool microwaves come in multiple sizes and cutout formats, so they are not all the same. Even within countertop models like Whirlpool UMC5225DW0, exterior width, height, depth, and interior capacity vary by series and whether the unit is used as countertop-only or with an optional trim kit (built-in look).
What sizes you’ll commonly see
Microwave sizing varies by type (countertop, over-the-range, built-in). For Whirlpool countertop units, interior capacity often falls in a mid-range, but the exterior dimensions still differ enough that you should match the exact model when replacing or fitting into a space.
Typical ranges you’ll run into:
- Interior capacity: about 1.0 to 2.0+ cu. ft. (many are 1.2 to 1.6 cu. ft.)
- Common cabinet/trim widths: 24 in., 27 in., 30 in. (varies by kit and installation)
- Depth: often ~20 to 25 in. with the door closed (deeper with the door open)
Model-specific fit notes for UMC5225DW0
Whirlpool UMC5225DW0 is a countertop microwave, and Whirlpool also lists trim kit sizes that create a built-in appearance. The manual shows trim kit size options of 27 in. and 30 in., which is a key reminder that “same brand” does not mean “same opening.” Check the exact cutout and clearance requirements in the UMC5225DW0 owner’s manual before planning cabinetry or replacement.
Trim kit sizing (from the manual)
| Built-in trim kit size | What it affects | Why it matters |
|---|---|---|
| 27 in. | Finished opening width | Determines whether it fits your cabinet run |
| 30 in. | Finished opening width | Prevents gaps, binding doors, and ventilation issues |
Why it matters
Microwaves need the right clearances for ventilation and safe operation. A unit that is “close” in size can still cause door interference, poor airflow, or an improper trim fit.
Quick checklist before you buy or install
- Confirm your microwave type (countertop vs built-in vs over-the-range)
- Measure the space (width, height, depth) and note nearby cabinets
- If using a trim kit, match the kit size to your opening (27 in. or 30 in.)
- Verify the turntable parts fit your exact model (tray and support ring vary)
- Order model-correct replacement parts from the parts list for UMC5225DW0, or search by model on Sears PartsDirect
Last updated: February 2026
How to replace a lightbulb in a whirlpool microwave?
To replace the light bulb in your Whirlpool UMC5225DW0 countertop microwave, unplug the power cord first, then remove the light lens/cover (typically held by a Phillips screw), swap in the correct replacement bulb, and reinstall the cover before restoring power. Use the UMC5225DW0 owner's manual for the exact bulb access location and bulb type.
Safety first (important)
Microwaves store high voltage energy internally; we keep this job limited to the light cover and bulb only.
- Unplug the microwave before starting.
- Let the bulb cool completely if it was recently on.
- Do not remove the outer cabinet or internal panels.
- Do not touch the glass of a halogen bulb with bare fingers (use a clean cloth).
- If the lens is cracked or melted, replace it before using the microwave.
Step-by-step: replacing the bulb
- Disconnect power: Unplug the unit.
- Access the light lens: Locate the light lens/cover (commonly on the bottom or side of the cavity area, depending on design).
- Remove the lens: Take out the Phillips screw(s) and lower the lens.
- Remove the old bulb: Unscrew it or pull it straight out (base style varies).
- Install the new bulb: Match the base and wattage listed in the manual.
- Reinstall the lens: Secure the lens and screw(s) snugly (do not overtighten).
- Restore power and test: Plug in and open the door or start a short cook cycle to confirm the light works.
Quick troubleshooting if the new bulb still does not work
| Symptom | Most likely cause | What we recommend |
|---|---|---|
| Light stays off | Wrong bulb type or loose bulb | Recheck bulb base, wattage, and seating per the manual |
| Light works intermittently | Loose lens/bulb connection | Tighten lens screw(s), reseat bulb |
| Microwave is dead too | Power supply issue (outlet, breaker, fuse) | Verify outlet power; then follow safe fuse guidance |
For fuse-related checks, use our guide: how to replace a microwave fuse.
Why it matters
Using the correct bulb type and reinstalling the lens properly helps prevent heat damage to the lens and keeps light wiring protected, which improves visibility and reduces the chance of arcing or burn marks.
Ordering parts
If you are also replacing turntable components while you are servicing the unit, common items for this model include the cook tray WPW10510836 and ring turn W10859927. You can order replacement parts from the parts list for your Whirlpool UMC5225DW0, or search by model number on Sears PartsDirect.
Last updated: February 2026
Does Whirlpool make countertop microwaves?
Yes. Whirlpool makes countertop microwaves, including the Whirlpool UMC5225DW0 countertop microwave. This type of microwave is designed to sit on a counter, plug into a standard outlet, and use a turntable system (tray, ring, and support) for even heating.
What “countertop microwave” means for Whirlpool models
A countertop microwave is a portable, plug-in unit that is not permanently mounted. For the Whirlpool UMC5225DW0, the UMC5225DW0 owner's manual covers safety, location requirements, and electrical requirements for typical countertop installation.
Common countertop features you will see
- Electronic touch controls and a display
- Multiple power levels for cooking flexibility
- A rotating turntable tray for more even heating
- Venting and clearance needs around the cabinet
- Standard household electrical connection (per the manual’s electrical requirements section)
Parts that commonly wear or get lost on countertop microwaves
If your Whirlpool countertop microwave is missing turntable pieces or the tray no longer rotates smoothly, these are common replacement items.
- Turntable support: support W10510839
- Turntable ring: ring turn W10859927
- Glass cooking tray: cook tray WPW10510836
- Countertop foot (helps stabilize the unit): microwave foot WPW10644489
Quick “what part does what” guide
| Part | What it does | Common symptom when missing/damaged |
|---|---|---|
| Support | Helps support/position the tray system | Tray sits unevenly or wobbles |
| Ring Turn | Allows the tray to roll/rotate | Tray stops turning or drags |
| Cook Tray | Holds food and rotates during cooking | No tray, uneven heating, spills |
| Microwave Foot | Stabilizes the microwave on the counter | Unit rocks or vibrates |
Why it matters
Using the correct countertop setup helps the microwave heat more evenly and reduces vibration, noise, and turntable binding. It also helps prevent damage to the cook tray and turntable ring over time.
Ordering the right Whirlpool parts
We list model-matched replacement parts for Whirlpool UMC5225DW0 on this page; for additional parts searches by model number, use Sears PartsDirect.
Last updated: February 2026
What are the parts inside a microwave?
In a Whirlpool UMC5225DW0 countertop microwave, the main internal systems include the cooking cavity, door lock system, control panel and display, interior light, and the turntable drive parts (shaft, hub, support, and glass tray). These work together to heat food evenly and operate safely; see the UMC5225DW0 owner's manual for the full parts and features diagram.
Common internal parts and what they do
Most countertop microwaves (including Whirlpool models like UMC5225DW0) are built around these core components:
- Magnetron: generates microwave energy for heating
- High-voltage section (transformer or inverter, capacitor, diode): powers the magnetron
- Cooling fan and air ducting: moves air to keep components from overheating
- Waveguide and waveguide cover: directs energy into the cavity and protects the waveguide opening
- Door lock system and interlock switches: prevents operation with the door open
- Control board, keypad, display: runs cook programs and timing
Parts you can see and service most often on UMC5225DW0
The items below are commonly removed for cleaning or replaced when worn or broken:
- Glass turntable (cook tray)
- Turntable support ring (roller ring)
- Turntable hub/shaft interface (drives rotation)
- Microwave feet (stability and vibration control)
| Part area | What you notice when it fails | Typical symptom |
|---|---|---|
| Turntable system | Tray does not rotate smoothly | Uneven heating, rattling, scraping |
| Door lock system | Door does not close or latch correctly | Microwave will not start |
| Control panel/display | Buttons do not respond | No start, wrong settings |
| Cooling airflow | Loud fan noise or weak airflow | Overheating shutoff, burning smell |
Why it matters
Knowing the major microwave components helps you troubleshoot faster. For example, if food heats unevenly, we focus first on the turntable system and correct installation of the support and tray before moving to electrical testing.
Parts and ordering tips
For turntable-related issues on this model, we commonly see these parts replaced:
- Cook tray WPW10510836 (glass tray)
- Ring turn W10859927 (turntable tray support)
- Support W10510839 (turntable support component listed for this model)
- Microwave foot WPW10644489 (stability and vibration)
You can order replacement parts for Whirlpool UMC5225DW0 from the parts list for this model, or search by model number on Sears PartsDirect.
Last updated: February 2026