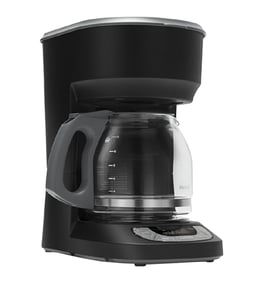

Can I run vinegar through my espresso machine to clean it?
Yes, we recommend descaling a GE P7CEBBS6R1BB espresso maker with a mild descaling solution; diluted white vinegar can work, but it must be followed by multiple fresh-water rinse cycles so you do not leave odor, taste, or loosened mineral debris in the brew path.
Best-practice way to use vinegar (if you choose it)
- Power the machine off and let it cool completely.
- Empty and rinse the water tank; then fill with a vinegar-and-water mix.
- Run a brew cycle (no coffee) and discard the liquid.
- Pause 10 to 15 minutes to let the solution work on scale.
- Repeat until the tank is empty.
- Rinse: run 2 to 4 full tanks of plain water through the system.
Vinegar mix ratios (what we see most often)
Use a lighter mix first; increase only if scale is heavy.
| Scale level | Vinegar : water | Notes |
|---|---|---|
| Light maintenance | 1 : 3 to 1 : 4 | Lower odor, gentler on seals |
| Moderate scale | 1 : 1 | Common “deep clean” ratio |
| Heavy scale | Use a coffee-machine descaler | More consistent results than strong vinegar |
When vinegar is a bad idea
Avoid vinegar if you notice any of these symptoms afterward; switch to a coffee descaler and rinse thoroughly.
- Rubbery or sour smell that will not rinse out
- Leaks at the brew unit area
- Steam wand sputtering or reduced steam output
- Grit or flakes continuing to appear in the cup
Parts that can be affected by scale (and why it matters)
Scale buildup restricts water flow and heat transfer, which can cause weak espresso, slow brewing, and extra strain on internal valves and seals. If you are still getting poor flow after descaling, the issue is often in the brew path components such as the coffee brewer assembly WC01X20613 or, for milk drinks, the GE steam wand assembly - profile WC01X20609.
Last updated: February 2026
How to order GE appliance parts?
To order parts for your GE P7CEBBS6R1BB coffee maker, confirm the exact model number first, then order by the part ID or part number to ensure fit. For in-warranty questions or out-of-stock help, contact Sears PartsDirect support with your model and serial information.
The fastest way to order the right part
- Find the model number on the rating label and match it exactly to P7CEBBS6R1BB.
- Identify the failed part by name and ID (example: coffee brewer assembly WC01X20613).
- Compare your symptoms to the part’s function (brewing, steaming, water supply, drip handling).
- Order using the part ID/part number to avoid look-alike parts.
- Keep your serial number handy if you are requesting in-warranty support.
Common parts customers order for this model
| What’s not working | Part to check first | What it affects |
|---|---|---|
| No coffee dispenses or weak brew | Coffee brewer assembly | Brewing and dispensing |
| No steam or poor froth | GE steam wand assembly - Profile | Milk steaming/frothing |
| Leaks or overflow at the front | Drip tray - Profile | Spill capture and drainage |
| Grounds not collecting properly | Disposal box | Used grounds handling |
Why it matters
Ordering by the exact GE model number P7CEBBS6R1BB and the correct part ID prevents returns and downtime, especially on assemblies (like the brewer or steam wand) where small design differences can change fit and performance.
Last updated: March 2026
Is 15 or 20 bar better for espresso?
For espresso, neither 15 bar nor 20 bar is “better” by itself; what matters is whether your GE P7CEBBS6R1BB can deliver stable, controlled brewing pressure at the puck (typically around 9 bar) with consistent temperature and flow. Higher advertised bar ratings mainly describe the pump’s maximum capability, not the pressure used for extraction.
What the bar rating really tells you
A “15 bar” or “20 bar” label is usually a marketing spec for peak pump pressure. In real espresso brewing, the machine regulates pressure and flow during extraction.
- Espresso quality depends on stable pressure, not maximum pressure
- Too much pressure at the puck can increase channeling and bitterness
- Consistency shot-to-shot matters more than the headline bar number
- Grind size, dose, and tamping (or brew unit condition) often drive results
- Scale buildup can reduce effective pressure and flow over time
When 20 bar can help (and when it does not)
A higher-rated pump can be beneficial if it helps the machine maintain target pressure under load (fine grind, dense puck), but it does not automatically improve taste.
| Spec on the box | What it usually means | What you should focus on |
|---|---|---|
| 15 bar | Pump can reach high peak pressure | Stable extraction, even flow, correct grind |
| 20 bar | More pump headroom | Consistency under resistance, good maintenance |
Quick checks that improve espresso more than bar rating
If shots are sour, weak, or bitter, these basics usually move the needle fastest:
- Descale and clean the brew path; scale restricts flow
- Use fresh beans and adjust grind finer or coarser in small steps
- Keep the brew unit clean; replace worn components if extraction becomes erratic
- Verify the water tank seats correctly and feeds consistently
- If the machine leaks or pressure seems inconsistent, inspect the brew system parts
If you suspect the brew mechanism is the issue (weak output, inconsistent puck saturation, internal leaking), the coffee brewer assembly WC01X20613 is the core brew module to check for wear or failure.
Why it matters
Espresso is a balance of pressure, flow, and temperature. A machine that reliably regulates extraction around typical espresso pressure will outperform a higher “bar” machine that surges, channels, or runs too hot or too cold.
Last updated: February 2026
Is it worth repairing an espresso machine?
Yes, it’s worth repairing a GE espresso maker like model P7CEBBS6R1BB when the machine is otherwise in good shape and the fix is a common wear item (leaks, clogged brewing path, worn drip components, or a failing steam wand). Replacement makes more sense when repairs are frequent or the brewer system is failing repeatedly.
Quick rule of thumb (repair vs. replace)
- Repair when the issue is isolated (one part, one symptom) and the machine has been reliable.
- Repair when the problem matches a known replaceable assembly such as the coffee brewer assembly WC01X20613 or GE steam wand assembly - profile WC01X20609.
- Replace when you have repeated failures (multiple symptoms) within a short period.
- Replace when performance is inconsistent even after cleaning and descaling.
- Replace when the cost of parts plus labor approaches the cost of a comparable new machine.
Common “worth repairing” symptoms on this model type
| Symptom | Likely area | Typical fix approach |
|---|---|---|
| Weak coffee, slow flow | Brew path or brewer mechanism | Deep clean, descale; replace brewer assembly if worn |
| No steam or poor froth | Steam wand circuit | Clean wand tip; replace steam wand assembly |
| Water pooling under cup area | Drip system | Clean and reseat; replace drip tray or grate |
| Grounds piling up or door won’t close | Disposal area | Empty and clean; inspect disposal box and service door |
What to check before you buy parts
- Run a full cleaning and descale cycle (scale buildup causes many “failure” symptoms).
- Confirm the water tank seats fully and the lid seals correctly.
- Inspect for cracks, warping, or heavy staining in the drip and disposal areas.
- Check for obvious leaks during brewing and steaming.
- If you suspect an electrical issue, use safe testing practices and the right tools (a multimeter helps).
Why it matters
A targeted repair keeps your P7CEBBS6R1BB producing consistent espresso and steam while avoiding the cost and waste of replacement. Most espresso maker problems come from scale, clogs, or a single worn assembly, which is exactly where part replacement pays off.
Last updated: February 2026
What are the parts of a coffee maker called?
Coffee maker parts are typically named for what they do: they store water or beans, brew coffee, create steam, and catch drips and grounds. On the GE P7CEBBS6R1BB espresso maker, common part names you will see include the brewer, steam wand, water tank, drip tray, and disposal (grounds) components.
Common coffee maker part names (and what they do)
Here are the most common names customers use when describing coffee maker and espresso maker parts:
- Water tank/reservoir: holds water for brewing
- Brewer/brew unit: compresses grounds and routes hot water through coffee
- Steam wand: produces steam for milk frothing
- Drip tray: catches overflow and rinse water
- Grounds/disposal box: collects used coffee pucks or spent grounds
- Bean container and lid: stores whole beans (on bean-to-cup models)
GE P7CEBBS6R1BB examples you can match to those names
If you are shopping by part name, these model-specific parts map to the common terms above:
| Common name | What it’s called on this model | When you replace it |
|---|---|---|
| Brew unit | Coffee brewer assembly WC01X20613 | Weak brewing, leaks inside, won’t brew |
| Steam wand | GE steam wand assembly - profile WC01X20609 | No steam, poor froth, wand leaks |
| Water reservoir | Water tank and lid assembly - profile WC01X20680 | Cracks, leaks, won’t seat properly |
| Drip tray | Drip tray - profile WC01X20622 | Cracked tray, constant overflow |
| Grounds bin | Disposal box WC01X20601 | Grounds not collecting, bin broken |
Why the names matter when ordering parts
Coffee makers often have several “tray” or “container” pieces that look similar. Using the correct part name and matching it to the function (brew, steam, drain, store) helps us get you the right GE replacement part the first time.
Quick tips before you order
- Confirm the model number is P7CEBBS6R1BB on the rating label.
- Match the symptom to the system: brew (brewer), steam (wand), leaks (tank or drip tray).
- Remove and reseat the water tank and drip tray to rule out a simple fit issue.
- Clean mineral buildup regularly; scale can mimic part failure.
- If you suspect an electrical issue, use safe testing practices and reference how to tell if a fuse is blown.
Last updated: February 2026
What is considered the best coffee maker?
The best coffee maker is the one that matches how you drink coffee every day: drip for volume and consistency, espresso for milk drinks and café-style shots, or bean-to-cup for convenience. For the GE P7CEBBS6R1BB espresso maker, “best” usually means reliable brewing, easy cleaning, and readily available replacement parts like the coffee brewer assembly WC01X20613.
How we define “best” (what to compare)
- Brew style: drip, espresso, pod, pour-over, or bean-to-cup
- Taste consistency: stable water temperature and repeatable extraction
- Ease of cleaning: removable drip tray, accessible brew path, simple descaling routine
- Milk-drink capability: steam wand performance and ease of purging/cleaning
- Parts support: ability to replace wear items instead of replacing the whole machine
Quick guide: which type is “best” for you?
| If you want... | Best fit | What to look for |
|---|---|---|
| Simple, great daily coffee | Drip coffee maker | Consistent temperature, thermal carafe, easy basket access |
| Lattes and cappuccinos | Espresso maker | Steam wand, stable pressure, easy cleaning |
| Fast and convenient cups | Pod machine | Pod availability, cost per cup, descaling reminders |
| One-touch convenience | Bean-to-cup | Grinder quality, brew group access, drip tray capacity |
For GE P7CEBBS6R1BB owners: what “best performance” looks like
If your drinks taste weak, bitter, or inconsistent, the “best” upgrade is often maintenance and a couple of key parts checks.
- Keep the drip area clean and seated correctly (see drip tray - profile WC01X20622).
- If milk froth is weak or sputtering, clean and purge the wand after every use; replace the wand assembly if it’s damaged (see GE steam wand assembly - profile WC01X20609).
- Use the right water hardness setting and descale on schedule (the hardness tester WC01X20603 helps you set this correctly).
- Store beans properly and keep the lid sealing well to protect flavor (see coffee bean container lid - profile WC01X20624).
Why it matters
“Best” is really about repeatable results. A machine that’s easy to clean and easy to maintain (with available GE parts like a brewer assembly, steam wand, and drip tray) delivers better flavor over time and costs less to keep running.
Last updated: February 2026
What is the 2 1 rule for espresso?
The 2:1 rule for espresso is a starting brew ratio: we aim for about 2 grams of liquid espresso out for every 1 gram of dry coffee in (by weight). On a GE P7CEBBS6R1BB espresso maker, it helps you dial in a balanced shot before fine-tuning grind and time for taste.
Quick example (how to use the ratio)
- Dose (dry grounds): 18 g
- Yield (espresso in cup): 36 g
- Typical shot time: 25 to 30 seconds
- Adjust grind to hit the time and flavor: finer slows flow, coarser speeds it up
| If your shot tastes like... | Most common cause | What we change first |
|---|---|---|
| Sour, thin, fast | Under-extracted | Grind finer (or increase dose slightly) |
| Bitter, harsh, slow | Over-extracted | Grind coarser (or reduce dose slightly) |
| Balanced but weak | Low strength | Increase dose or reduce yield (try 1.5:1) |
| Balanced but too intense | High strength | Increase yield (try 2.5:1) |
Dial-in checklist (repeatable steps)
- Use a scale; weigh both the dose and the yield.
- Start at 2:1, then change only one variable at a time.
- Keep tamp pressure consistent; focus on grind size for flow control.
- If you use milk, a slightly higher yield (2.2:1 to 2.5:1) often tastes smoother.
- If your machine struggles to build pressure or flow is inconsistent, clean and inspect the brew path.
Why it matters
The 2:1 rule gives us a consistent baseline so changes in grind size, dose, and shot time produce predictable flavor results. It also helps troubleshoot whether a “bad shot” is a recipe issue or a machine maintenance issue.
When a part issue is likely (not just recipe)
If you cannot get stable flow even after dialing in, check for clogs, leaks, or worn components in the brew system; the coffee brewer assembly WC01X20613 is the core brew module that can affect extraction consistency.
Last updated: February 2026
What is the coffee puck holder called?
On the GE P7CEBBS6R1BB espresso maker, the “coffee puck holder” name depends on what you mean: the part that holds coffee during brewing is commonly called a portafilter (with a filter basket), while the container that catches and stores spent pucks is commonly called a knock box (or grounds bin).
Quick identification for this model
Use these cues to match the name to the function you’re describing:
- Holds coffee during brewing: portafilter and filter basket (brew group area)
- Stores used pucks/grounds: grounds container, disposal box, or knock box
- Catches drips under the spouts: drip tray
- Holds water for brewing: water tank
For this GE model, the part that most closely matches “puck disposal container” is the disposal box WC01X20601.
Common terms vs what you replace
| What you’re calling it | Common name | What it does | Replace if… |
|---|---|---|---|
| Puck holder (brewing) | Portafilter / filter basket | Holds grounds while extracting espresso | Basket is bent, won’t lock, leaks around rim |
| Puck holder (discarding) | Knock box / grounds bin | Collects spent pucks after brewing | Cracked, won’t seat, won’t latch, odors won’t clean out |
| Tray under coffee | Drip tray | Catches overflow and rinse water | Cracked, overflowing, won’t slide in |
If you meant the tray under the coffee outlet, the matching part is the drip tray - profile WC01X20622.
Why it matters
Using the right term helps you order the correct GE replacement part the first time. “Puck holder” can mean either the brewing hardware (portafilter area) or the waste container (grounds disposal), and they solve very different problems.
Last updated: February 2026