- Kenmore refrigerator water filters
- Whirlpool refrigerator water filters
- Samsung refrigerator water filters
- GE refrigerator water filters
- LG refrigerator water filters
- Frigidaire refrigerator water filters
- KitchenAid refrigerator water filters
- Maytag refrigerator water filters
- Kenmore Elite refrigerator water filters
- Estate refrigerator water filters
- GE Profile refrigerator water filters
- Amana refrigerator water filters
- Bosch refrigerator water filters
- Dacor refrigerator water filters
- Electrolux refrigerator water filters
Top DIY repair help
View All Repair Categories
Appliances
Lawn & Garden
Power Tools
Home Improvement
Sports & Leisure
Heating & Cooling
Quick Links
How to replace a band saw tire
less than a minute readMay 20Lyle Weischwill
Repair time and Difficulty
15 minutes or less
Tools Required
- Work gloves
- Slot screwdriver
This DIY repair guide shows how to replace the tire on a band saw. The band saw tire stretches tightly around the drive wheel, to protect the blade from touching the wheel directly. The tire grips the blade as the blade rotates around the wheels. If the tire stretches or wears out, it no longer grips the blade well, and the blade won’t turn or could slip off the wheel. Replace a loose or damaged band saw with the manufacturer-approved band saw part.
Follow the steps in this repair guide and video to replace the tire on Craftsman, Rikon, Wen, Ryobi, Tradesman and Powertec band saws.
Instructions
- 1. Shut off the electricity
Unplug the band saw’s power cord from the wall outlet.
- 2. Release the blade tension
Open the upper and lower cabinet doors.
Rotate the blade’s quick-release lever to release the blade tension.

PHOTO: Open the cabinet doors. 
PHOTO: Release the blade tension.
- 3. Remove the table leveling screw
Remove the table leveling screw from the front of the table.
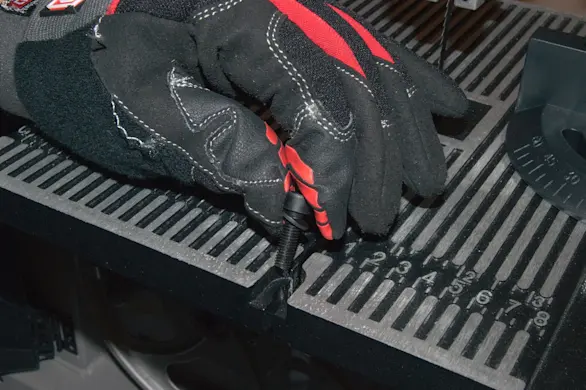
PHOTO: Remove the table leveling screw.
- 4. Remove the blade
Open the blade cover in the upper cabinet.
Pull the blade out of the band saw.

PHOTO: Open the blade cover. 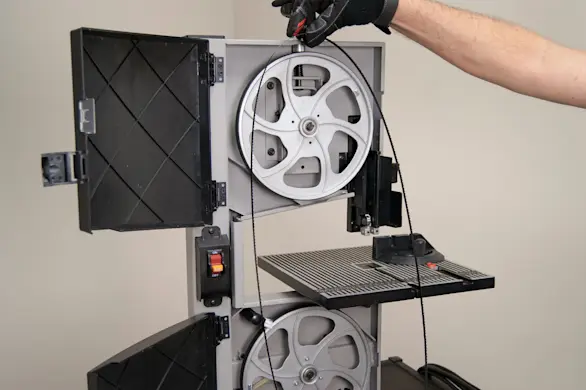
PHOTO: Remove the blade.
- 5. Remove the upper wheel
Release the upper drive wheel from the drive wheel bracket.
Pull the upper drive wheel out of the cabinet and set it on a stable work surface.
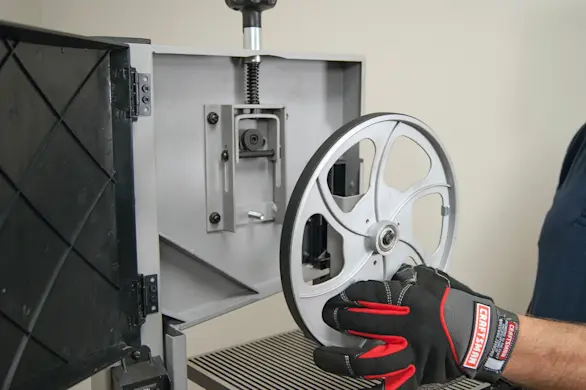
PHOTO: Remove the upper wheel.
- 6. Remove the tire
Pry the tire out of the drive wheel channel using a slot screwdriver and remove the tire from the drive wheel.
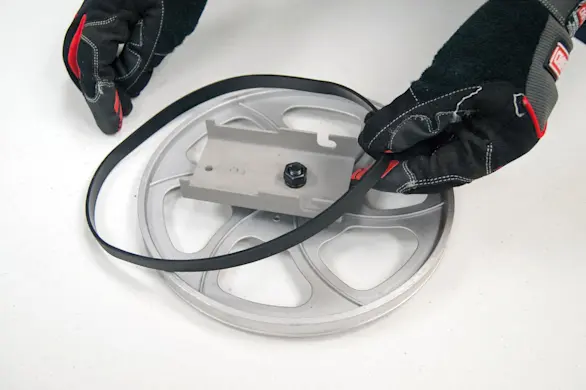
PHOTO: Remove the tire.
- 7. Install the new tire
Work the new tire into one side of the drive wheel channel.
Stretch the tire outward and work it into the channel around the rest of the drive wheel.
Push all edges of the tire completely into the drive wheel channel.
- 8. Reinstall the upper wheel
Reinstall the upper drive wheel on the drive wheel bracket.

PHOTO: Reinstall the upper wheel.
- 9. Reinstall the blade
Position the blade with the teeth pointing downward and forward.
Work the saw blade into the cabinets and over the drive wheels.
Close the blade cover in the upper cabinet.
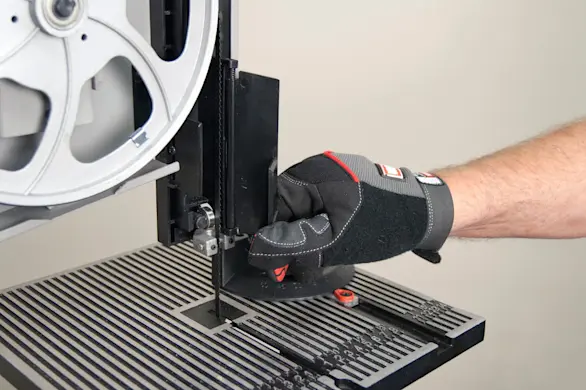
PHOTO: Close the blade cover.
- 10. Reinstall the table leveling screw
Reinstall the table leveling screw at the front of the table.
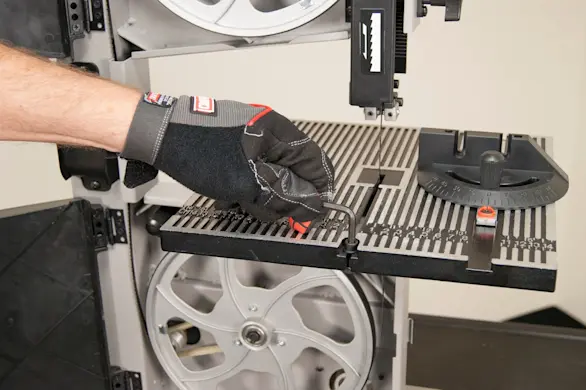
PHOTO: the table leveling screw.
- 11. Re-tension the blade
Align the blade on the upper and lower drive wheels.
Rotate the blade’s quick-release lever to apply blade tension.
Close the cabinet doors.

PHOTO: Apply blade tension.
- 12. Restore power
Plug the band saw into the wall outlet.