- Kenmore refrigerator water filters
- Whirlpool refrigerator water filters
- Samsung refrigerator water filters
- GE refrigerator water filters
- LG refrigerator water filters
- Frigidaire refrigerator water filters
- KitchenAid refrigerator water filters
- Maytag refrigerator water filters
- Kenmore Elite refrigerator water filters
- Estate refrigerator water filters
- GE Profile refrigerator water filters
- Amana refrigerator water filters
- Bosch refrigerator water filters
- Dacor refrigerator water filters
- Electrolux refrigerator water filters
Top DIY repair help
View All Repair Categories
Appliances
Lawn & Garden
Power Tools
Home Improvement
Sports & Leisure
Heating & Cooling
End of summer leaf blower tune-up
less than a minute readSep 08Lyle Weischwill
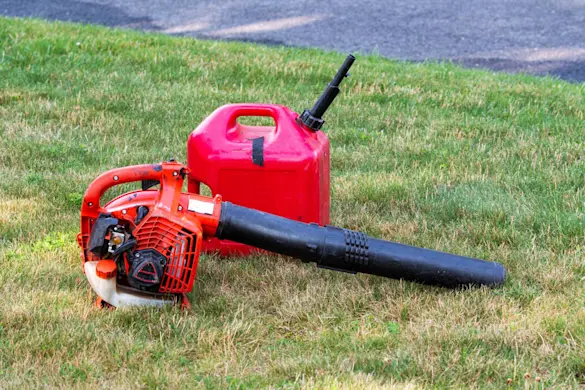
As summer winds down and the first signs of fall creep in, your leaf blower is about to become the star of your yard work lineup. Whether you've been using it for quick grass clippings clean-up or it's sat quietly this summer, it’s smart to give it a quick tune-up before the leaves start piling up. A few simple steps now - fresh fuel, a clean filter, and a once-over on key parts - can mean the difference between a blower that starts on the first pull and one that leaves you reaching for the rake.
Spending just 15 minutes on maintenance at the end of summer not only makes fall cleanup easier, it also helps prevent breakdowns later in the season when you need your blower most.
Check and replace old fuel
Tools needed:
Fuel-safe container
Funnel
Shop rag
Drain any fuel left in the tank into a container, since gas sitting all summer can break down and gum up the carburetor. Wipe the tank opening clean to keep debris out, then refill with a fresh gas-and-oil mix (if required by your model). Adding fuel stabilizer helps keep the mix fresh longer. Once filled, prime the carburetor several times to pull clean fuel into the system before starting.
Inspect air filter and spark plug
Tools needed:
Screwdriver
Spark plug socket
Wire brush
Remove the air filter cover and check the filter element. Foam filters can be washed in warm soapy water, dried, and lightly oiled before reinstalling. Paper filters should be tapped gently to dislodge debris, but replace them if they’re dark or clogged. For the spark plug, disconnect the boot and remove the plug. Look for carbon buildup or cracks, and check the electrode gap. Light deposits can be cleaned with a wire brush, but replace the plug if it’s badly worn or out of spec.
Clean carburetor and fuel filter
Tools needed:
Carburetor cleaner spray
Small brush
Gloves and safety glasses
Needle-nose pliers or hook tool
Remove the air filter housing to access the carburetor and spray cleaner into the throat, wiping away residue. Pull the fuel filter out of the tank with pliers or a hook tool and replace it if it’s dark, brittle, or clogged. If cleaning doesn’t solve the problem, you may need to rebuild the carburetor or replace the carburetor.
Check fuel lines and connections
Tools needed:
Flashlight
Utility knife (for trimming new lines, if needed)
Inspect each line closely. Healthy lines are flexible; cracked, stiff, or discolored lines should be replaced. Wiggle each connection to make sure it’s snug; loose fittings can leak fuel or draw in air, leading to hard starts. If replacing the fuel line, cut the new tubing cleanly and push it fully onto the fitting to ensure a tight seal.
General cleaning and inspection
Tools needed:
Mild soap and water
Clean rag
Screwdriver set
Silicone-safe lubricant (optional)
Wipe down the blower housing with a damp rag, avoiding electrical areas. Check all screws and fasteners; vibration often loosens them over time, so tighten as needed. Test the throttle and choke controls to confirm they move smoothly, applying a small amount of silicone-safe lubricant if they stick. Finally, check the blower tube and fan intake for debris, since even small blockages can reduce airflow and strain the motor.
Doing a quick tune-up at the end of summer means your leaf blower will be ready the first time you need it this fall. Fresh fuel, clean filters, and tight connections make for easier starts and more reliable performance. A little attention now saves frustration later, and ensures your blower is ready to tackle that first blanket of leaves without missing a beat. For more tips and step-by-step repair guides, visit our leaf blower DIY repair help section.