 Installation guide




Are KitchenAid microwaves any good?
Yes. KitchenAid microwaves are a solid choice when you want a premium look, strong build quality, and convenient features; performance is typically best when the unit is installed correctly and maintained (especially the venting and door fit) for your KitchenAid KMHC319KPS01 microwave/hood combo. See the installation guide for model-appropriate clearances and venting requirements.
What “good” usually means for a microwave/hood combo
KitchenAid over-the-range units are designed to do two jobs: heat food and help ventilate your cooktop area. In real homes, satisfaction usually comes down to these factors:
- Even heating and reliable cooking results (sensor features vary by model)
- Quiet, effective vent fan performance for smoke and steam
- Door alignment and latch operation (smooth close, consistent seal)
- Lighting and visibility over the cooktop
- Long-term serviceability (availability of common replacement parts)
What to check on KMHC319KPS01 specifically (installation and fit)
A “good” microwave can feel disappointing if it is installed too tight to a wall or vented incorrectly. The KMHC319KPS01 installation instructions call out key fit items, including:
- Suitable for use above electric or gas cooking products up to 36 inches wide
- Left-side clearance: allow at least 6 inches to open the door fully
- Right-side clearance (some handle styles): allow at least 3 inches so you can grab the integrated handle
- Use a grounded 3-prong outlet; do not use an extension cord
Quick fit and clearance snapshot
| Item | Typical requirement for this install | Why it matters |
|---|---|---|
| Cooktop width below | Up to 36 in | Safe, intended coverage area |
| Left side clearance | 6 in | Door opens fully |
| Right side clearance (some models) | 3 in | Handle access, usability |
| Power | Grounded 3-prong outlet | Reduces shock risk |
Common “not so good” complaints and the usual causes
These issues are common across many brands and are often repairable:
- Slow heating or weak cooking: can point to high-voltage component problems (for example, a failing magnetron W11230995 or gaoxin-hvd c W11256462)
- Dead display or no power: can relate to a blown microwave fuse W11707984 or an interlock issue
- Won’t start, stops when door moves: door switch/interlock problems (see assembly, interlock (includes switches) W11197766)
- Poor ventilation: grease buildup, blocked damper, or a failing fan motor
Why it matters
A microwave/hood combo is judged on more than cooking. Proper clearances, correct venting design, and a reliable door interlock system directly affect day-to-day usability, noise, and safety.
Last updated: February 2026
How to hard reset a KitchenAid microwave?
To hard reset your KitchenAid KMHC319KPS01 microwave/hood combo, unplug the power cord (or turn off the circuit breaker) for 5 to 10 minutes, then restore power and test heating, the keypad, and the vent fan. This clears many temporary control glitches.
Hard reset steps (KMHC319KPS01)
- Turn the microwave off.
- Unplug the unit from the outlet in the upper cabinet, or switch the dedicated breaker off.
- Wait 5 to 10 minutes (this lets the control fully discharge).
- Restore power.
- Set the clock if prompted.
- Heat a cup of water for 60 seconds to confirm normal operation.
If the reset does not fix it
A reset helps with software-like lockups; it will not correct a blown fuse, door-switch problem, or a failed high-voltage component.
- If the display is dead or the unit goes completely blank: check the house breaker first; then suspect an internal fuse.
- If it runs but does not heat: suspect a high-voltage circuit issue.
- If it starts then stops when you close the door or press Start: suspect a door interlock issue.
- If the vent fan or lights act erratically: inspect the vent grille area and lamp components.
Common parts related to “won’t start” or “no heat” symptoms
| Symptom | What it often points to | Example part for this model |
|---|---|---|
| No power, dead display | Internal protection opened | Microwave fuse W11707984 |
| Starts then stops, door-related behavior | Door interlock/switch alignment | Assembly, interlock (includes switches) W11197766 |
| Runs but no heat | High-voltage circuit component | Magnetron W11230995 |
Why it matters
Resetting power is the fastest, safest first step because it can restore normal operation after a power flicker or control-board glitch without disassembly. If symptoms return quickly, using the correct diagnostic path prevents unnecessary part replacement.
For installation-related power access (upper cabinet outlet, mounting, and handling precautions), follow the installation guide.
Last updated: February 2026
How do I find the model number on my KMHC319KPS01?
On your KitchenAid KMHC319KPS01 microwave/hood combo, the model number is printed on the model and serial number plate located behind the microwave door on the front frame. Open the door and look along the front-facing frame around the oven opening.
Where to look (fast checklist)
- Open the microwave door fully
- Look on the front frame (the face of the microwave cavity opening)
- Find the model and serial number plate (label/plate)
- Write down both the model number and serial number
- Use the full model number when ordering parts or checking diagrams
What the label typically includes
Most KitchenAid microwave/hood combo ID plates list these items:
- Model number (for example, KMHC319KPS01)
- Serial number
- Electrical ratings (voltage and amperage)
- Certification markings
| Item on plate | What it’s used for |
|---|---|
| Model number | Matching the correct parts list and diagrams |
| Serial number | Identifying production series for service and part revisions |
| Electrical ratings | Verifying power requirements during installation |
Why it matters
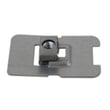
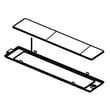
Using the exact model number helps us match the correct replacement parts for your KMHC319KPS01, such as the microwave mounting plate W11025649 or microwave vent grille W10701701, and prevents ordering a similar-looking part that will not fit.
For the official location description and installation references, use the installation guide.
Last updated: March 2026


