




Are KitchenAid microwaves any good?
Yes. KitchenAid microwaves, including over-the-range microwave/hood combos like model KMHC319LSS00, are a solid choice when you want premium styling, strong feature sets, and dependable day-to-day performance. The biggest “good vs. not good” difference usually comes down to installation/venting setup, maintenance, and using the right replacement parts when wear items fail.
What KitchenAid does well
- Fit and finish: Stainless styling and trim tend to hold up well in normal kitchen use.
- Convenience features: Sensor-style cooking, multiple power levels, and preset programs are common.
- Microwave + hood combo value: You save space by combining cooking and ventilation in one appliance.
- Parts support: Common service parts are available when something simple stops working (fuse, interlock, door hardware).
Common complaints we see (and what they usually mean)
| Symptom | What it often points to | Typical next step |
|---|---|---|
| Runs but does not heat | High-voltage circuit issue | Use our guide: why is my microwave not heating |
| Dead display or no power | Blown fuse or power supply issue | Check/replace microwave fuse W11707984 if diagnosis confirms |
| Starts then stops when door moves | Door switch/interlock problem | Inspect/replace assembly, interlock (includes switches) W11197766 |
| Loud vibration or rattling | Fan, mounting, or turntable support issue | Check mounting, then inspect turntable parts |
What to check before deciding it is “bad”
- Confirm the unit is on a dedicated circuit and the outlet is solid.
- Make sure the door closes firmly and latches smoothly.
- Keep the cavity clean; food splatter can cause arcing and poor results.
- Verify the turntable and support are seated correctly.
- If heating is weak or uneven, stop using it and follow a safe diagnostic path (microwaves store high voltage).
Why it matters
Most “KitchenAid microwave quality” issues are actually repairable component failures (fuse, interlock switches, high-voltage parts) or setup problems. Addressing the root cause quickly helps protect the control board, door system, and cooking performance.
Last updated: February 2026
How long is the warranty on a KitchenAid microwave?
KitchenAid microwaves typically include a 1-year limited warranty from the date of purchase that covers factory-specified parts and repair labor when the unit is operated and maintained as instructed. For your KitchenAid KMHC319LSS00 microwave/hood combo, keep your proof of purchase and record the serial number for any warranty claim.
What the 1-year warranty usually covers
Most KitchenAid microwave warranties for the first year focus on defects in materials or workmanship. Coverage commonly includes:
- Factory-specified replacement parts
- Repair labor performed by an authorized servicer
- Issues that occur under normal household use
- Failures not caused by installation, misuse, or damage
What is usually not covered
Warranty exclusions vary, but these are common items that are not covered:
- Cosmetic damage (scratches, dents, discoloration)
- Damage from power surges, improper voltage, or improper installation
- Normal wear items and maintenance
- Service calls to correct installation or explain operation
Quick warranty checklist (before you schedule service)
Use this list to avoid delays when you contact service:
- Locate your receipt or other proof of purchase date
- Write down the model number KMHC319LSS00 and the serial number
- Note the symptom and when it started (no heat, no power, sparking, etc.)
- Confirm the microwave is on a dedicated, properly grounded circuit
Common symptoms that can look like a warranty issue
Some problems are caused by a failed component rather than user settings. These parts are commonly involved in “no power” or “won’t start” complaints:
| Symptom | Common part involved | Example part for KMHC319LSS00 |
|---|---|---|
| Dead display, no response | Fuse or fuse holder | Microwave fuse W11707984 |
| Runs but does not heat | High-voltage component | Gaoxin-hvd c W11256462 |
| Won’t start when door closes | Door interlock switches | Assembly, interlock (includes switches) W11197766 |
Why it matters
Knowing the typical 1-year coverage helps you decide whether to pursue warranty service first or troubleshoot parts like a fuse, interlock assembly, or high-voltage diode. That saves time and prevents paying out of pocket for a covered repair.
Last updated: February 2026
How to clean a KitchenAid microwave oven combo?
To clean your KitchenAid KMHC319LSS00 microwave/hood combo, we recommend using steam to loosen food splatter, then wiping the cavity and door surfaces clean. Keep water out of vents and controls, and clean the vent grille and filters regularly so the hood fan can move air properly.
Quick cleaning steps (safe for most microwave/hood combos)
- Unplug the microwave or switch off power at the breaker.
- Microwave a mug of water for 2 to 5 minutes, then let the steam sit 1 to 2 minutes.
- Wipe the interior with a soft cloth or sponge; use mild dish soap for greasy spots.
- Clean the door glass and seals gently; do not scrape or use abrasives.
- Wipe the control panel with a barely damp cloth, then dry immediately.
- Clean the exterior stainless with a non-abrasive cleaner and wipe with the grain.
Hood and airflow areas to clean
Grease and dust buildup around the hood intake can reduce ventilation and make the fan louder.
- Remove and wash the grease filters (hand wash in hot, soapy water; dry fully before reinstalling).
- Wipe the underside intake area and the fan cover area you can reach.
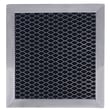
- Clean the microwave vent grille W10701701 if it is greasy or restricting airflow.
What to avoid
- Bleach, ammonia, or harsh oven cleaners inside the microwave cavity
- Abrasive pads or powders (they can scratch the cavity coating and door glass)
- Spraying cleaner directly into vents, the control panel, or around the door latch area
Common cleaning solutions (comparison)
| Cleaning need | What we use | How to use it |
|---|---|---|
| Everyday wipe-down | Mild dish soap + warm water | Wipe, then rinse cloth and wipe again |
| Odors | Lemon water or a small amount of vinegar in water | Steam, then wipe dry |
| Stuck-on splatter | Steam first | Let steam dwell, then wipe (no scraping) |
Why it matters
Regular cleaning helps prevent odors, reduces arcing risk from food buildup, and keeps the hood venting efficiently. It also protects high-wear areas like the door seals and vent intake from grease and residue.
Last updated: February 2026
How to lock control panel on KitchenAid microwave hood combo?
On the KitchenAid KMHC319LSS00 microwave/hood combo, the Control Lock is activated from the keypad by pressing and holding the key that has “Control lock” printed on or near it for about 3 seconds; repeat the same press-and-hold to unlock.
How to lock and unlock the controls
- Make sure the microwave is not cooking and the door is fully closed.
- Find the keypad button labeled with “Control lock” (often printed as a secondary function).
- Press and hold that button for about 3 seconds.
- Confirm the lock by looking for a “LOCKED” message, a lock icon, or a tone.
- To unlock, press and hold the same button again for about 3 seconds.
If Control Lock will not turn on
- Use a firm, steady press; do not tap repeatedly.
- Cancel any active cycle first, then try again.
- Power reset: turn off the breaker (or unplug if accessible) for 1 minute, then retry.
- Re-close the door; a weak latch can prevent the control from accepting commands.
- If keys do not respond consistently, the touch panel may be failing.
Parts that can affect keypad response
A door that is not latching or a failing interface can make the microwave ignore long-press commands.
| What you notice | What to check | Model-compatible part example |
|---|---|---|
| Door does not “click” shut or pops open | Door latch alignment/wear | Microwave door latch W10740455 |
| Buttons intermittently do not respond | User interface keypad/control panel | Pcba, user interface W11582284 |
Why it matters
Control Lock prevents accidental starts and unwanted setting changes, and it is a quick way to confirm the keypad and door-latch system are working normally.
Last updated: February 2026
Who makes KitchenAid microwave ovens?
KitchenAid microwave ovens, including model KMHC319LSS00, are made under the KitchenAid brand, which is owned by Whirlpool Corporation. In practical terms, that means many KitchenAid microwave/hood combo designs and internal components are shared across Whirlpool-family products, even when the final assembly is done by a manufacturing partner.
What “made by Whirlpool” means for parts and repairs
When Whirlpool owns the brand, it typically controls product engineering, specifications, and the service parts supply chain. That is why KitchenAid microwaves often use Whirlpool-style components and part numbering.
Common implications:
- Parts compatibility is usually determined by the exact model number (KMHC319LSS00), not just the brand name.
- Many electrical and door-safety parts are shared across related Whirlpool-built platforms.
- Control boards and user interface parts are model-specific more often than basic hardware.
- Door and interlock parts must match exactly for safe operation.
- Using the correct OEM part helps prevent repeat failures and fit issues.
Parts you might see on Whirlpool-built KitchenAid microwave platforms
If you are troubleshooting a no-power or no-heat symptom on KMHC319LSS00, these are common part categories we see involved:
| Symptom | Common area to check | Example part for this model |
|---|---|---|
| Dead, no display | Line fuse or fuse holder | Microwave fuse W11707984 |
| Runs but does not heat | High-voltage circuit | Gaoxin-hvd c W11256462 |
| Blows fuse when door closes/starts | Door interlock system | Assembly, interlock (includes switches) W11197766 |
Why it matters
Knowing Whirlpool Corporation is behind KitchenAid helps you shop smarter: you can focus on the exact KMHC319LSS00 parts list and proven failure points (fuse, interlock, high-voltage components) instead of guessing by brand alone.
Helpful DIY resources
Last updated: February 2026
Why is the exhaust fan not working on my KitchenAid microwave?
On the KitchenAid KMHC319LSS00 microwave/hood combo, an exhaust fan that will not run is usually caused by a failed vent fan motor, a loose/burned wire connection, or a control issue that is not sending power to the fan. Start with power and wiring checks before replacing electronic parts.
Safety first (important)
Microwaves contain high-voltage components that can store a dangerous charge even when unplugged. For internal electrical testing beyond basic visual checks, we recommend using a qualified service technician.
Quick checks we recommend first
- Confirm the fan is not set to an automatic mode that only runs with certain cooktop heat conditions.
- Turn the fan on at each speed; listen for motor hum (humming with no airflow often points to a stuck or failing motor).
- Check for a blocked damper or heavy grease buildup in the vent path.
- Verify the unit has steady power (no tripped breaker, no loose outlet connection).
- If the fan runs but airflow is weak, inspect the vent grille and ducting for obstructions.
Most common causes and what to do
| Symptom | Most likely cause | What we do next |
|---|---|---|
| No sound, no airflow | No power to fan motor (wiring, control, or interlock-related issue) | Inspect wiring connections; then test for voltage at the motor when fan is commanded ON |
| Hums but does not move air | Fan motor seized or fan wheel jammed | Check for debris; replace the motor assembly if seized |
| Runs intermittently | Loose connection or failing control output | Reseat connectors; inspect for heat damage; consider control replacement if power output is inconsistent |
| Airflow weak but motor runs | Blocked duct, stuck damper, grease buildup | Clean venting and confirm damper opens freely |
Parts that commonly relate to this problem
If testing shows the fan motor is not operating correctly, the motor assembly is the typical repair. If the fan is not receiving power when commanded ON, the issue can be in wiring or the control system.
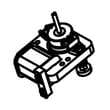
- Consider the vent fan motor assembly if the motor is seized or electrically open: microwave vent fan motor assembly W11613599
- If the unit shows broader control problems (buttons, display, multiple functions affected), control parts may be involved: electronic control WPW10565479
Why it matters
A working exhaust fan removes heat, smoke, and grease from the cooktop area. When it fails, moisture and grease can build up faster, and cooking heat can stress nearby components in the microwave/hood combo.
Last updated: February 2026


