




How do I know what wattage my Whirlpool microwave is?
For your Whirlpool UMV1170LS0 microwave/hood combo, the wattage is typically listed on the model and serial tag (often found on the oven frame behind the door) and sometimes on the product rating label. If you cannot find a wattage number, you can still estimate cooking power by doing a simple water-heating test.
Where to look on the microwave
Check these common label locations on over-the-range units like the UMV1170LS0:
- Open the door and look along the oven frame (around the door opening)
- Check the inside edge of the door area for a model and serial tag
- Look behind the upper grille area if your unit has a visible rating label there
- If the microwave is installed over a range, use a flashlight and look up under the control panel area
Quick wattage estimate (simple home test)
If you cannot find the wattage on the label, this test helps you compare performance to typical microwave wattage ranges.
- Measure 1 cup (8 oz) of room-temperature water
- Record the starting temperature (optional but helpful)
- Heat on High for 2 minutes
- Compare how hot it gets to what you expect from a typical 900 to 1100 watt microwave
What the results usually mean
| Result after 2 minutes (1 cup water) | What it suggests |
|---|---|
| Barely warm | Low output or a heating problem |
| Hot but not near steaming | Mid-range output |
| Very hot or near steaming | Higher output |
If heating seems weak or inconsistent, use our troubleshooting guide: why is my microwave not heating.
Why it matters
Wattage affects cook times, defrost performance, and whether packaged-food instructions match your results. Knowing the wattage also helps when diagnosing heating issues tied to high-voltage components.
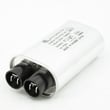
If you are troubleshooting a no-heat condition, common related parts for this model include the microwave magnetron W10754299, capacitor W10850446, and gaoxin-hvd c W11256462.
Last updated: February 2026
What is the lifespan of a whirlpool microwave?
Most Whirlpool microwaves, including over-the-range microwave/hood combos like model UMV1170LS0, typically last 7 to 10 years with normal household use. Heavy daily use, poor ventilation, and repeated power surges shorten life; regular cleaning and proper airflow help it reach the high end of that range.
What usually fails first (and what it looks like)
Many “end of life” symptoms are tied to a few common systems:
- No heat but everything else runs: often points to the high-voltage circuit (magnetron, capacitor, diode)
- Dead display or random resets: commonly control or power-supply related
- Runs then stops: can be a safety thermostat opening from overheating
- Blows the house breaker or goes completely dead: can involve a fuse or shorted component
- Loud buzzing or burning smell: stop using it and inspect for arcing or failed high-voltage parts
If your UMV1170LS0 is not heating, our troubleshooting steps in why is my microwave not heating help narrow down the most likely cause.
Parts that commonly extend the life of UMV1170LS0
Some repairs are straightforward and can keep a good unit going longer, especially when the cavity and door are in good shape.
| Symptom | Common part area | Example part for this model |
|---|---|---|
| Microwave runs but does not heat | High-voltage system | Microwave magnetron W10754299 |
| Unit goes dead (no display) | Line protection | Microwave fuse W11707984 |
| Hood light out | Lighting | Microwave/hood light bulb 8206232A |
| Poor venting, greasy airflow | Filters | Filter W10208631A |
Why it matters
A microwave/hood combo works harder than a countertop unit because it also manages cooking smoke and heat. Keeping airflow clear (grease filter clean, vents unobstructed) reduces heat stress on the electronic control and safety thermostats, which directly impacts lifespan.
Quick habits that add years
- Clean the grease filter regularly and keep the intake area clear
- Avoid running the microwave empty (it stresses the magnetron)
- Use microwave-safe cookware only (prevents arcing and cavity damage)
- Wipe spills quickly to prevent corrosion and burned-on residue
- Use a surge protector rated for the circuit (where appropriate) to reduce control-board damage
Last updated: February 2026
Are all Whirlpool microwaves the same size?
No. Whirlpool microwaves are not all the same size; even within the same brand, dimensions and capacity vary by style (countertop, built-in, or over-the-range). For your Whirlpool UMV1170LS0 microwave/hood combo, use the model-specific measurements when planning cabinet fit and venting clearance.
What typically varies between Whirlpool microwave sizes
Even when two units look similar, these specs often differ:
- Overall width/height/depth (cabinet fit and door swing clearance)
- Interior capacity (cubic feet)
- Mounting and venting layout (top or rear exhaust, recirculating)
- Electrical requirements (dedicated circuit needs)
- Trim kit or built-in cutout requirements (built-in models)
Typical size ranges (helpful for planning)
These ranges are common across many Whirlpool microwave types:
| Microwave type | Common width range | Common capacity range |
|---|---|---|
| Countertop | 18 to 24 inches | 0.9 to 2.2 cu. ft. |
| Built-in | 24, 27, or 30 inches (cabinet widths) | 1.0 to 2.2 cu. ft. |
| Over-the-range (microwave/hood combo) | About 30 inches | 1.6 to 2.1 cu. ft. |
How we recommend confirming the correct size for UMV1170LS0
Because fit is model-specific, we recommend these checks before ordering parts or planning an install:
- Match the full model number UMV1170LS0 on the rating label.
- Measure the existing opening (width, height, depth) and note any trim or cabinet lip.
- Confirm venting direction (recirculating vs. outside vent) and duct location.
- Verify mounting hardware compatibility if you are replacing the unit; the bracket pattern can differ.
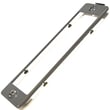
- If you need mounting hardware, use the model-matched microwave mounting plate W11025649.
Why it matters
Microwave size affects more than appearance. A mismatch can cause cabinet interference, poor door clearance, misaligned ducting, and extra installation work. Using UMV1170LS0-SPECIFIC fit details helps avoid returns and rework.
Last updated: February 2026
How many cubic feet is my microwave?
Your Whirlpool UMV1170LS0 microwave/hood combo has a 1.7 cu. ft. cooking capacity. This is the interior cavity volume (not the exterior size), and it helps you judge what cookware fits and what replacement accessories, like the turntable, should match.
What “1.7 cu. ft.” means in real use
Capacity is the usable cooking cavity volume. For most households, 1.7 cu. ft. is a practical mid-range size for an over-the-range microwave.
- Fits most standard dinner plates and medium casserole dishes
- Gives more usable space than compact 1.1 cu. ft. units
- Helps when comparing replacement turntables and racks by model fit
- Does not indicate vent fan airflow (CFM) or exterior dimensions
Quick capacity comparison
| Microwave type | Typical capacity (cu. ft.) | Common use |
|---|---|---|
| Compact countertop | 0.7 to 1.1 | Small spaces |
| Mid-size countertop | 1.1 to 1.6 | Everyday reheating |
| Over-the-range (like UMV1170LS0) | 1.6 to 2.1 | Family use plus hood venting |
Parts that should match the cavity size
When you replace interior or fit-sensitive items, using UMV1170LS0-COMPATIBLE parts helps avoid clearance and seating issues.
- Turntable gl W11367904 (glass tray that must fit the cavity and roller path)
- Driver, turntable W11245707 (coupler that drives tray rotation)
- Filter W10208631A (grease filter for the hood section)
Why it matters
Knowing the correct cubic feet helps you choose cookware that rotates freely, avoid overheating from blocked airflow, and ensure replacement parts fit and function correctly.
Last updated: February 2026


